Windows
Installation
Please download the latest release from the Windows Agent release notes page.
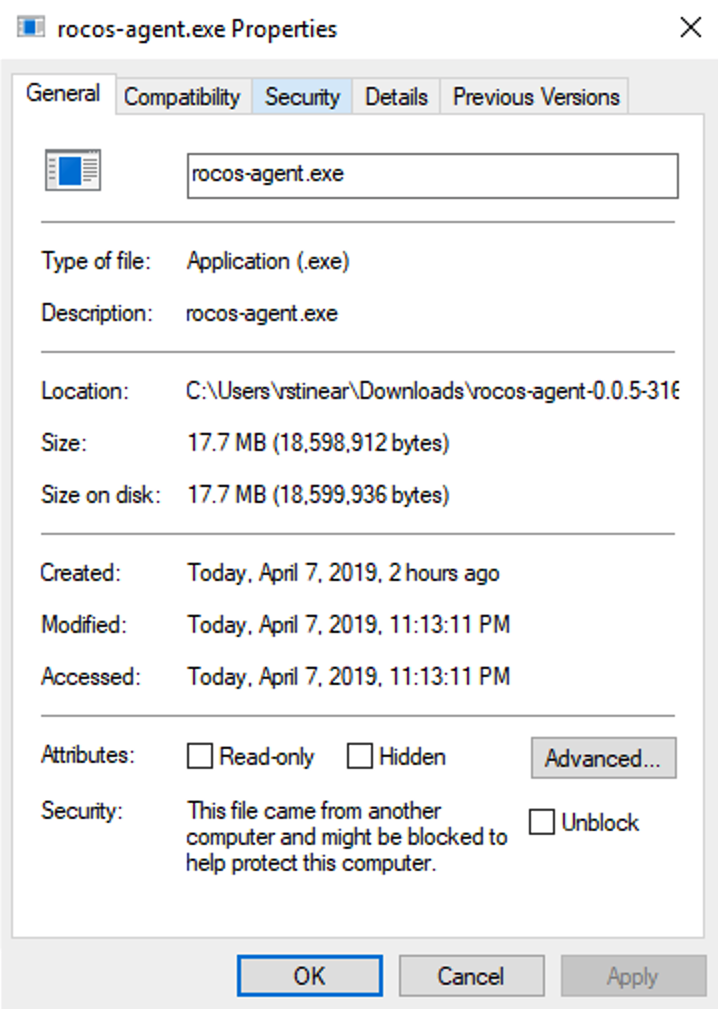
After downloading the agent, unzip the application to a directory of your choice, then get properties for the rocos-agent.exe file, and select 'Unblock' from the bottom right of the prompt before clicking OK.
Run the Installer
Open a command line in the directory to which you unzipped the agent, then enter:
rocos-agent.exe
You'll now be asked a series of questions to get the agent configured for your robot.
- First login
- Then pick the project where you'd like to add this robot. If you only have one robot this step will be skipped. If you need a new project setup do this on the Robotics portal then re-run "rocos-agent.exe")
- You'll now be asked to choose a callsign. Callsigns must be unique within your project, be lower case and only contain alphanumeric characters. You can also use hyphens. An example callsign is 'robot-1'. Note you won't be able to change the callsign once you've created the robot, so choose wisely.
- You can now choose a friendly name for the robot.
- Once this is all done you can now click on the provided link to see your robot dashboard in the Rocos portal.
Running the Agent
To run the agent, in the command line where the agent was unzipped, run the following
rocos-agent -d
Configuring the Agent
To change the configuration of the agent, especially its plugins so you can set your own ports for MAVlink and ROS for example, edit the configuration file located in the same directory as the rocos-agent executable. See each plugin's documentation for more information about what you can change, for example, checkout the ROS Plugin.
Re-Initializing Your Robot
If you need to re-initialize the robot, for example, to change its name or callsign, you can run:
rocos-agent --init
This will reset the authentication details and allow you to re-initialize the robot from the start.
Upgrading the DroneDeploy Agent
We're working hard to pack as many features into the Robotics platform as possible. This means the DroneDeploy agent will improve in functionality too. Keep an eye on our release notes page for new agent releases.
Please note - the agent doesn't not currently merge your existing configuration on upgrade, so please backup your agent.json file before upgrading if you want to retain your settings.
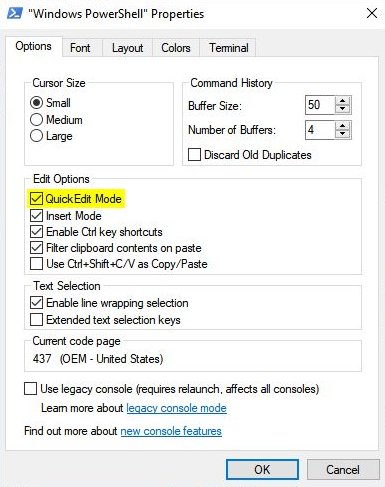
Important Note
Command consoles on Windows contain a "QuickEdit" feature which is known to cause halting of the agents foreground threads, breaking functionality. This can be avoided simply by not clicking or highlighting text within the console window, or alternatively disabling the feature altogether. To achieve this, click the icon drop down menu in the console windows title bar and select properties. From there, untick the "QuickEdit Mode" checkbox in the Edit Options section and click OK.