Agent Configuration
Configuration of the DroneDeploy Agent software is broken into two categories:
The Agent Configuration, or Static Configuration contains the information which the Agent uses to connect your robot to the DroneDeploy Robotics Portal. This configuration is generated when you first run the Agent software in interactive mode (or if you reinitialise with the --init command line parameter). It also contains settings used to modify the startup behaviour of the agent, such as the locations of other configuration files. You will not usually need to modify the Agent Configuration.
The Component Configuration contains the details of the configuration to use for each of the various Agent Components which embody the important functionality of the Agent. This configuration is stored and managed by the Robotics Portal, and is downloaded automatically to the Agent at every startup. You have the power to edit this configuration yourself in the DroneDeploy Robotics Portal. See the section below regarding Remote Agent Configuration for instructions on how to manage the configuration of the Agent on your robot. The details of the various configuration options for each component can be found in the documentation for that component.
Remote Agent Configuration
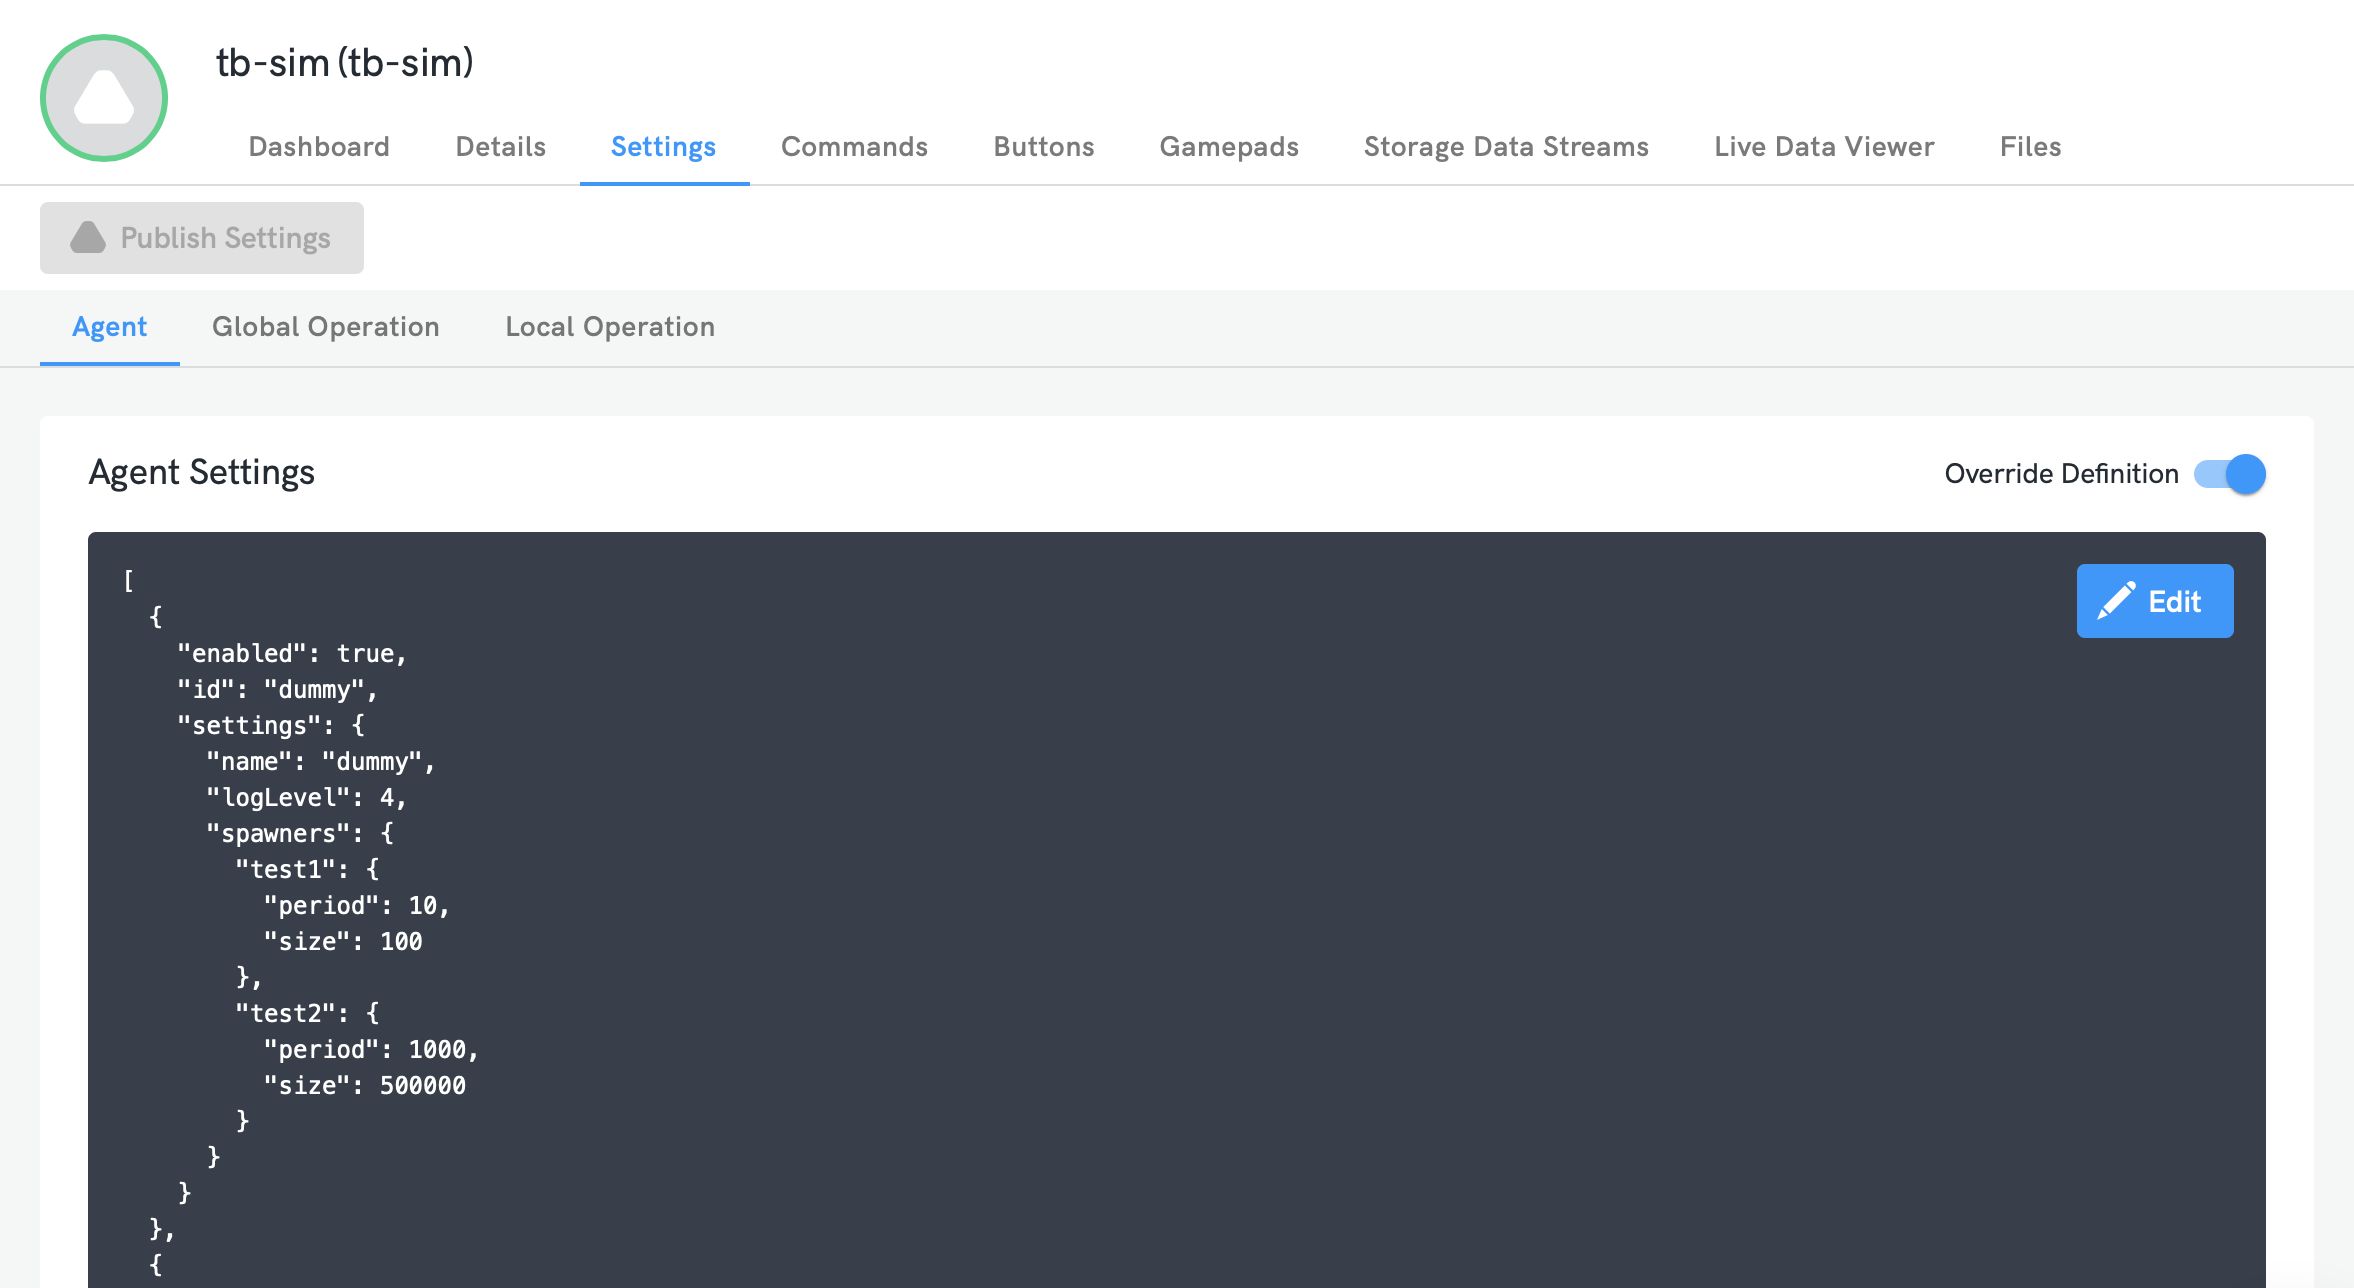
The Component Configuration for each robot can be managed via the Robotics Portal using the Settings tab, as shown in the image below: the Agent Settings tab shows the current Component Configuration in JSON format.
Normally, the Component Configuration for each robot is managed as part of a Robot Profiles for that robot: the settings shown in the robot page are read-only, and editing must be performed in the Settings tab for the Robot Definition.
If you need to edit the configuration of a specific robot (for example, when testing settings changes), then enabling the Override Definition toggle switch at the top-right of the Agent Settings tab will allow the configuration for that particular robot to be edited without affecting other robots sharing the same Definition.
To modify the Agent's Component Configuration, click the Edit button in the top-right corner of the settings display; a model editing interface window will appear, as shown here:
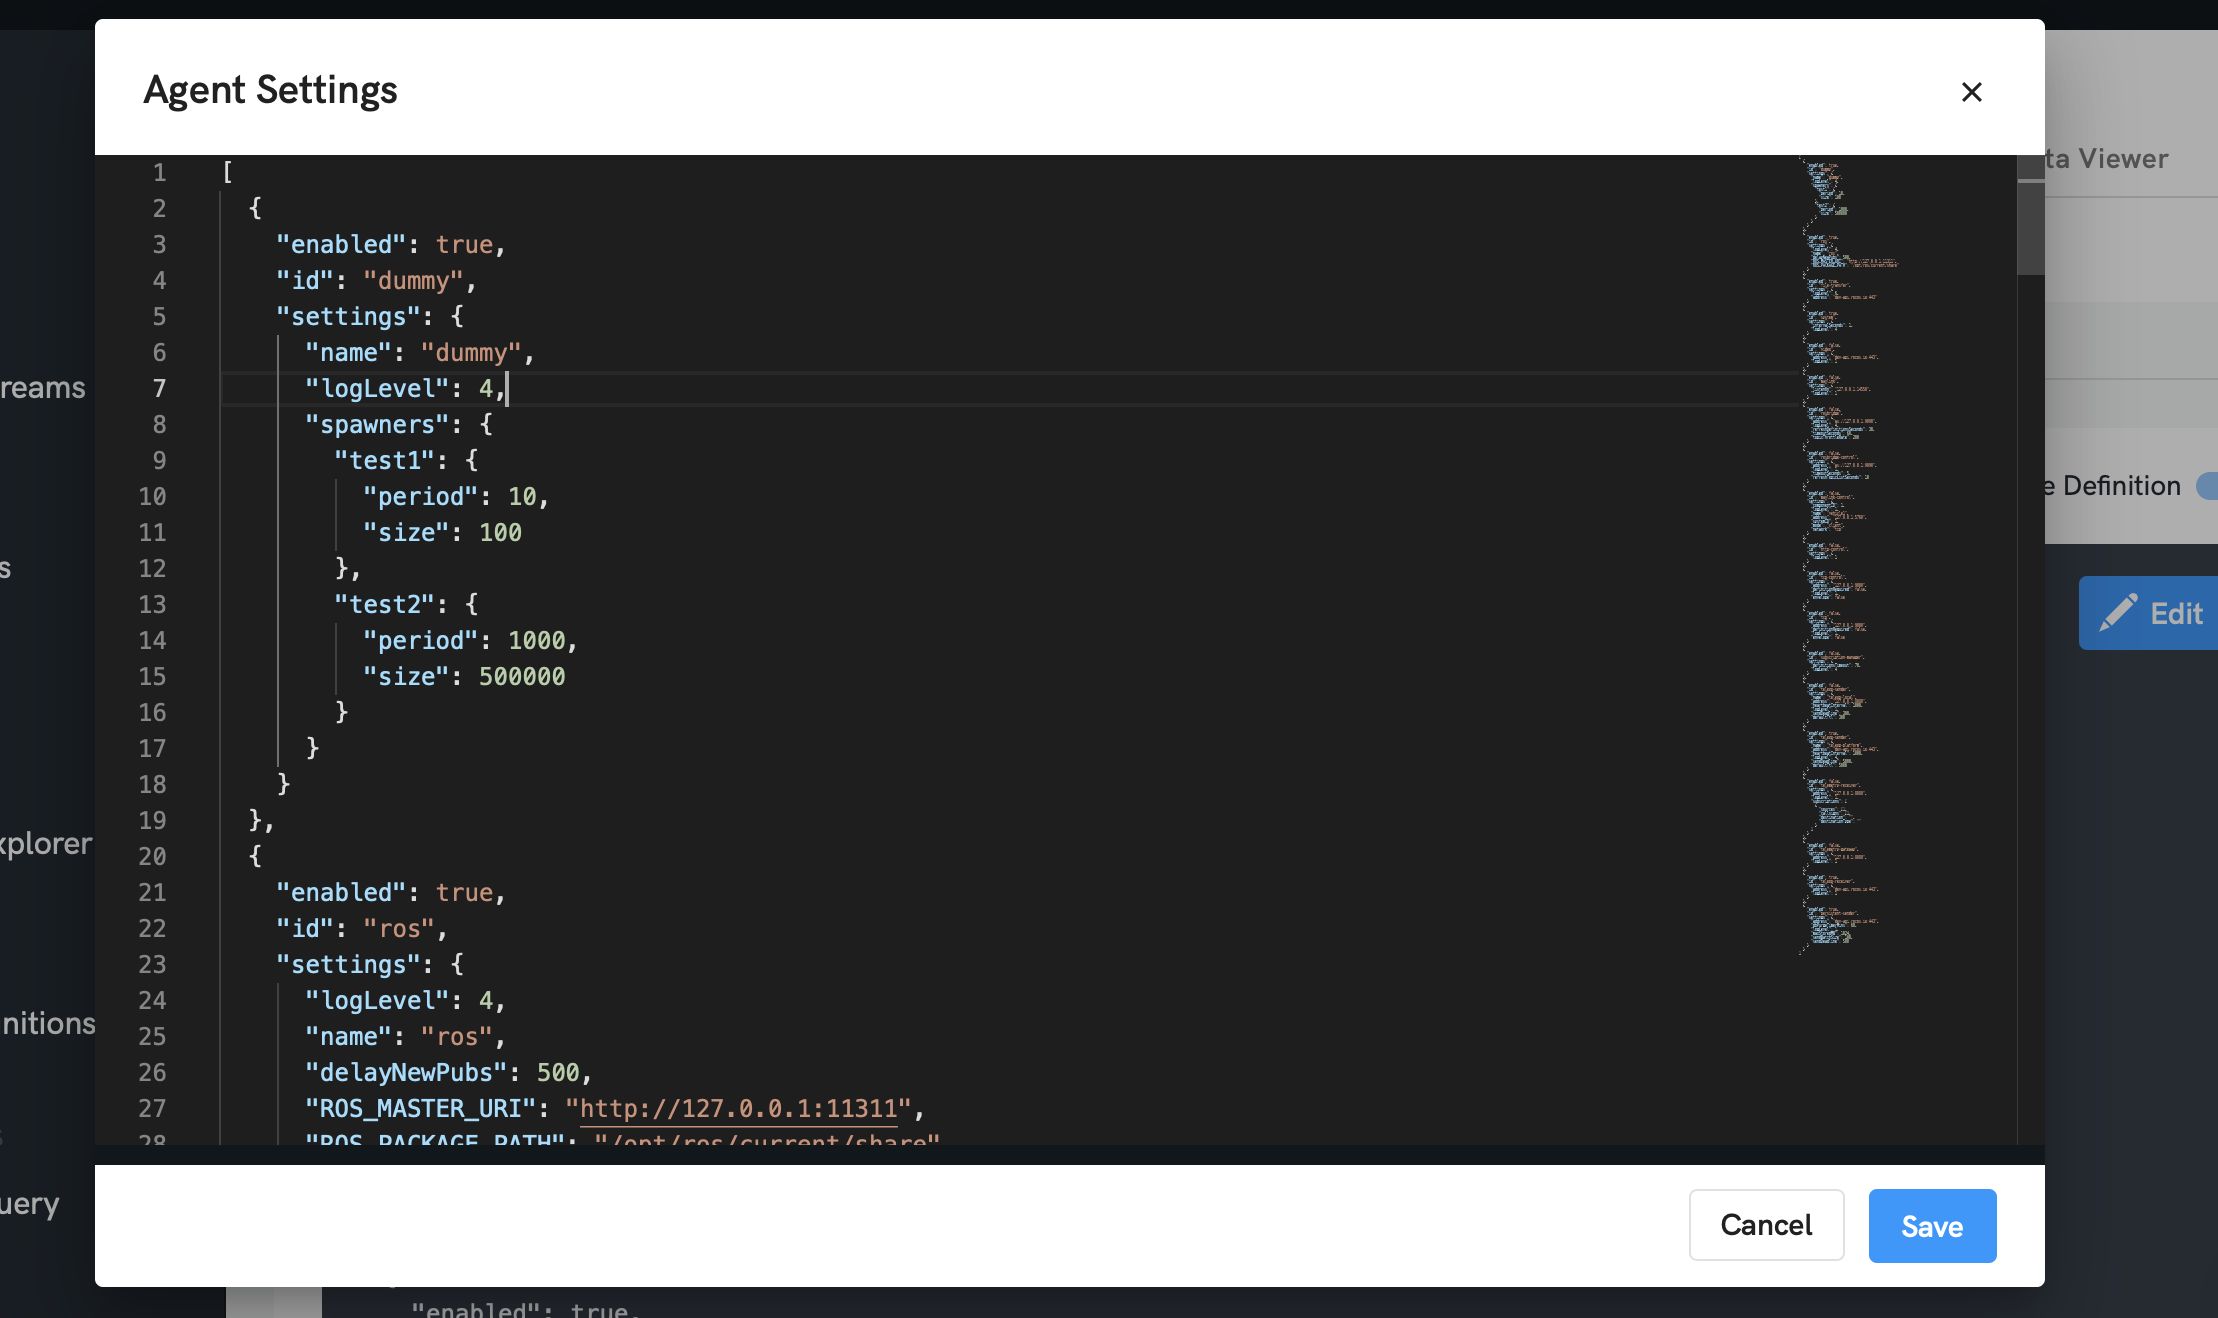
Edit the configuration, taking care to ensure that your configuration is valid JSON - the save button will be disabled if invalid JSON is detected. Once you have completed your changes, save them by clicking the Save button at the bottom right of the window. If you click Cancel, or click outside the editor window, your changes will be discarded instead.
Having made some changes, these changes will not be applied to your robots unless you Publish them, using the button at the top-left of the Agent Settings tab. When you publish the new configuration, any affected robots which are currently online will apply the new configuration immediately - affected robots which are currently offline will apply the new configuration the next time they come online.
Offline Agent Configuration
If the Agent is unable to reach the DroneDeploy Robotics Portal at startup and therefore can't download the component configuration, the Agent will instead use the last-downloaded local versions of the configuration files present on the robot. By default, these files are located at:
Agent Configuration:/etc/opt/rocos-agent/agent.json
Component Configuration:/etc/opt/rocos-agent/agent-settings.json
In an internet-denied environment, you may edit these configuration files directly: take care to ensure that any changes you make are valid JSON.
When the Agent is able to reconnect to the DroneDeploy Robotics Portal, it will download a new version of the agent-settings.json file and overwrite the old file on your robot.
You may wish to disable the use of remote component configuration management, so that you are able to edit the Agent's configuration directly on your robot, without risking losing your configuration changes in the event your robot does connect to the internet.
To do this, either:
Launch the agent with the --local command line parameter (see Command Line Parameters); or
Add the configuration setting "configlocal: true" into your Agent Configuration file (agent.json).