Spot Network Setup - CORE Payload Internet via Spot Ethernet
This page outlines the steps to set up Spot and the Spot CORE payload so that the CORE can access the internet through Spot. It achieves this via its ethernet connection to Spot.
Insure the Wi-Fi that you are connecting to is the correct frequency (2.4GHz or 5GHz) for the Spot robot type.
*Spot Explorer cannot connect to a 5GHz network
Accessing Spot’s Admin Console via Ethernet
Plug in Ethernet cable into Spot’s rear ethernet port to get access to Spot’s admin console web page.
Spot’s default IP address at this rear port is: 10.0.0.3
You need to set your computer ethernet connection details as follows depending on your laptop Operating System:
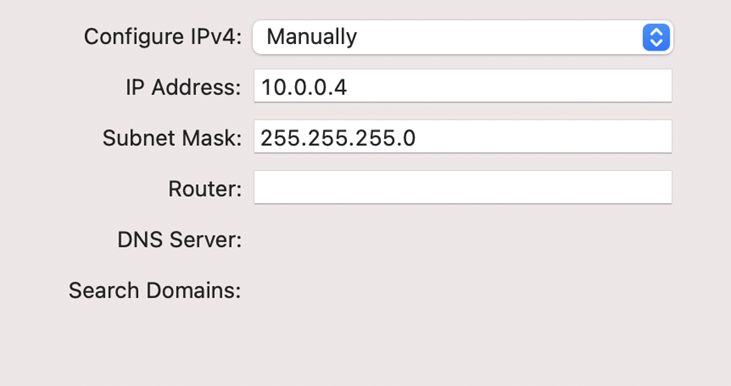
a) On a MacBook:
b) On a Windows Laptop:
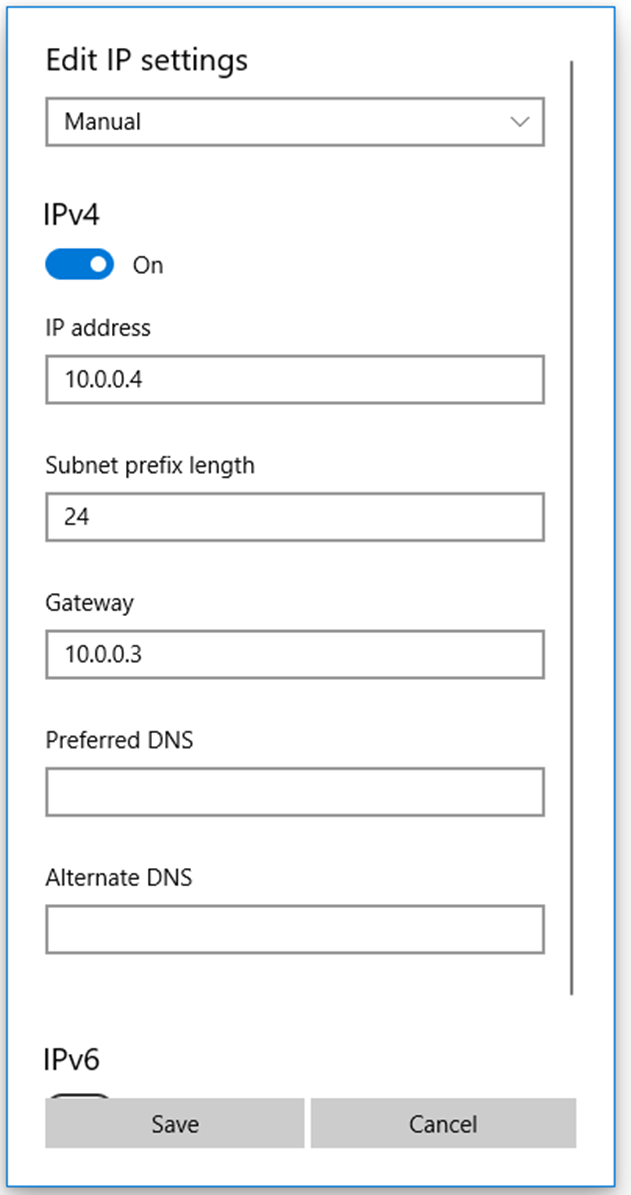
10.0.0.4 can be replaced with any IP address on the same subnet as Spot. E.g. 10.0.0.1, 10.0.0.2… But not 10.0.0.3.
Once you have done this and the ethernet cable is plugged in, you can type in https://10.0.0.3in your browser. You will be taken to Spot’s admin console page. Make sure to include the https:// in the address.
Setting Up Spot's WiFi
Click on “Network Setup”. Next click on the WiFi tab. You will be taken to a page that looks like this:
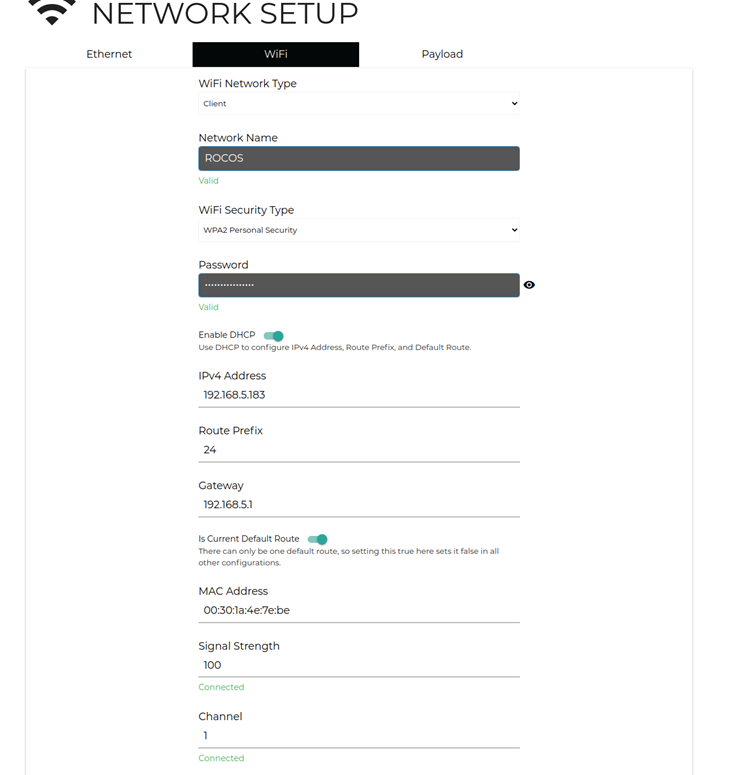
Enter the following details:
· Wi-Fi Network Type should be: Client
· Wi-Fi Security type is most commonly left as the default (WPA2 Personal Security)
· Enter the network name and password for your Wi-Fi network.
· Enable DHCP (unless your network security requires using a predetermined static IP address. For use in the Rocos Office this is not the case - the router will assign this for us).
· Enable “Is Current Default Route”.
All other settings can be ignored. They will be automatically assigned.
Click Apply Changes at the bottom of the page. After doing this, refresh the page. You should see an IPv4 address has been assigned to the Spot robot. Make a note of this address. It is very important. If you forget it, you can plug the ethernet cable into the robot and access the admin console page again as we have just done.
Type in the Spot IP address that has just been assigned from the WiFi network setup stage into your browser. You should be able to access the admin console this way from now on.
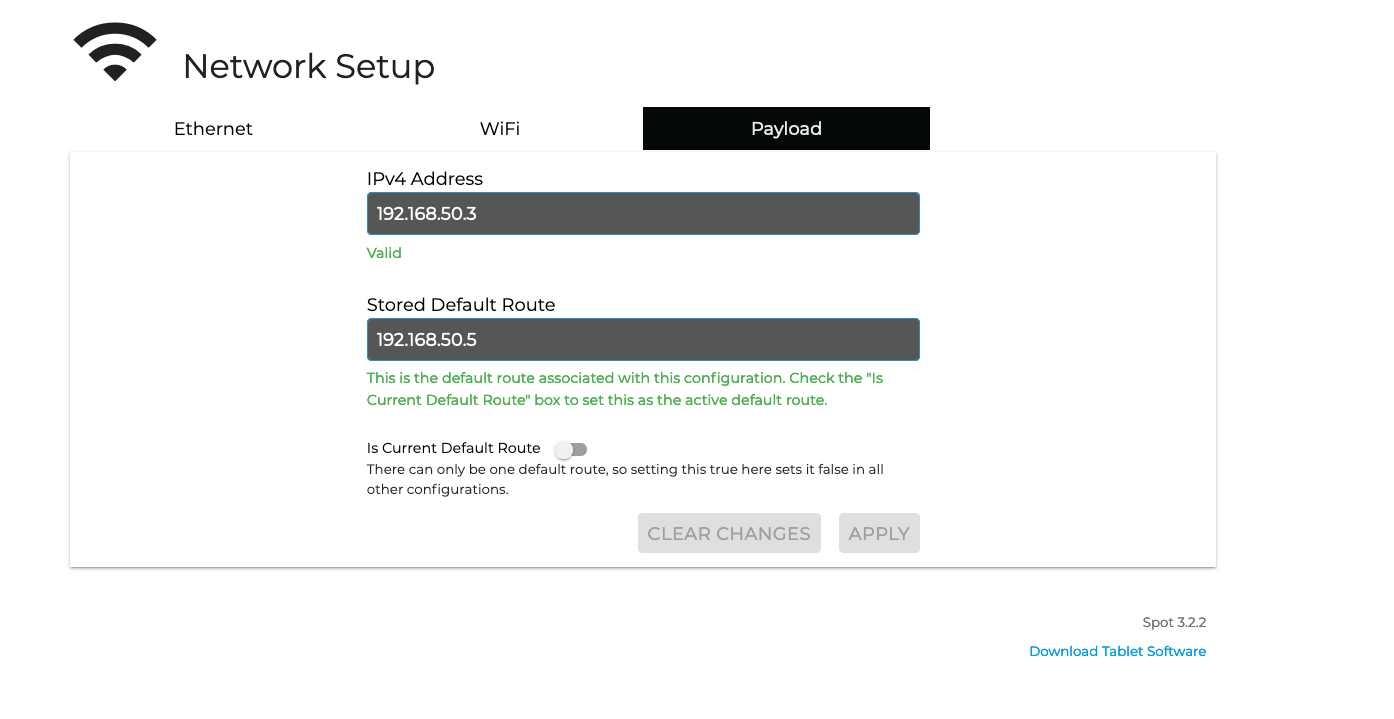
The Payload Network tab should also look as below:
Network Setup for the Spot CORE Payload
Now that Spot’s Wi-Fi is set up, we need to allow the Spot CORE to access the internet via Spot. When we enabled “Is Current Default Route” for Spot’s Wi-Fi, we made this possible.
Navigate to the Payloads tab in the Spot admin console. You should see the Spot CORE there. If you don’t, you need to run through the payload registration process which is outlined in the Boston Dynamics documentation.
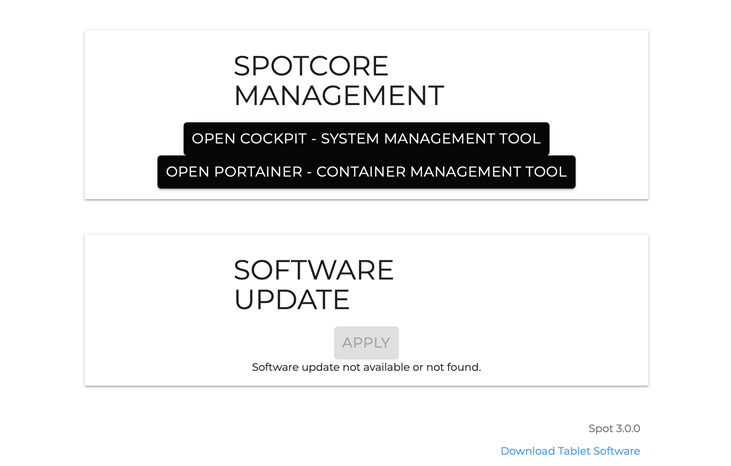
Otherwise, click on the Spot CORE payload and scroll to the bottom of the page. You should see the option to navigate to Spot CORE cockpit. Click on this option and login using the required credentials. The defaults are:
user: spot
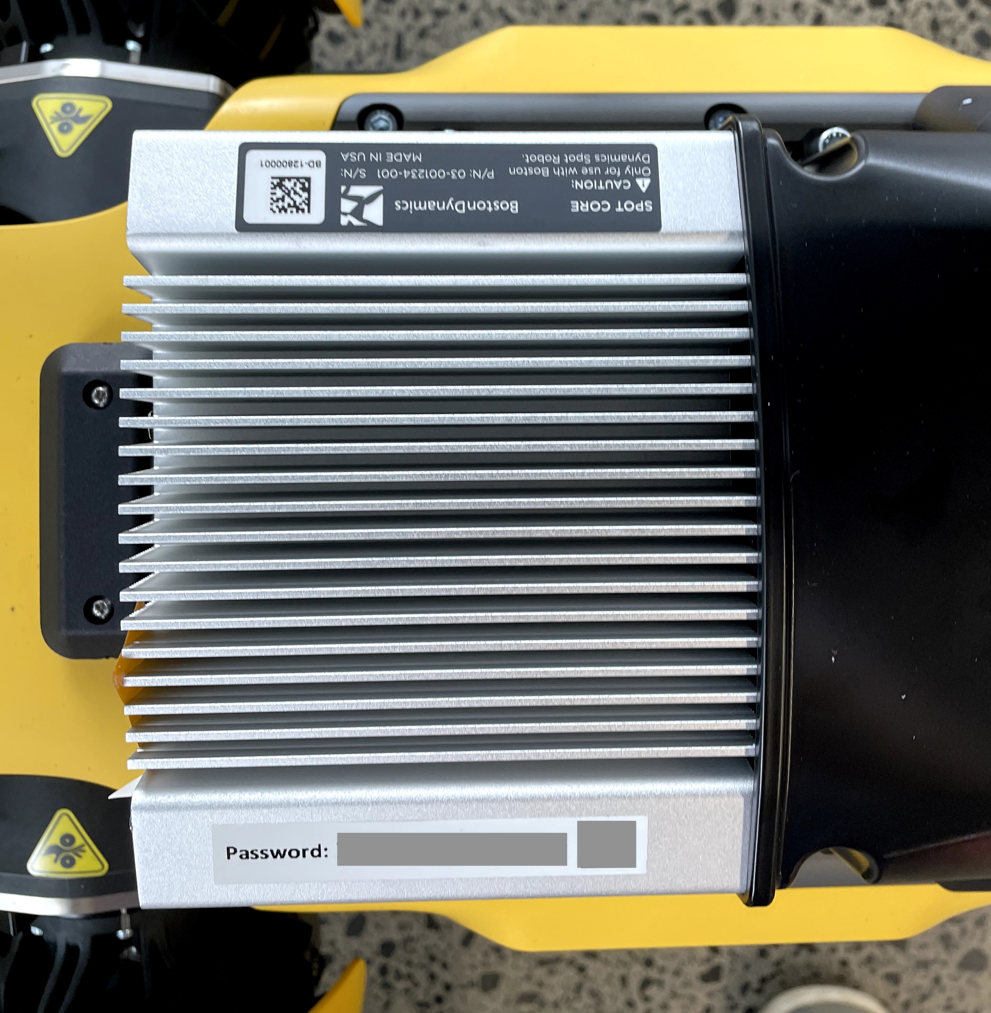
password: → can be found on a sticker on top of the spot core. This is the default factory password. example below

Go to the networking tab and click on the enp2s0 network adapter.

Add in the following details so that your network setup resembles the image above. Only enter in the following though, nothing else!
· Add 8.8.8.8 as a DNS server address.
· At the top under “Addresses”, set the drop down option to manual if it isn’t already.
· Ensure the address is 192.168.50.5 → This is the default IP address for a rear payload on spot.
· The net mask should be 24
· The gateway should be 192.168.50.3 → This is the default IP address for Spot as accessed from the payloads. This tells the Spot CORE that it can access the internet through Spot.
Confirm Spot has internet access by using the terminal in the Spot CORE cockpit page. Type in the following command:
ping google.com
You should receive responses indicating that google.com is reachable.
Network Setup for the Spot CORE IO Payload
Note: this requires the Spot CORE IO to be at version 3.2.3 or greater.
Similar to the Spot CORE, the Spot CORE IO has a GUI in which you can configure its network settings.
Navigate to the Payloads tab in the Spot admin console. You should see the Spot CORE IO there. If you don’t, you need to run through the payload registration process which is outlined in the Boston Dynamics documentation.
Otherwise, click on the Spot CORE IO payload and scroll to the bottom of the page. You should see the option to navigate to Spot CORE IO admin console. Click on this option and login using the required credentials. The admin login for the Spot robot itself should be used.

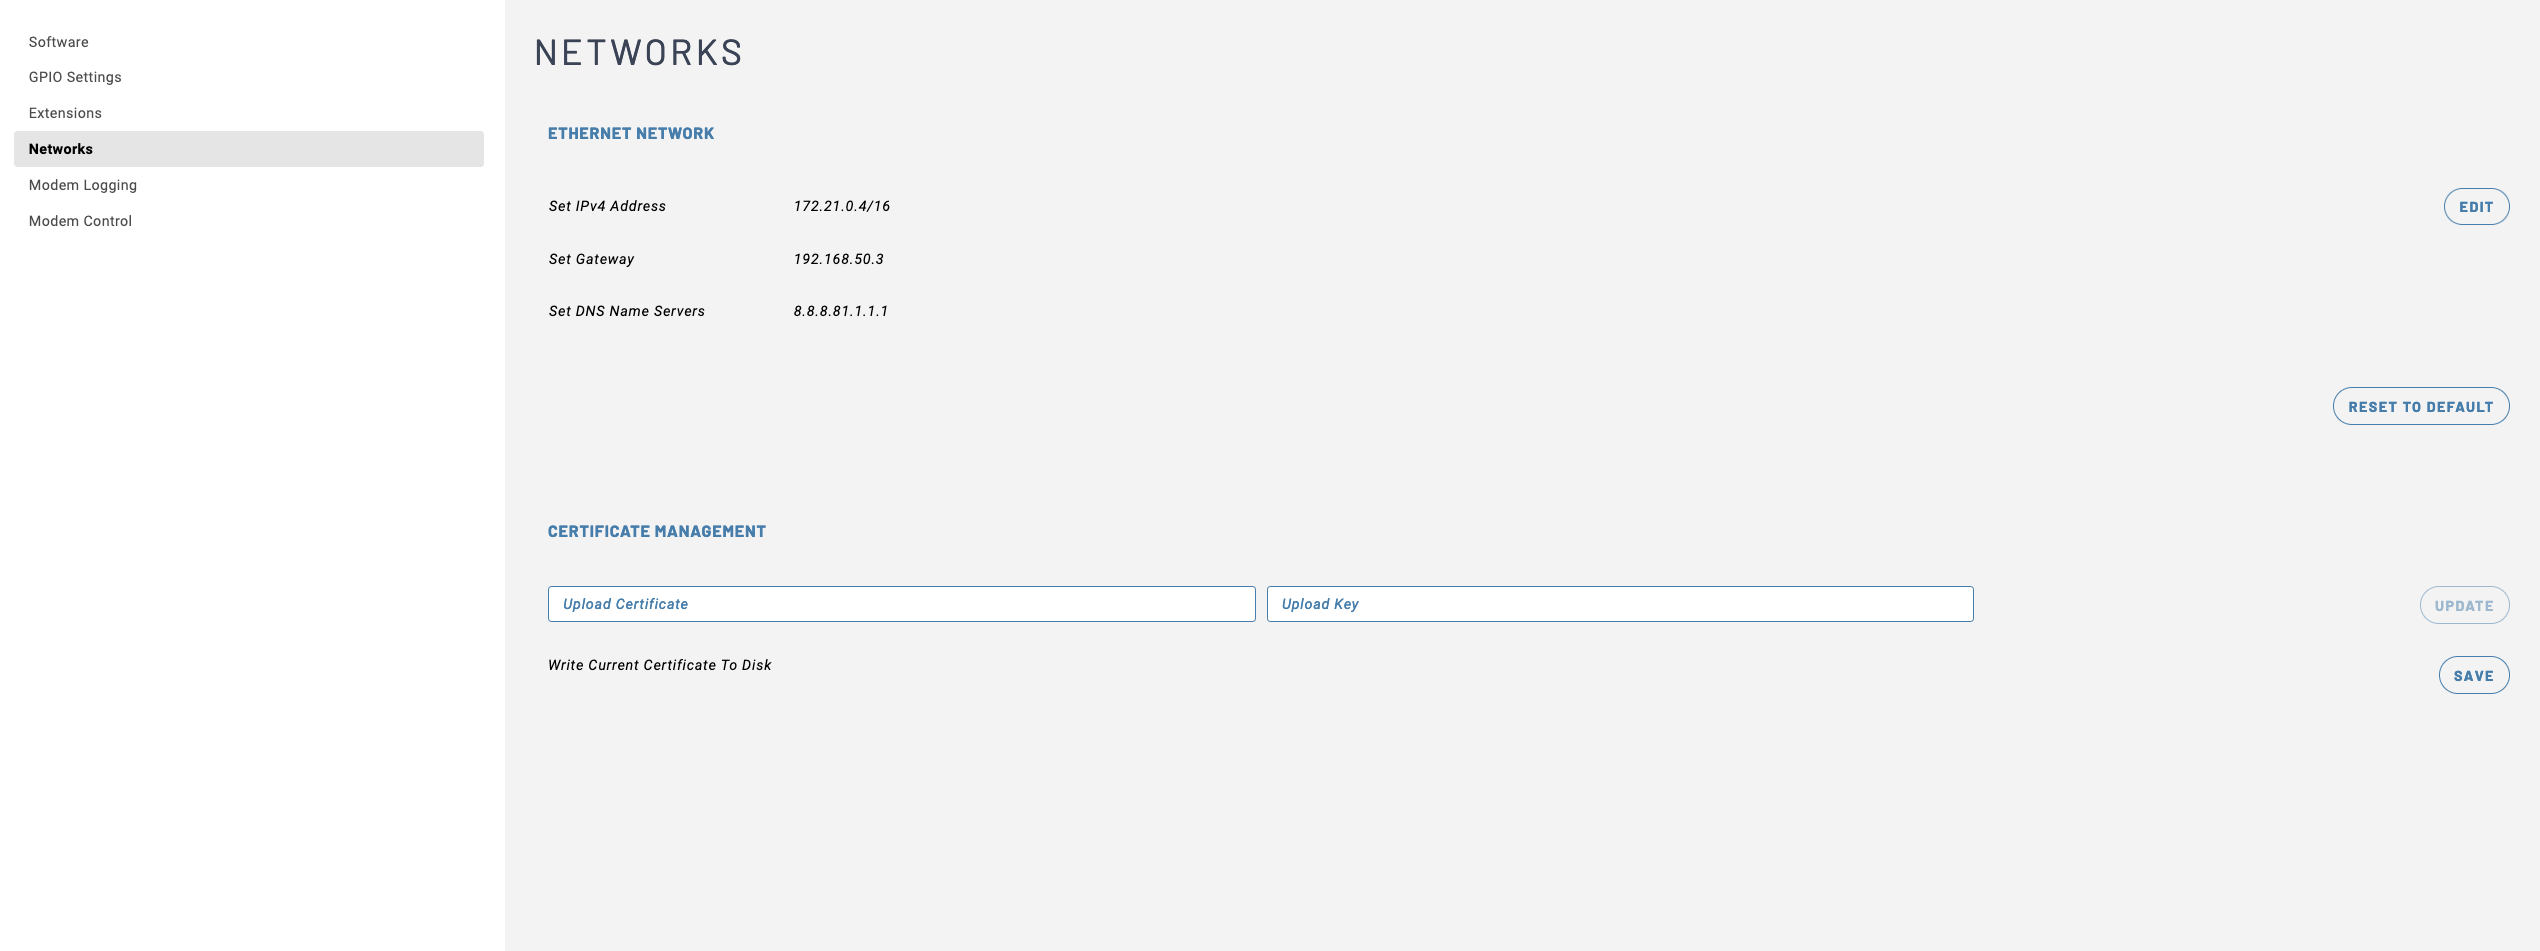
Once logged in, update the CORE IO network settings in the network tab so that your DNS Name Server and Gateway entries are as follows:
- Gateway:
192.168.50.3 - DNS Name Servers:
8.8.8.8,1.1.1.1
Confirm that the CORE IO has internet access:
-
SSH into the CORE IO:
ssh -p 20022 spot@<spot-ip-address>- E.g. if you are connected to Spot over ethernet, use the ethernet IP address of 10.0.0.3:
ssh -p 20022 [email protected] - Log in using your CORE IO password when prompted.
- E.g. if you are connected to Spot over ethernet, use the ethernet IP address of 10.0.0.3:
-
Now type in the following command:
ping google.com
You should receive responses indicating that google.com is reachable.
Installing the Rocos agent onto the Spot CORE
Use the terminal in the Spot CORE cockpit page. You can use this to install the agent on the CORE, by following the instructions here: