Creating an Event
This tutorial steps you through creating an Event based on a robot's telemetry data: we are going to set up an Event which detects whenever a virtual robot is moving, and calls an HTTP web-hook in response.
For explanation of what an Event is, and how they can be used, see Events & Actions .
Getting Started
For this walkthrough, we’re using a Virtual ROS TurtleBot called T-1. This is fairly similar to any real robot running ROS on an Ubuntu system.

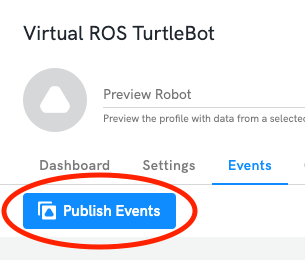
You can find the new Events tab either on the robot specific tab group, or in the robot profile’s tab group. In this example, we’ll use the Robot Profile to create a new Event Definition:

Defining an Event
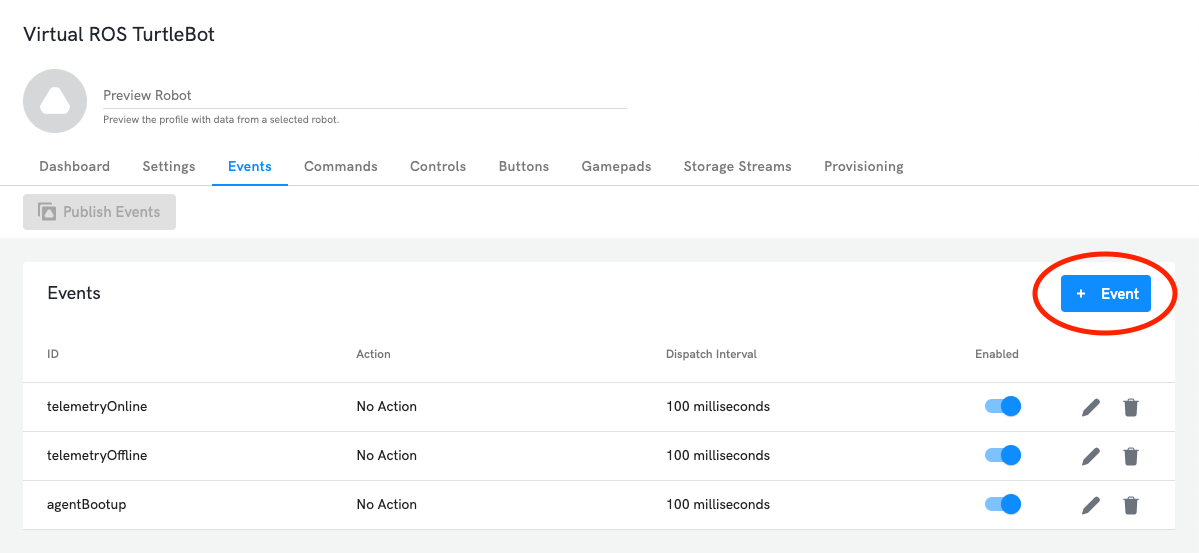
By default the virtual robot definitions have existing ‘starter’ events defined for telemetryOnline, telemetryOffline and agentBootup. You’re free to explore these, but we’ll create a new event to demonstrate the functionality.
On the Events tab, create a new Event:
Provide an ID, and optionally define a Dispatch Interval. We’ll enter ‘turtleMoving’ as the ID and set the dispatch interval to 5 seconds:

A Dispatch Interval defines how frequently the agent should raise the event to the platform. This allows you to ensure, for example, that if you’ve configured a ‘battery low’ event, it only gets raised once a minute, rather than at the frequency the telemetry is originating which could be many times per second depending on the battery sensor.
You can also provide a more human-friendly description.
In the Trigger section, you’re defining the criteria upon which the agent will raise an event. First, select the telemetry you want to evaluate as part of the trigger by clicking the ‘Data Picker button and click in the ‘insert button to the left of the checkbox. For this walk-through we’ll select the pose message:
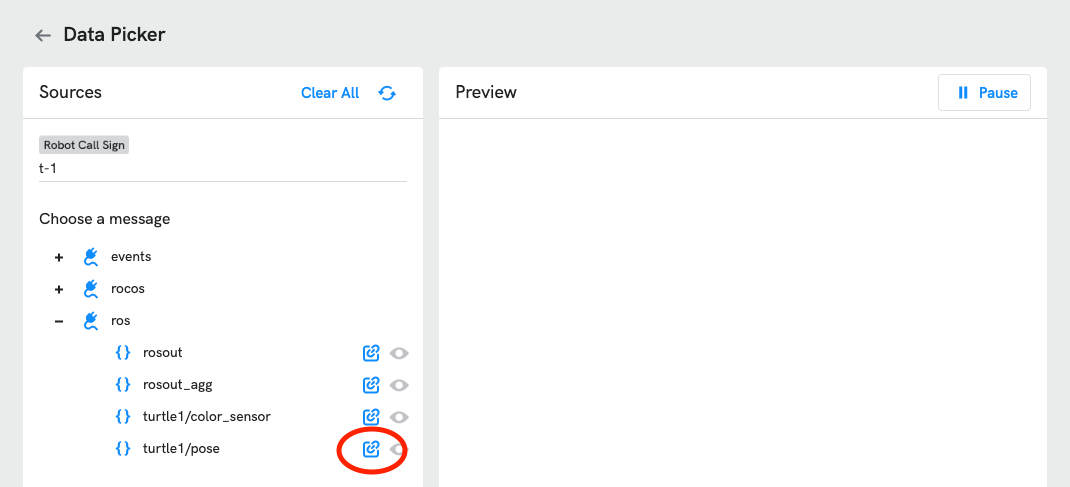
Set the sample interval for the pose message to 200ms.
In the ‘Basic trigger configuration, the UI has populated a $msg value, which represents the full pose message. We’ll add a property to this so we’re evaluating linear_velocity:
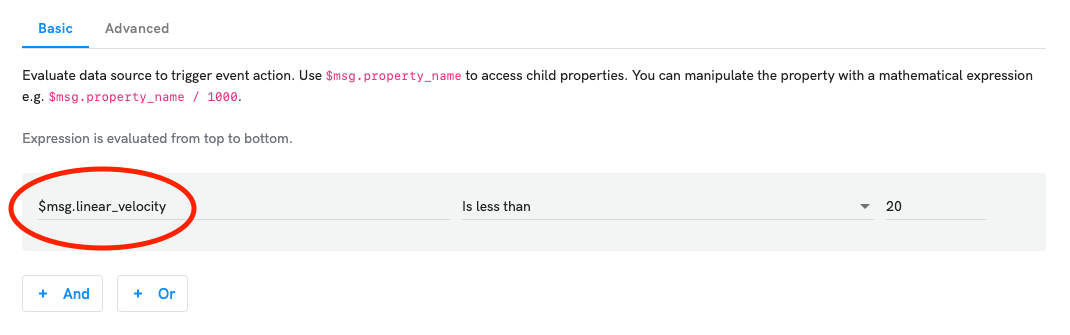
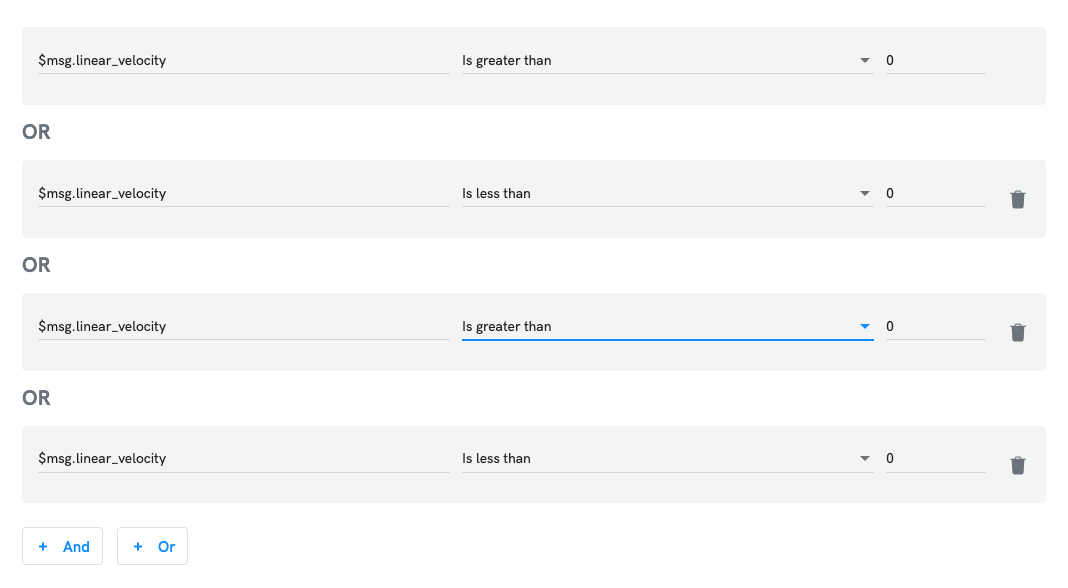
For this event, we want to be notified when the Turtle starts moving. We’ll add four trigger expressions to detect this, two for linear velocity and two for angular velocity, with logical Or between each:
Note the trigger criteria are evaluated by the agent, while the actions are executed by the platform.
When event being prepared, agent will copy the original data from the source message to the Event's own data payload. We have the option to turn off this data replication to avoid unnecessary data traffic for the Event as shown below, however in our case, since the payload of the /ros/turtle1/pose message is not too large, we'll leave this enabled.

We’ll now configure a simple HTTP action to demonstrate calling an HTTP endpoint when the Event is raised. As a target for our HTTP request, we’ll use requestbin.net which is a free development tool for creating arbitrary HTTP endpoints on the internet. Navigate to https://requestbin.net, and you’ll see an interface that looks like this:
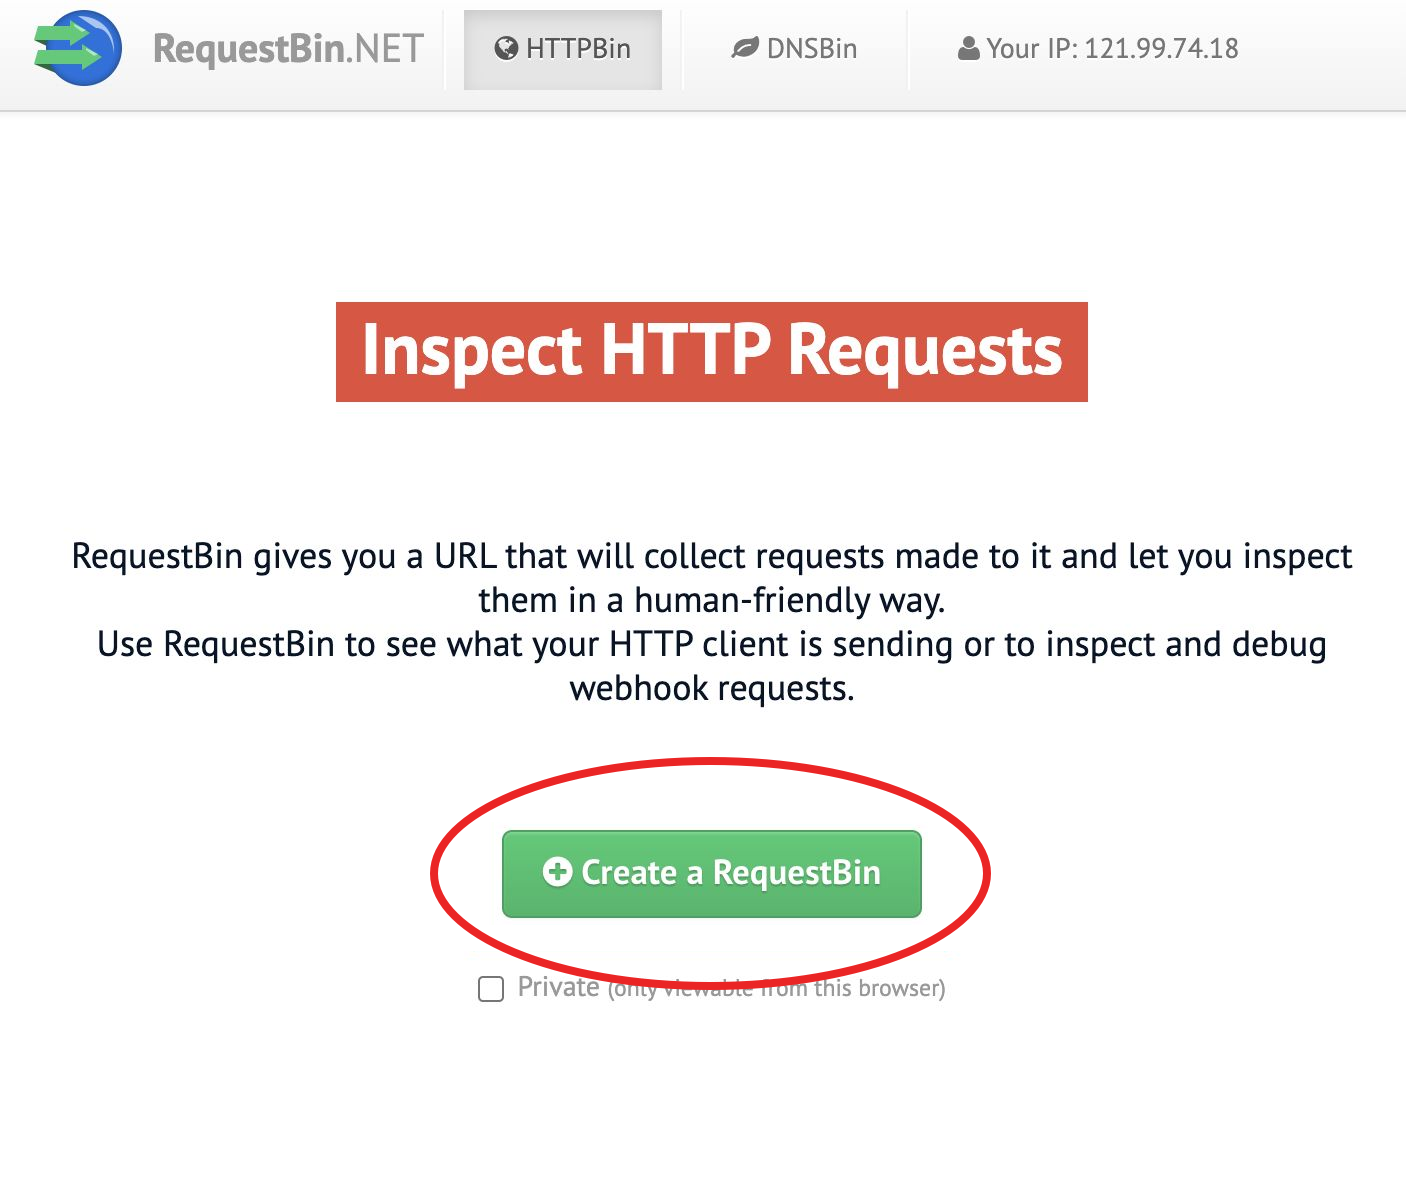
Click the ‘Create a RequestBin’ button, and you’ll be presented with a page like this:
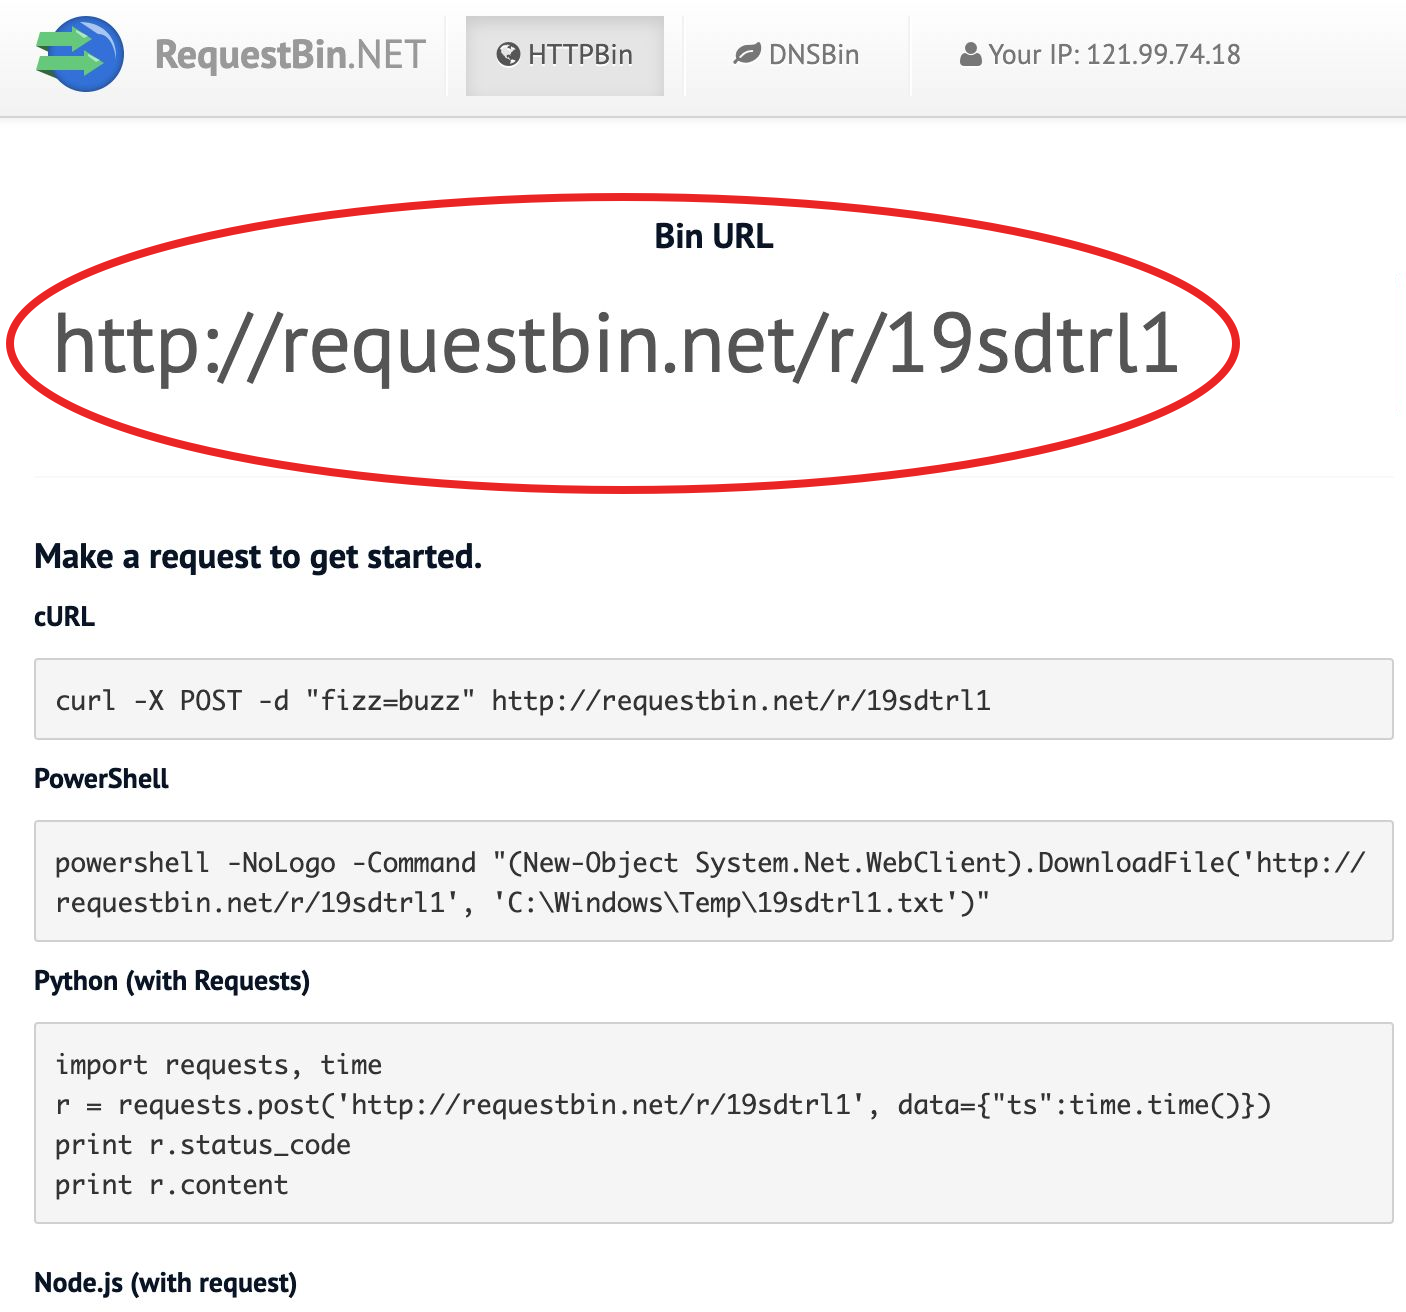
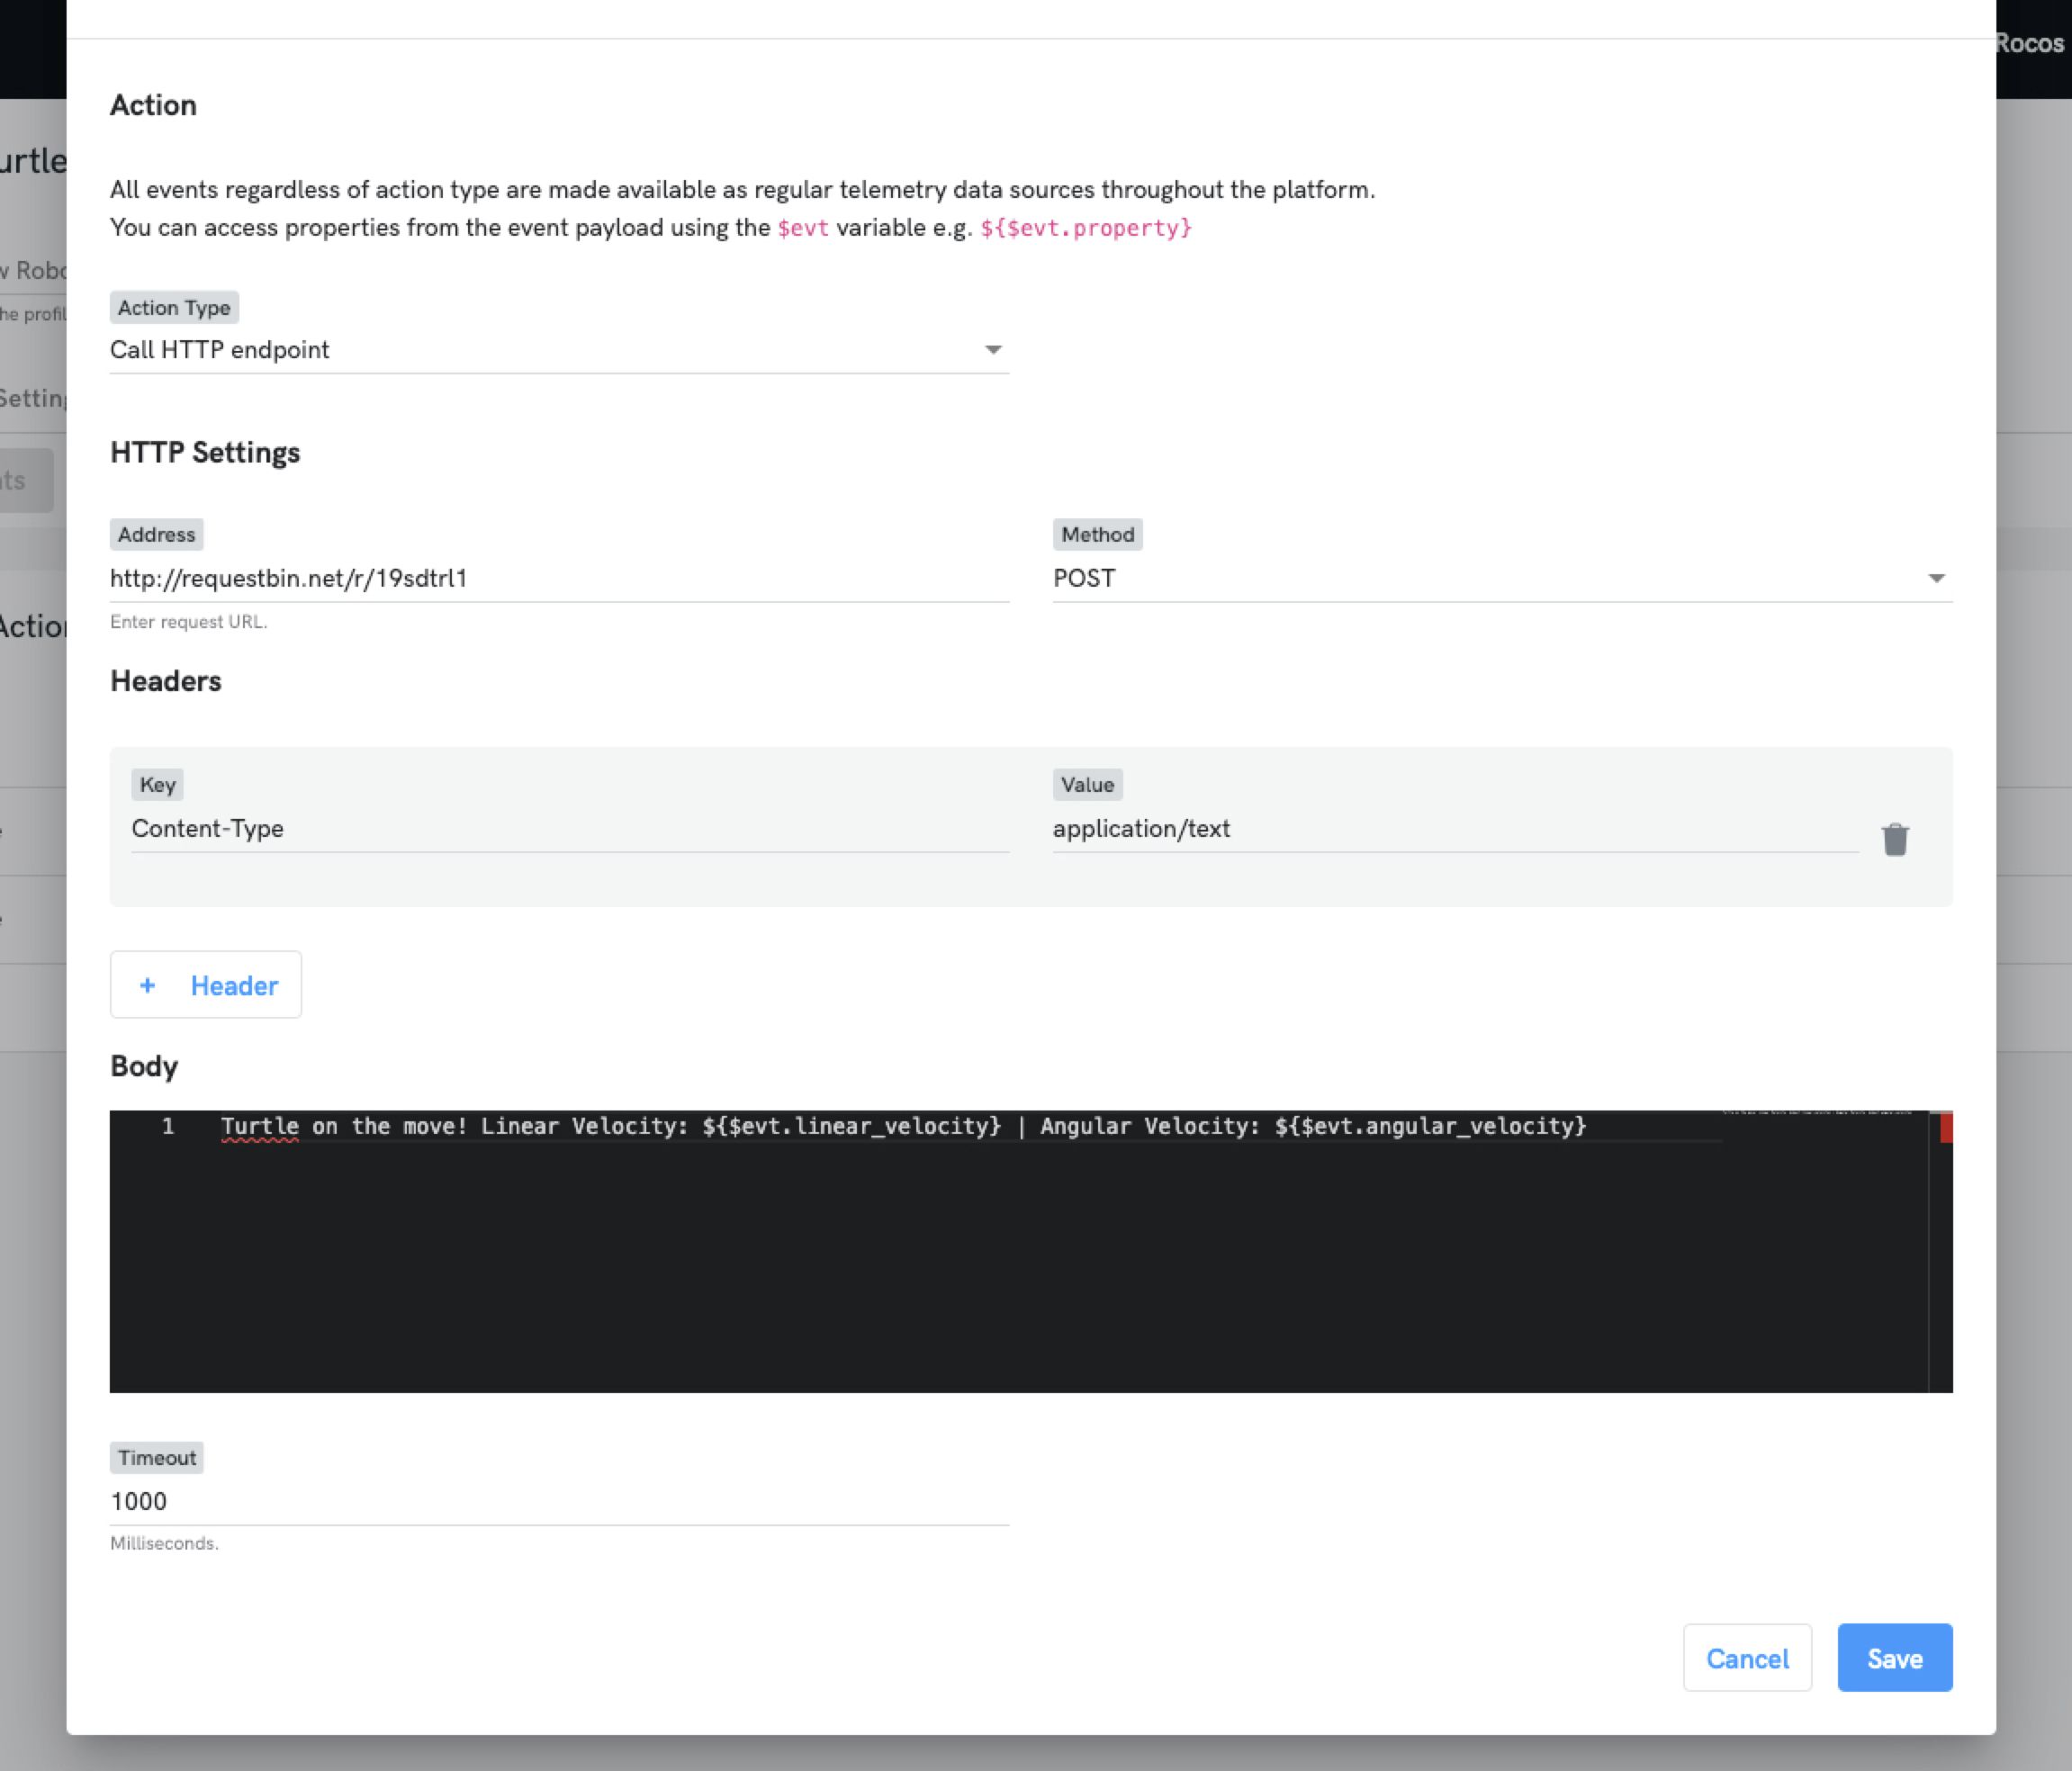
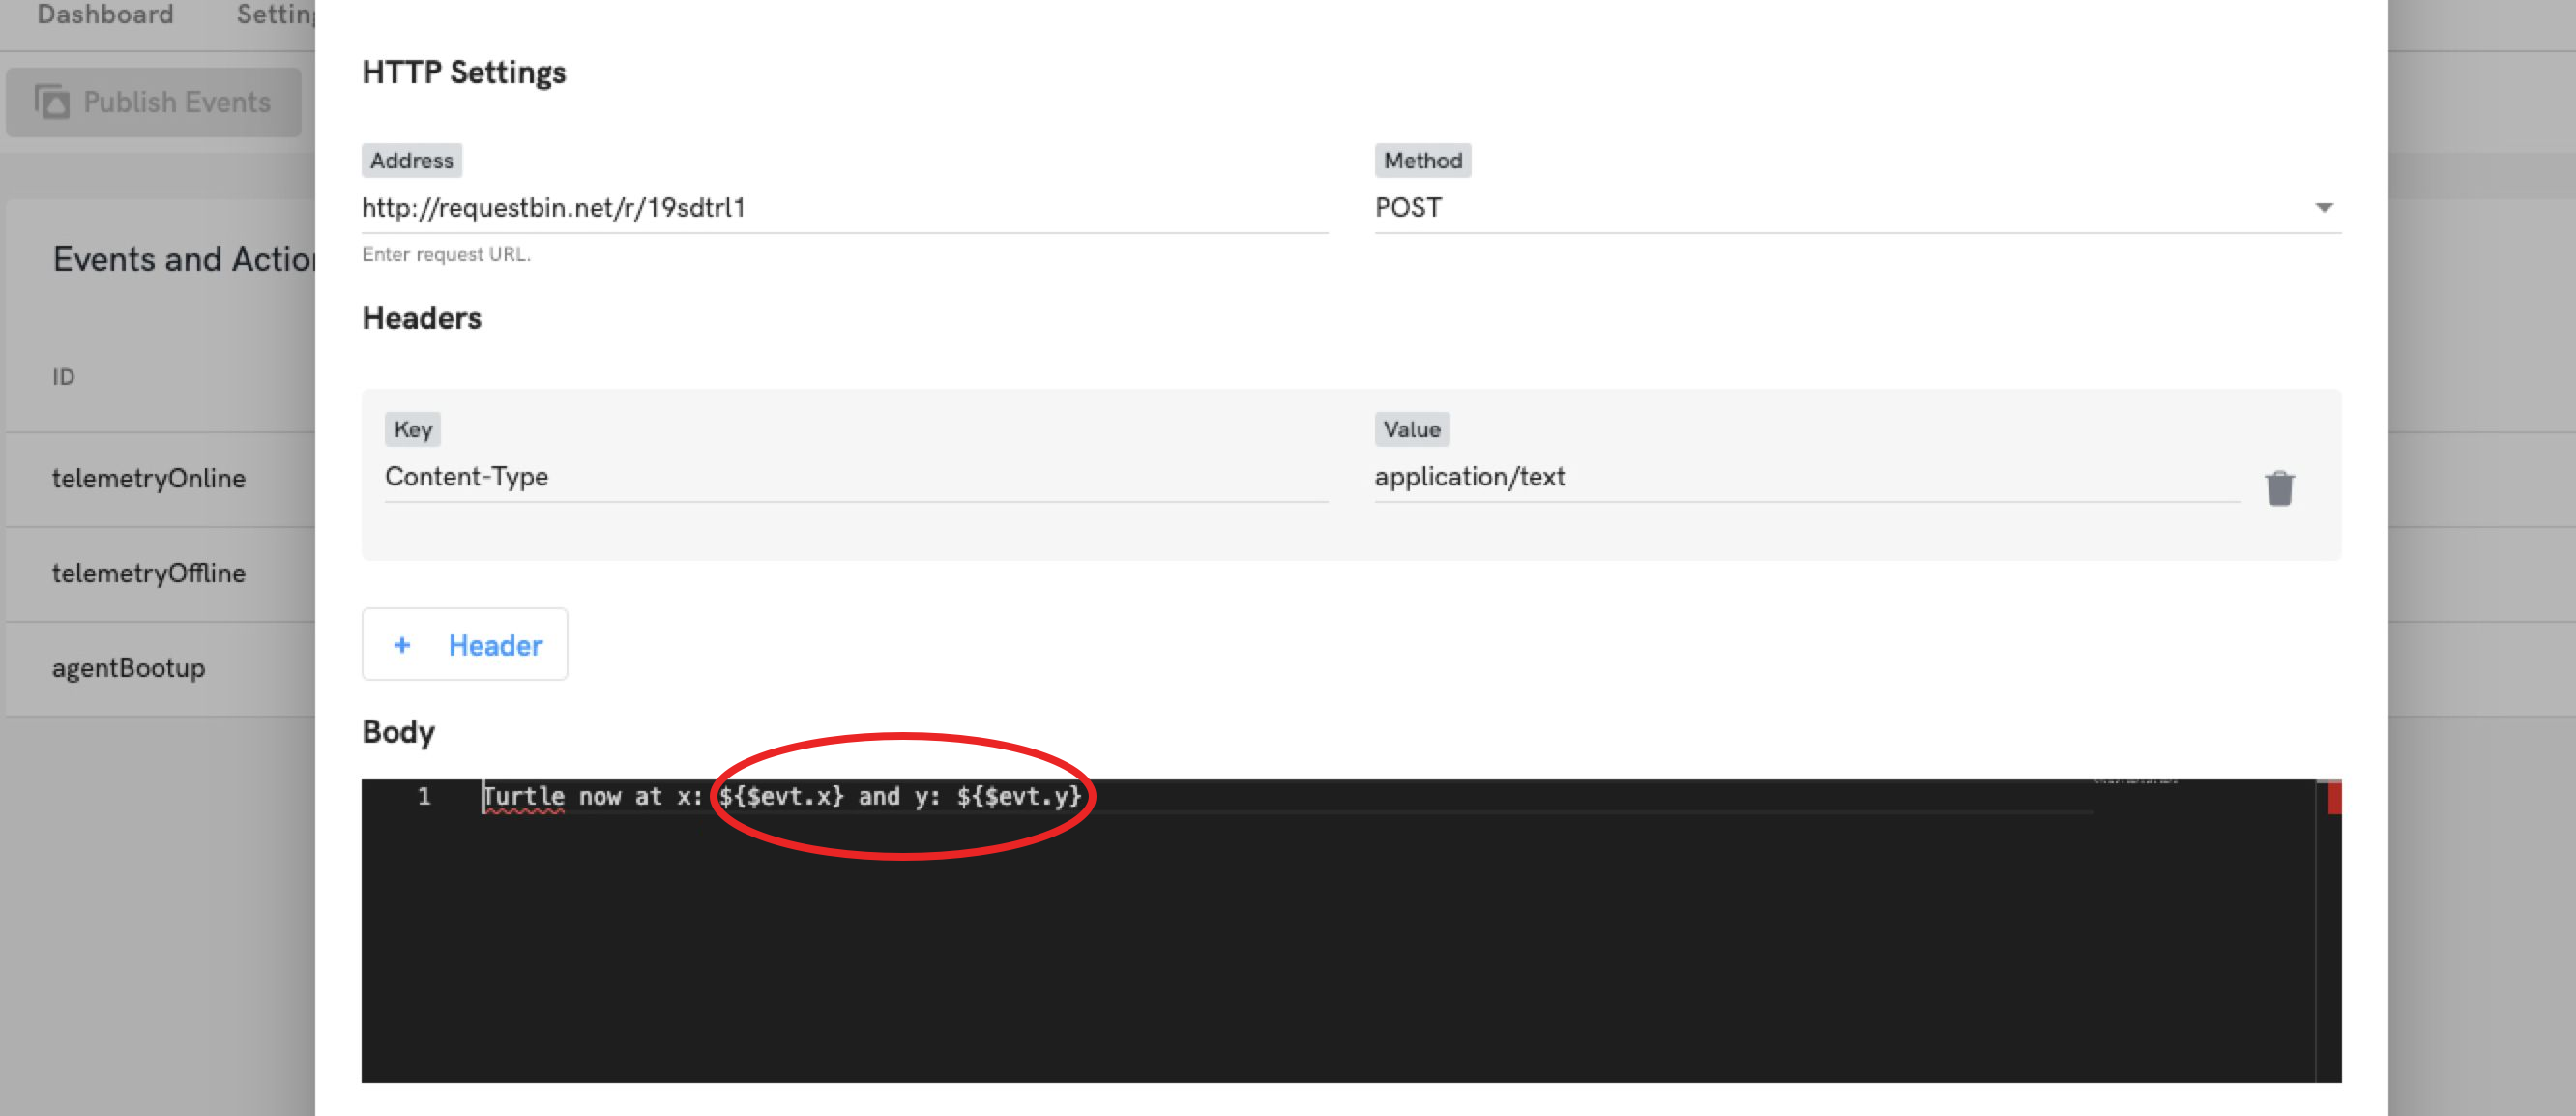
Copy the Bin URL, switch back to the Robot Automation Portal and enter the address into the Address field of the HTTP action. Update the rest of the fields as in the following:
- Method: POST
- Headers - Content-Type: application/text
- Body: Turtle on the move! Linear Velocity: evt.linearvelocity} | Angular Velocity: evt.angular velocity},
- Timeout: 1000
The Action section should now look like this, but with your unique requestbin address:
We’re now ready to test our event. Click ‘Save’ then ‘Publish Events' back on the list view:
This sends the Event definition to any agents with the Virtual ROS TurtleBot robot profile, in our case the T-1 virtual TurtleBot we created at the beginning of this walkthrough.
Navigate to Operations > Local Ops, then ensure T-1 has been added to the scene:
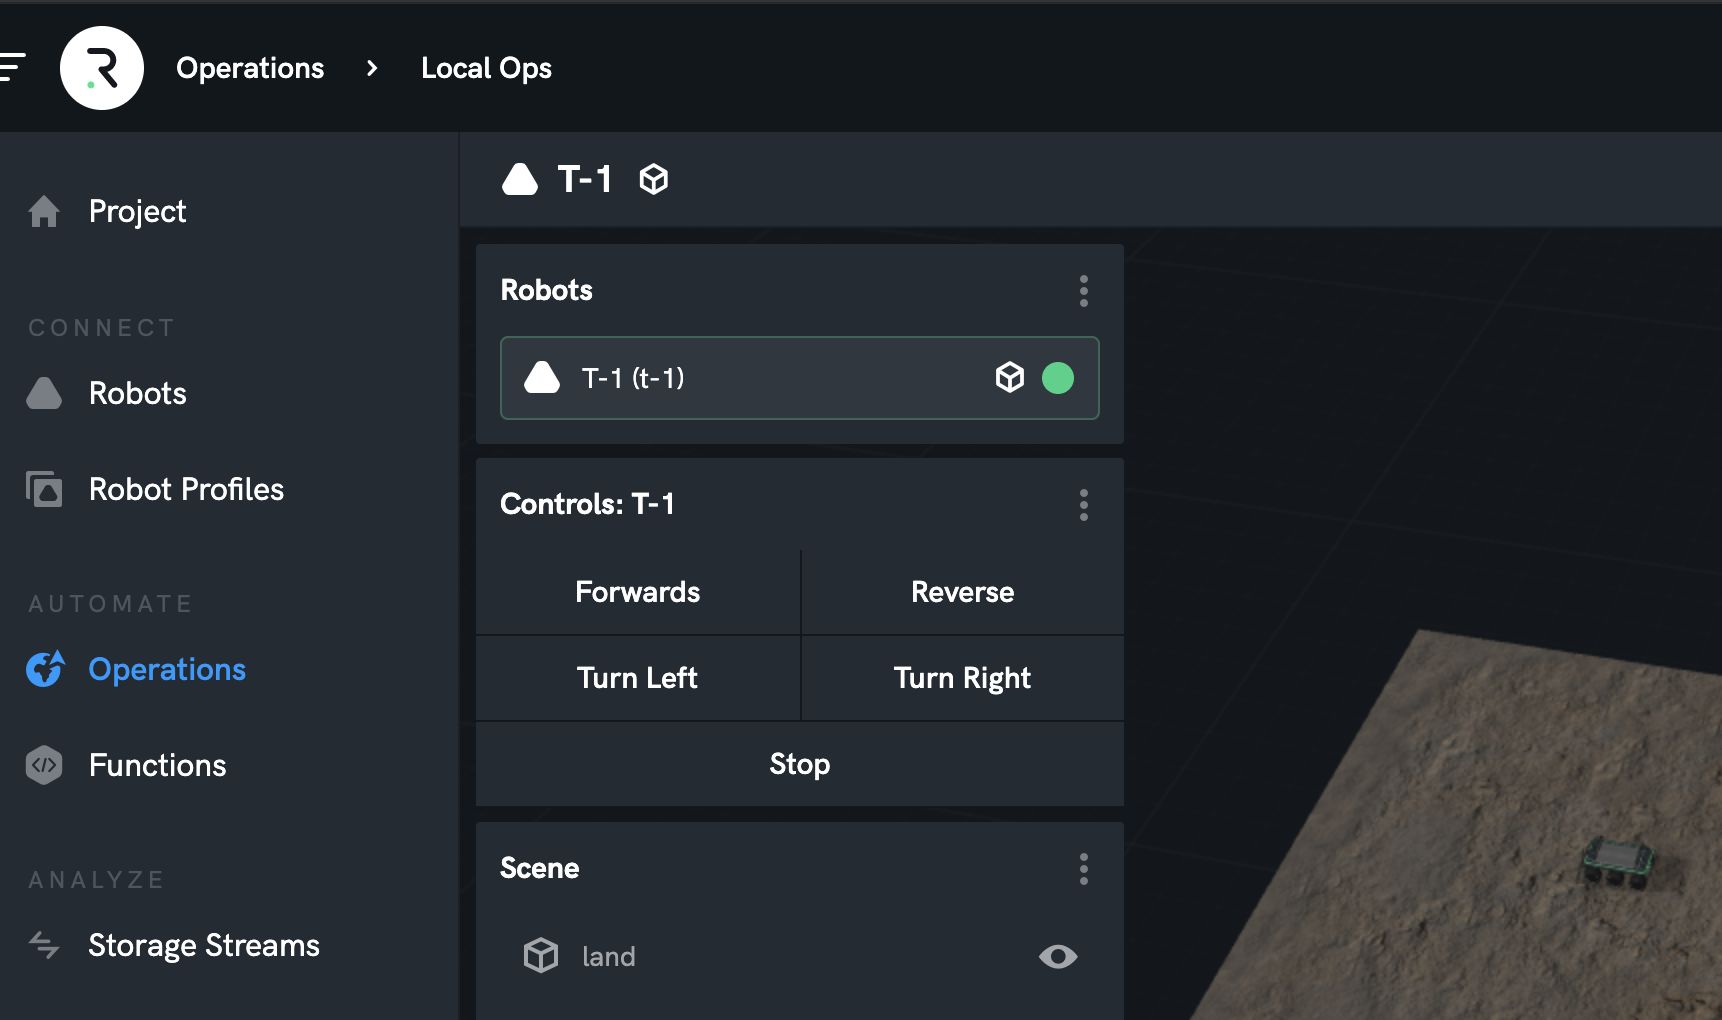
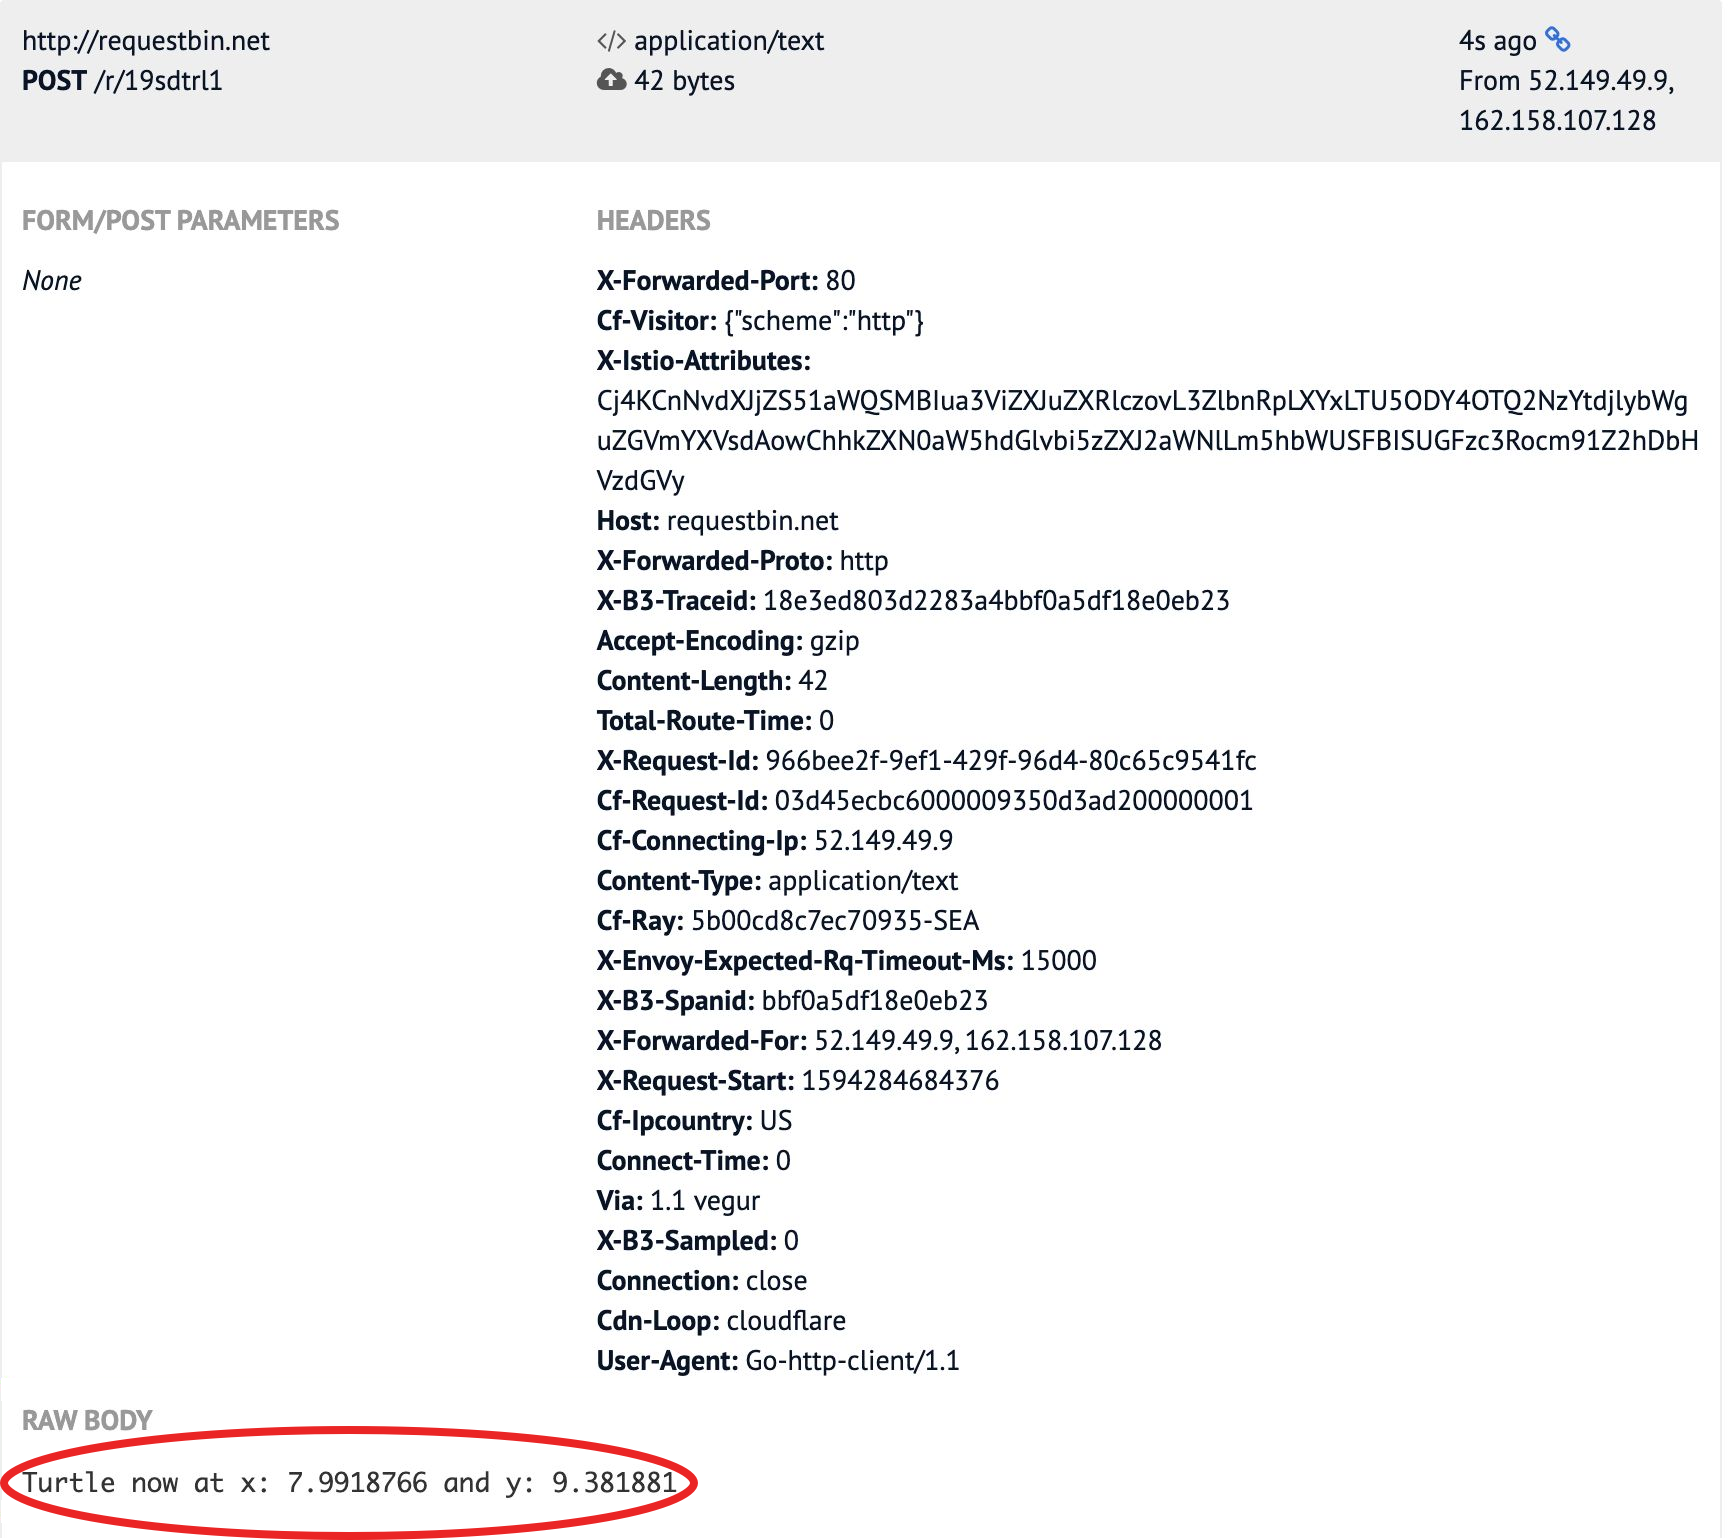
Click the Forwards button to move T-1 forward. This will cause the linear_velocity to increase above zero, which in turn will cause the trigger to evaluate to true and the HTTP action will be called. You can verify that the HTTP action was called correctly by refreshing your requestbin page and viewing the list of recorded posts.
Populating the HTTP Action Body with Telemetry Information
We can use some Javascript template literals to add information from the underlying telemetry message which triggered the event to the HTTP message body. We’ll make it so that whenever the HTTP Action is called, the body of the message includes the current pose information for T-1.
Update the body of the HTTP action so it has the following - note the placement of the ${} sections:
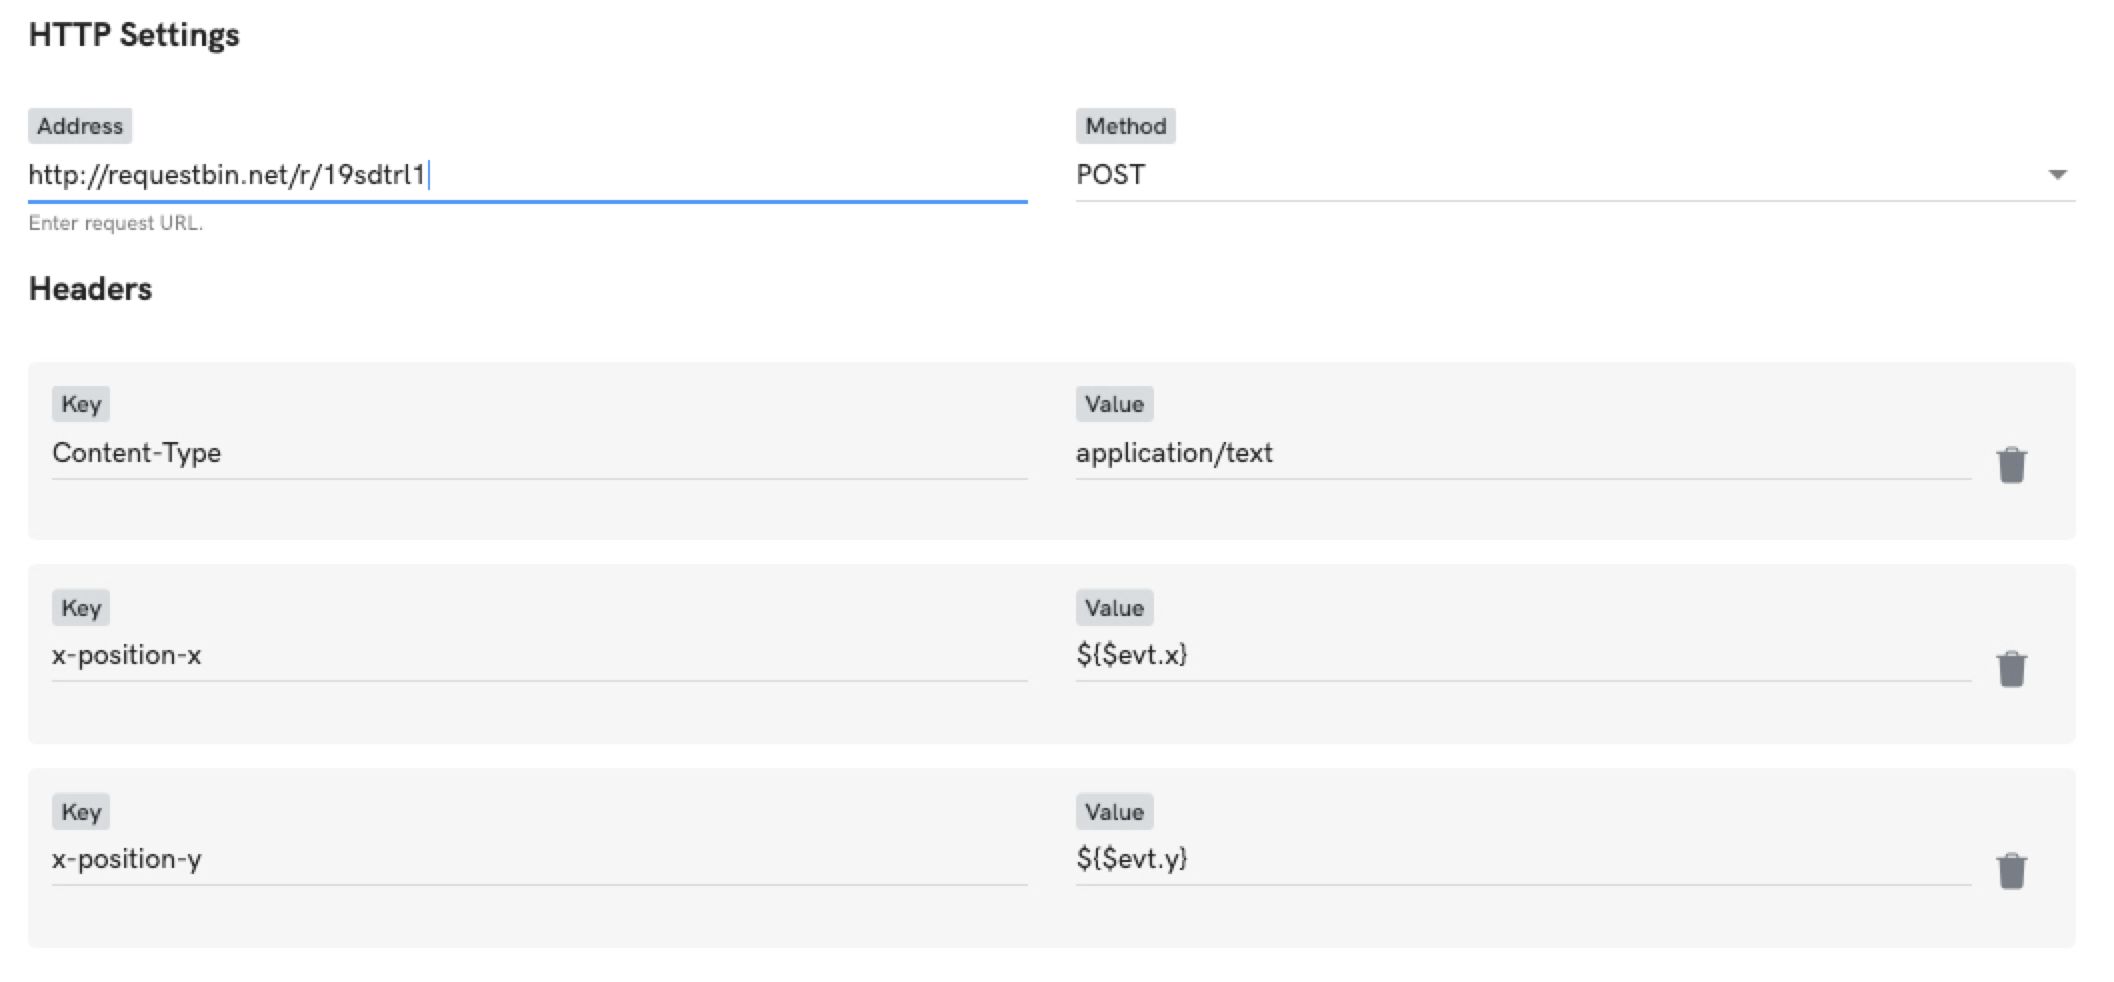
We can use variable $evt within the placeholder to access the event payload data. The $evt variable can also be used within the Address and Value fields as shown:
We can also use variable $robot within the placeholder to access the robot information related to the event. There are 2 properties available from $robot variable such as ${$robot.callsign} and ${$robot.project}
Now when you move the robot around and refresh your requestbin page, you’ll see a recorded post similar to this: