Events & Actions
Events provide the ability to detect the occurrence of a particular condition onboard a robot, and to automatically take action in response to that condition.
For example, some applications might be:
- Page your support team when a wheeled robot detects that it has become stuck.
- Notify a PLC controlling a conveyor belt when a robot completes loading a carton onto the belt.
- Send a drone back to its charging station when the battery drops below a certain threshold.
In order to use the Events feature, the minimum required Agent version is v1.3.2.
Creating Event Definitions
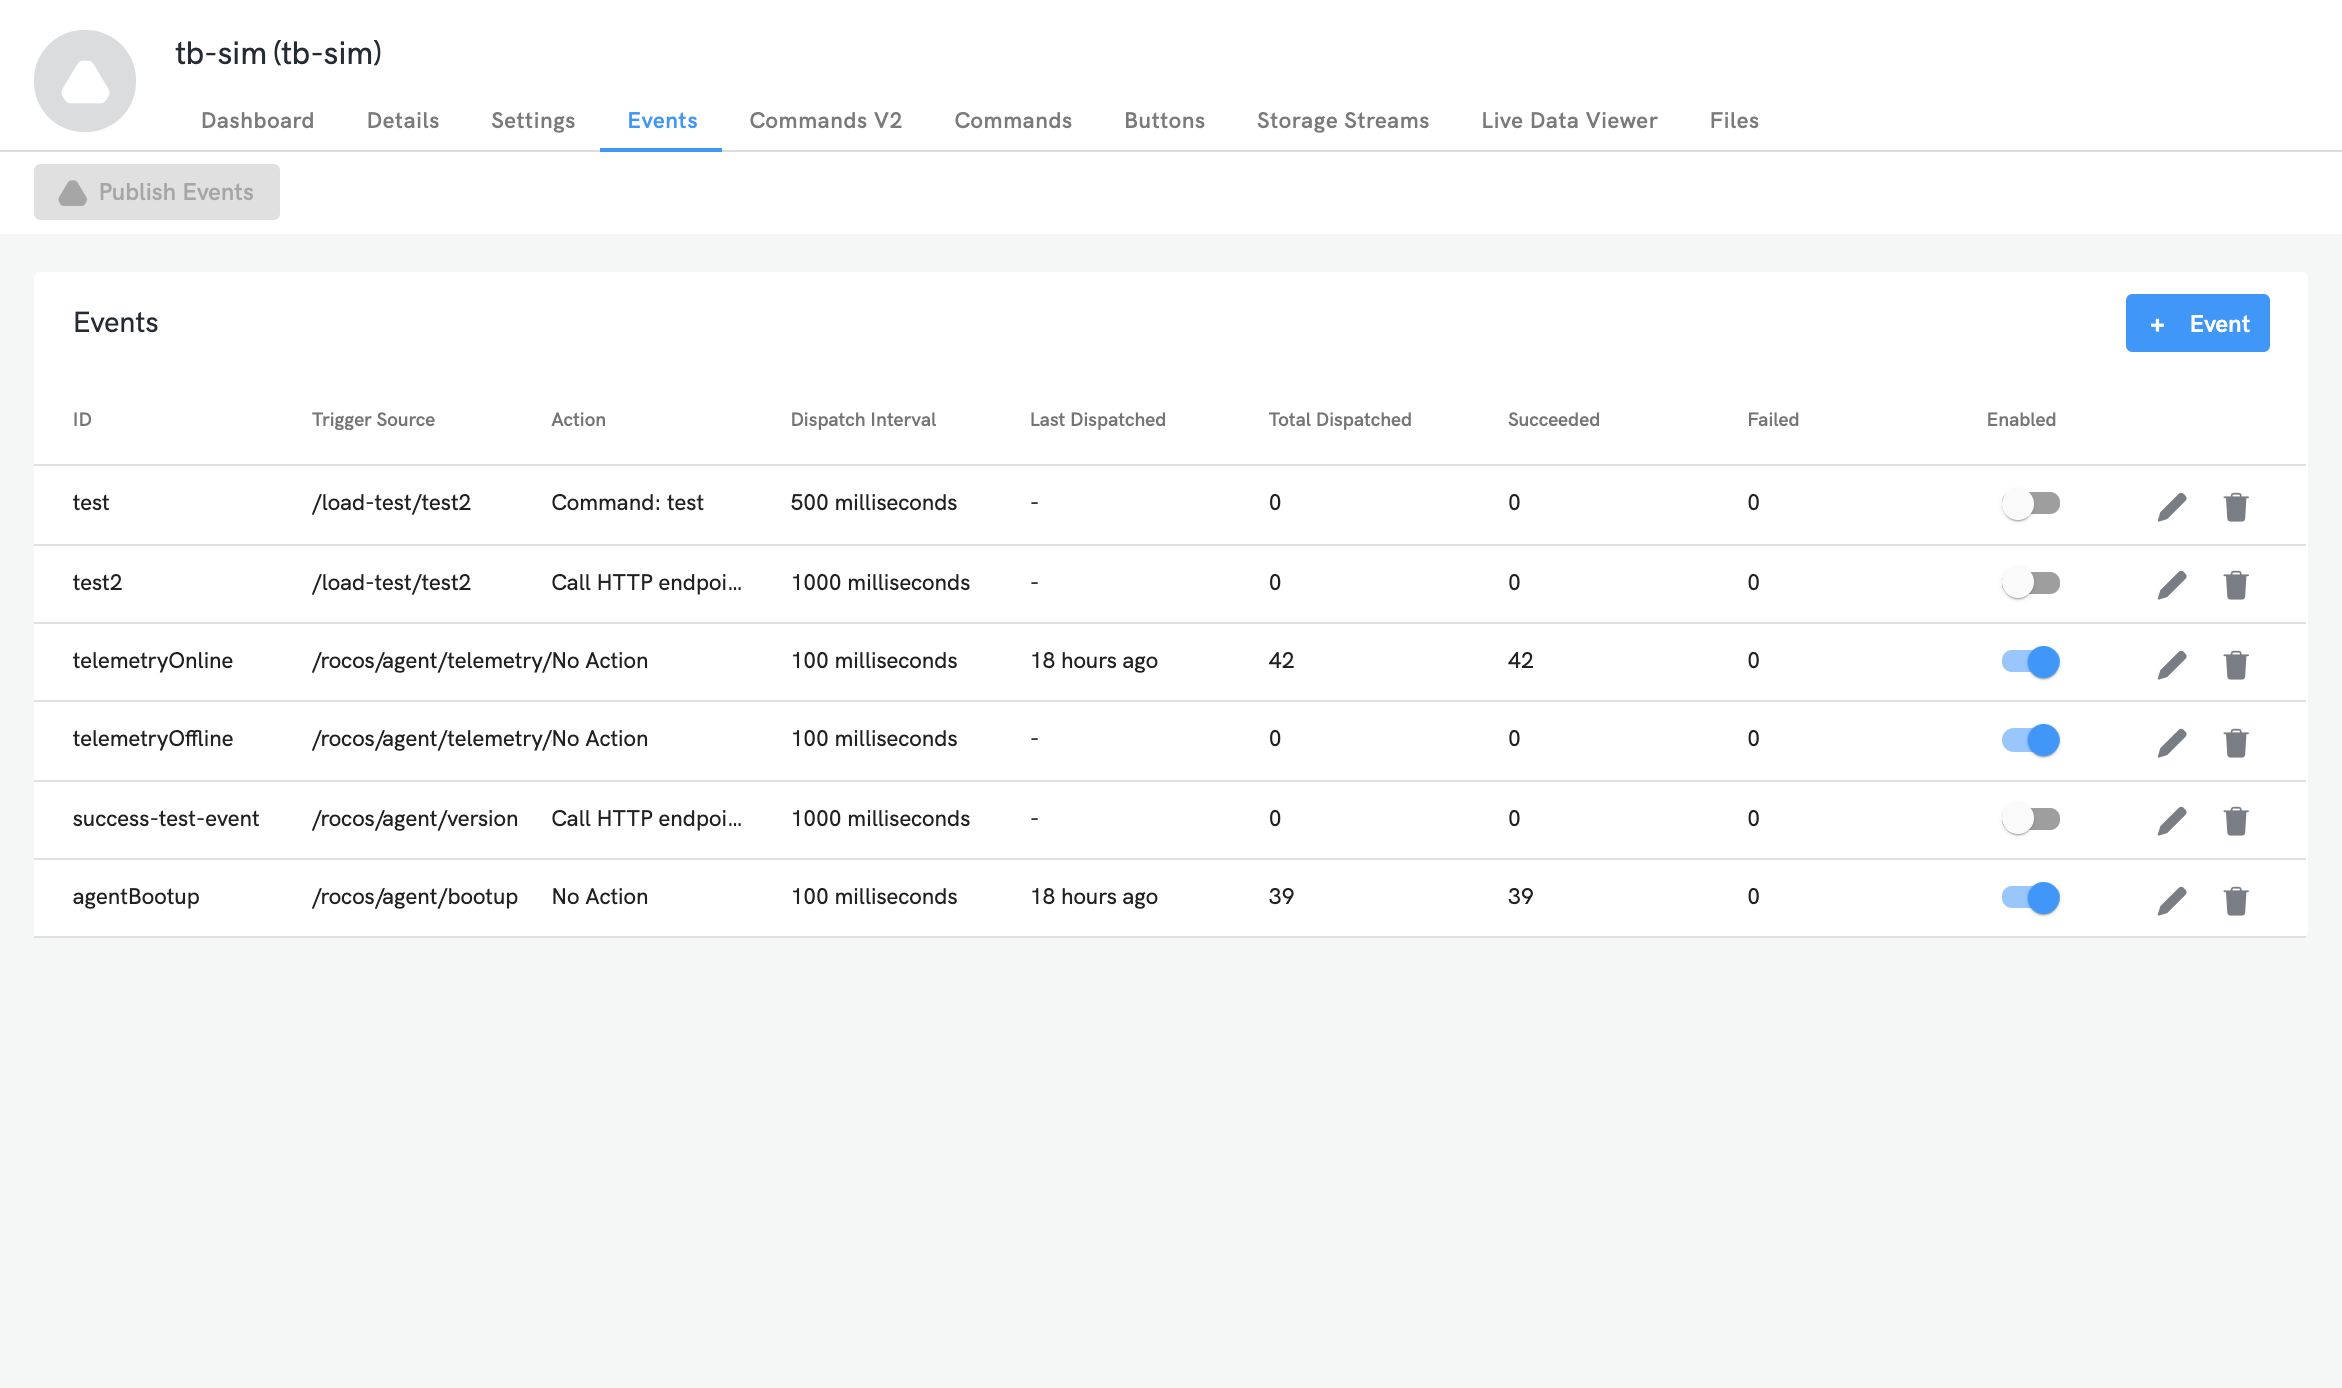
Events are created and responded to in accordance with a corresponding Event Definition. Event Definitions may be associated either with a Robot, or with a Robot Profile - in either case, Events Definitions are shown on the "Events" tab:

For an example of creating and testing an Event Definition, see Creating an Event.
Event Triggers
Instances of Events are created in response to evaluating a single selected Telemetry Message at a specified sampling interval.
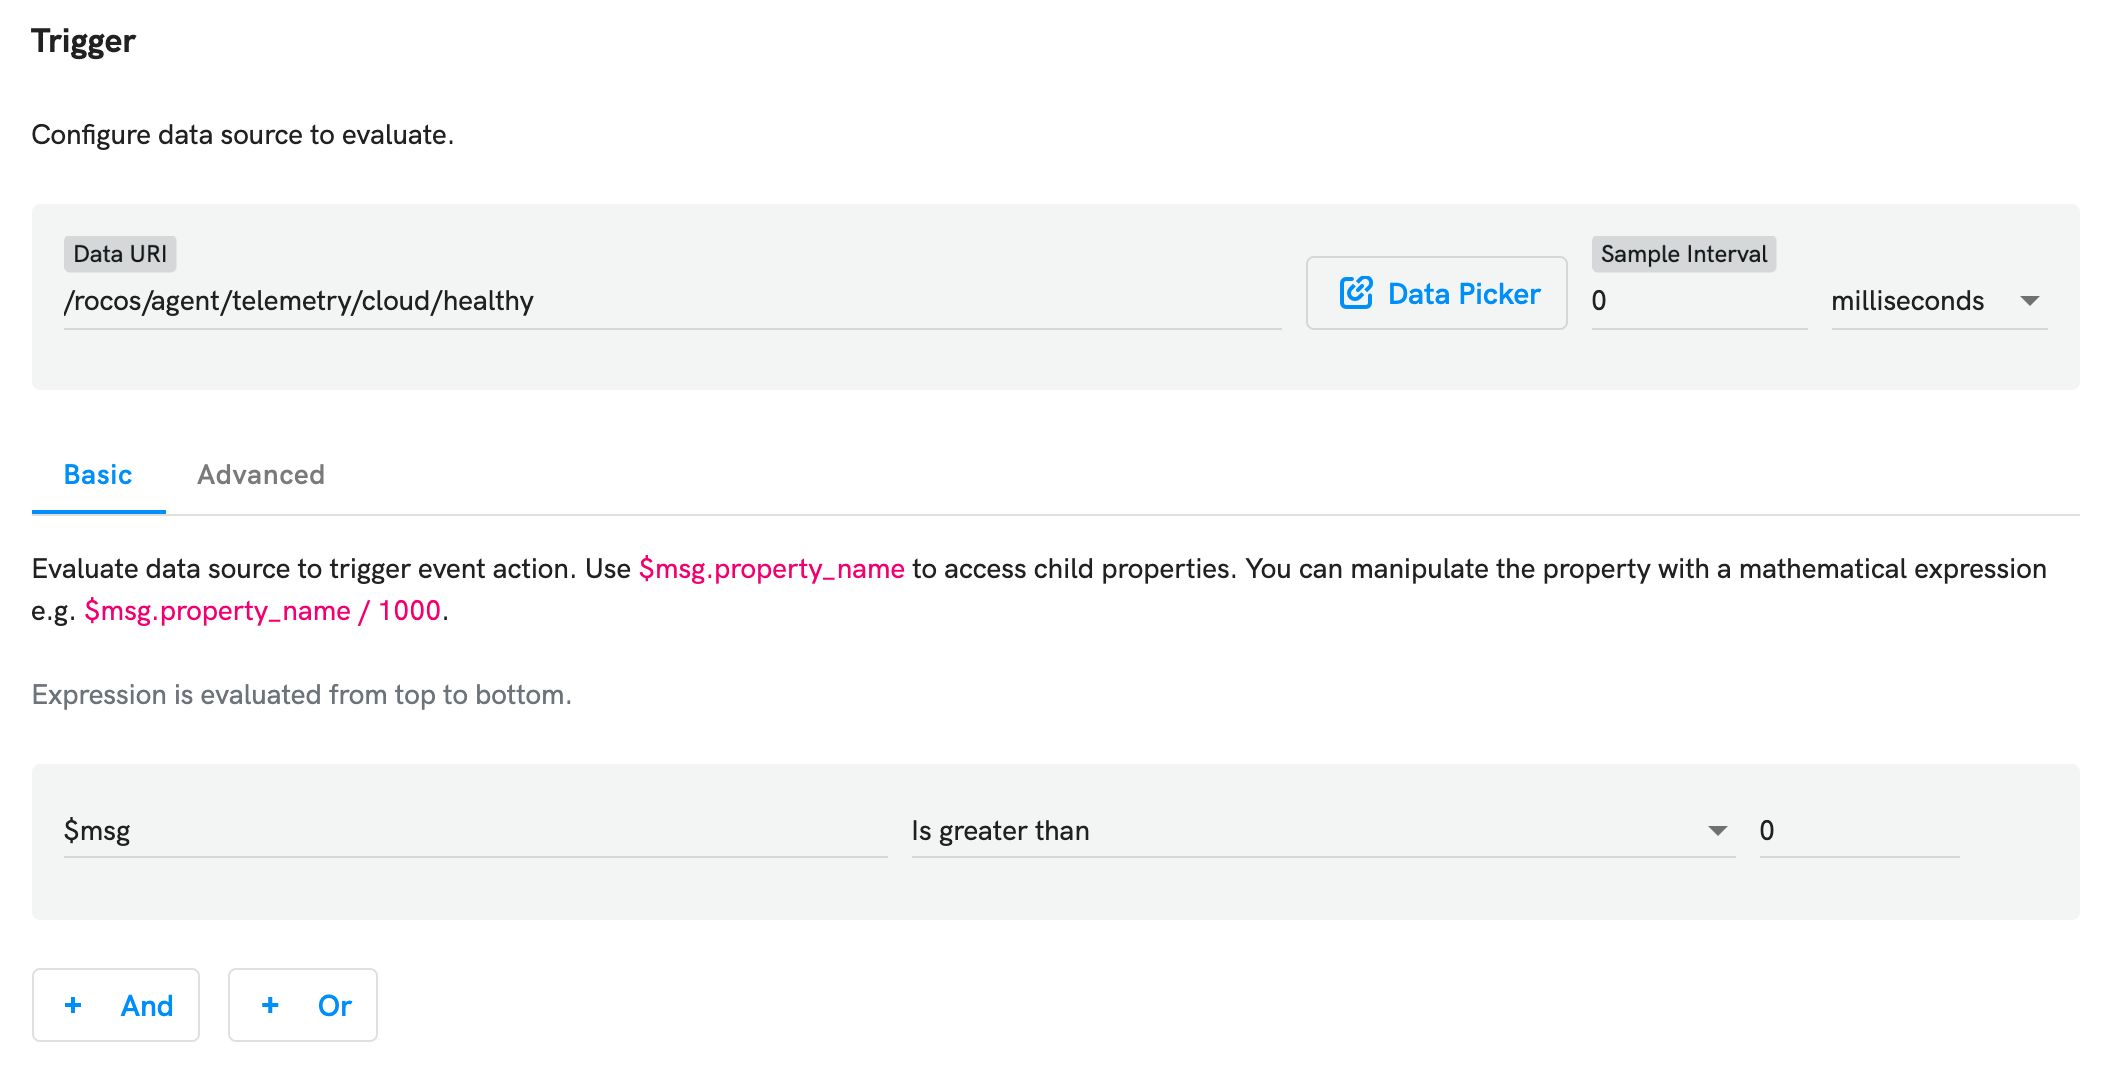
Each time the source message is sampled, the fields of the message are evaluated against one or more trigger criteria. Trigger criteria maybe be composed of several expressions build up using the UI shown above, or a single boolean JavaScript expression. The content of the source message is exposed for use in trigger conditions as a variable $msg.
If the sampling rate is set to zero, then the event trigger conditions will be evaluated as rapidly as the source message is published: while this will result in events triggering in a more responsive manner, in the case of topics which are published at high frequencies, it will also increase CPU load onboard the robot, so sample interval should be chosen to be the slowest speed which will reliably capture the behaviour of interest.
Event Trigger Mode
After the trigger condition has been evaluated, whether or not the Event is triggered depends on the triggering mode associated with that Event
There are four provided options for the event trigger mode:
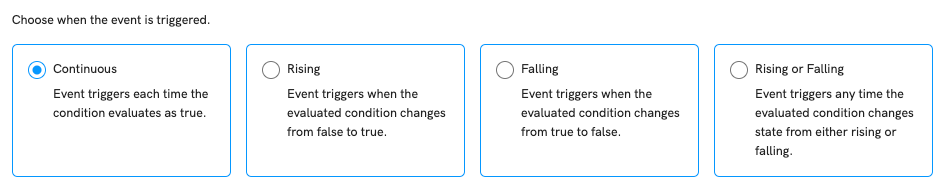
- Rising: if the first message received results in the event condition being evaluated as true, then the event will trigger.
- Falling: if the first message received results in the event condition being evaluated as false, then the event will trigger.
- Rising or Falling: The event condition will not be met on the first message, regardless of its value. The first message is required to set the initial state of the event condition evaluator.
Why are the different event modes required?
Imagine a scenario where you want an event to trigger when your robot's battery reaches below 10%. You configure an event so that when this happens, a text message is sent to your phone.
If you were to use the "Continuous" mode for this (assuming a Sample Interval and Dispatch Interval of 1 second) the following would happen. The battery would reach less than 10%, and from that moment on, the event would trigger every second. A text message would then be sent every second which is obviously not desired.
Instead what you would want is an edge-triggered mode. In this case, the "Rising" mode would be suitable. The battery would fall below 10% and so the evaluated condition would go from false to true: the rising edge condition is met. The event would be triggered once, and the text message would be set once, as desired.
Event Dispatch
Even after the trigger conditions for an Event have been met, a new Event will only be created and dispatched if sufficient time has elapsed since the last time that Event was dispatched. By increasing this Dispatch Interval, you can prevent multiple events being raised in response to a single occurrence of behaviour.
Setting a relatively fast Sample Interval, but a slow Dispatch Interval, allows reliably capturing brief/transient occurrences, without risking raising hundreds of Events all describing the same occurrence.
Event Payloads
Events are just like other Telemetry Messages, in that they contain both meta-data and a data payload (which is usually JSON). Usually, you want the Event to contain a copy of the payload from the source message which caused the Event to be created. This allows capturing the particular details surrounding the raising of the Event for both later analysis, and use in the Actions which the event will trigger.
However, in the case that the source message is very large (such as containing point cloud data), you may not want to transfer all this data into the Event itself. This is because Event messages are automatically conveyed over the network to, and stored in, the DroneDeploy Robotics Portal; raising Events with large payloads may result in increased network and consumption costs. If you want to raise an Event based on a large source message, or just don't care to retain the source message's data, then you can configure the Event to have no payload.
Actions
Each Event Definition may specify a single Action, a behaviour which is automatically carried out in response to the raising of the event. Possible Action types are:
- Call an HTTP endpoint.
- Invoke a Command on a robot.
- Take no action.
Taking no action is useful if you just want the occurrence to be recorded, but do not need to immediately respond.
The content of the Event (which, as mentioned above, is usually the same as the content of the original source message) is available for use in configuring the Action, exposed as the variable $evt.
Managing Events
You can view, edit and create new Event Definitions on the 'Events' tab, available on both Robot and Robot Profile pages. Each item in the list is a separate Event Definition:
Event History
When the DroneDeploy Robotics Portal receives each Event, and attempts to perform the corresponding Action, the result of this is recorded to assist in diagnostics. When you click on one of the entries in the list of Event Definitions, a pop-up will appear which shows the recent history of Events and Actions for that Event Definition:
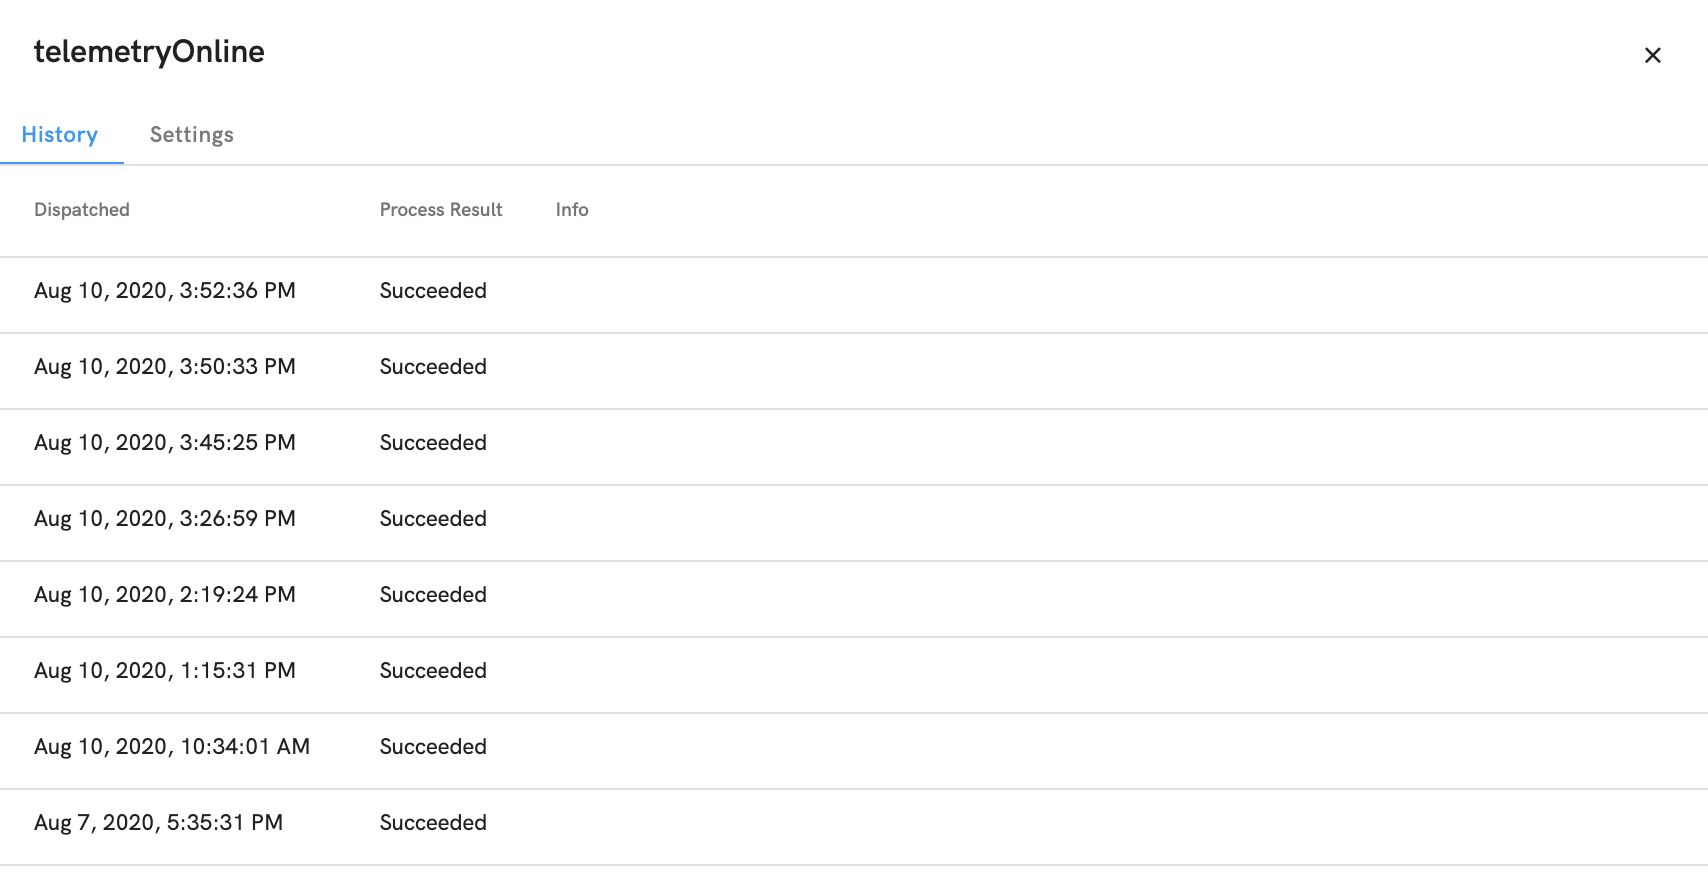
If there is a problem with the Action you have configured, then the information shown here may assist you in diagnosing the issue.
Logging Events As Telemetry
As mentioned above, when dispatched, Events are just like any other Telemetry Message. Accordingly, they can be viewed in the Live Data Viewer tab, and used in the definition of Storage Streams.
When you create a new Project, you will note that the default Robot Profiles provided in this Project all include a Storage Stream definition for capturing Events:
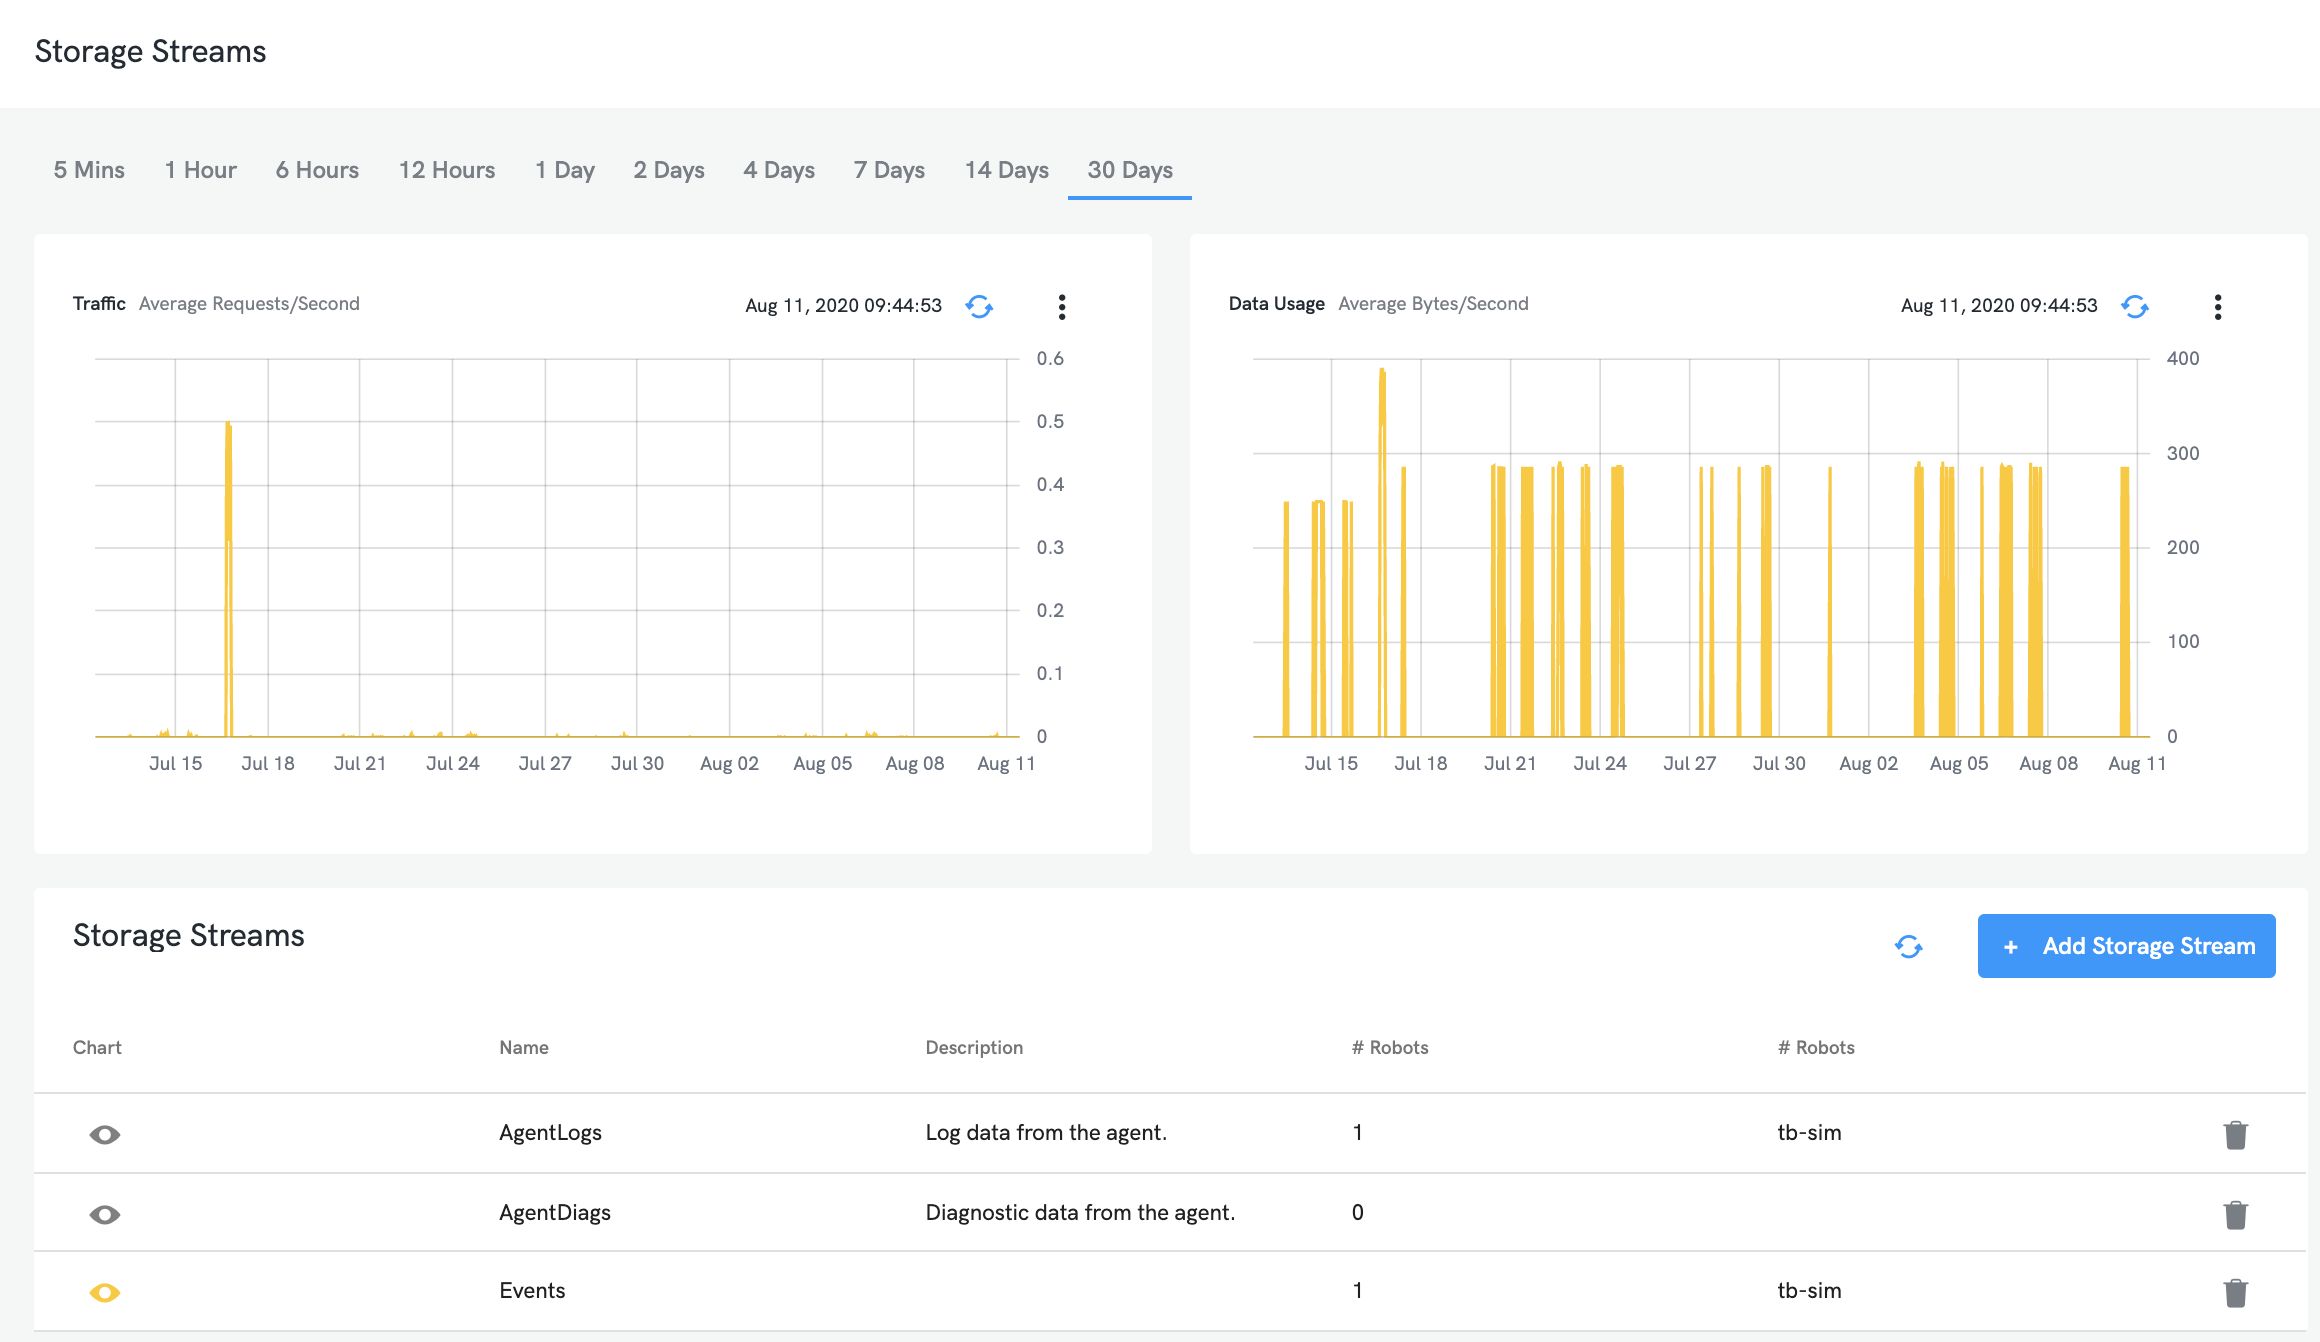
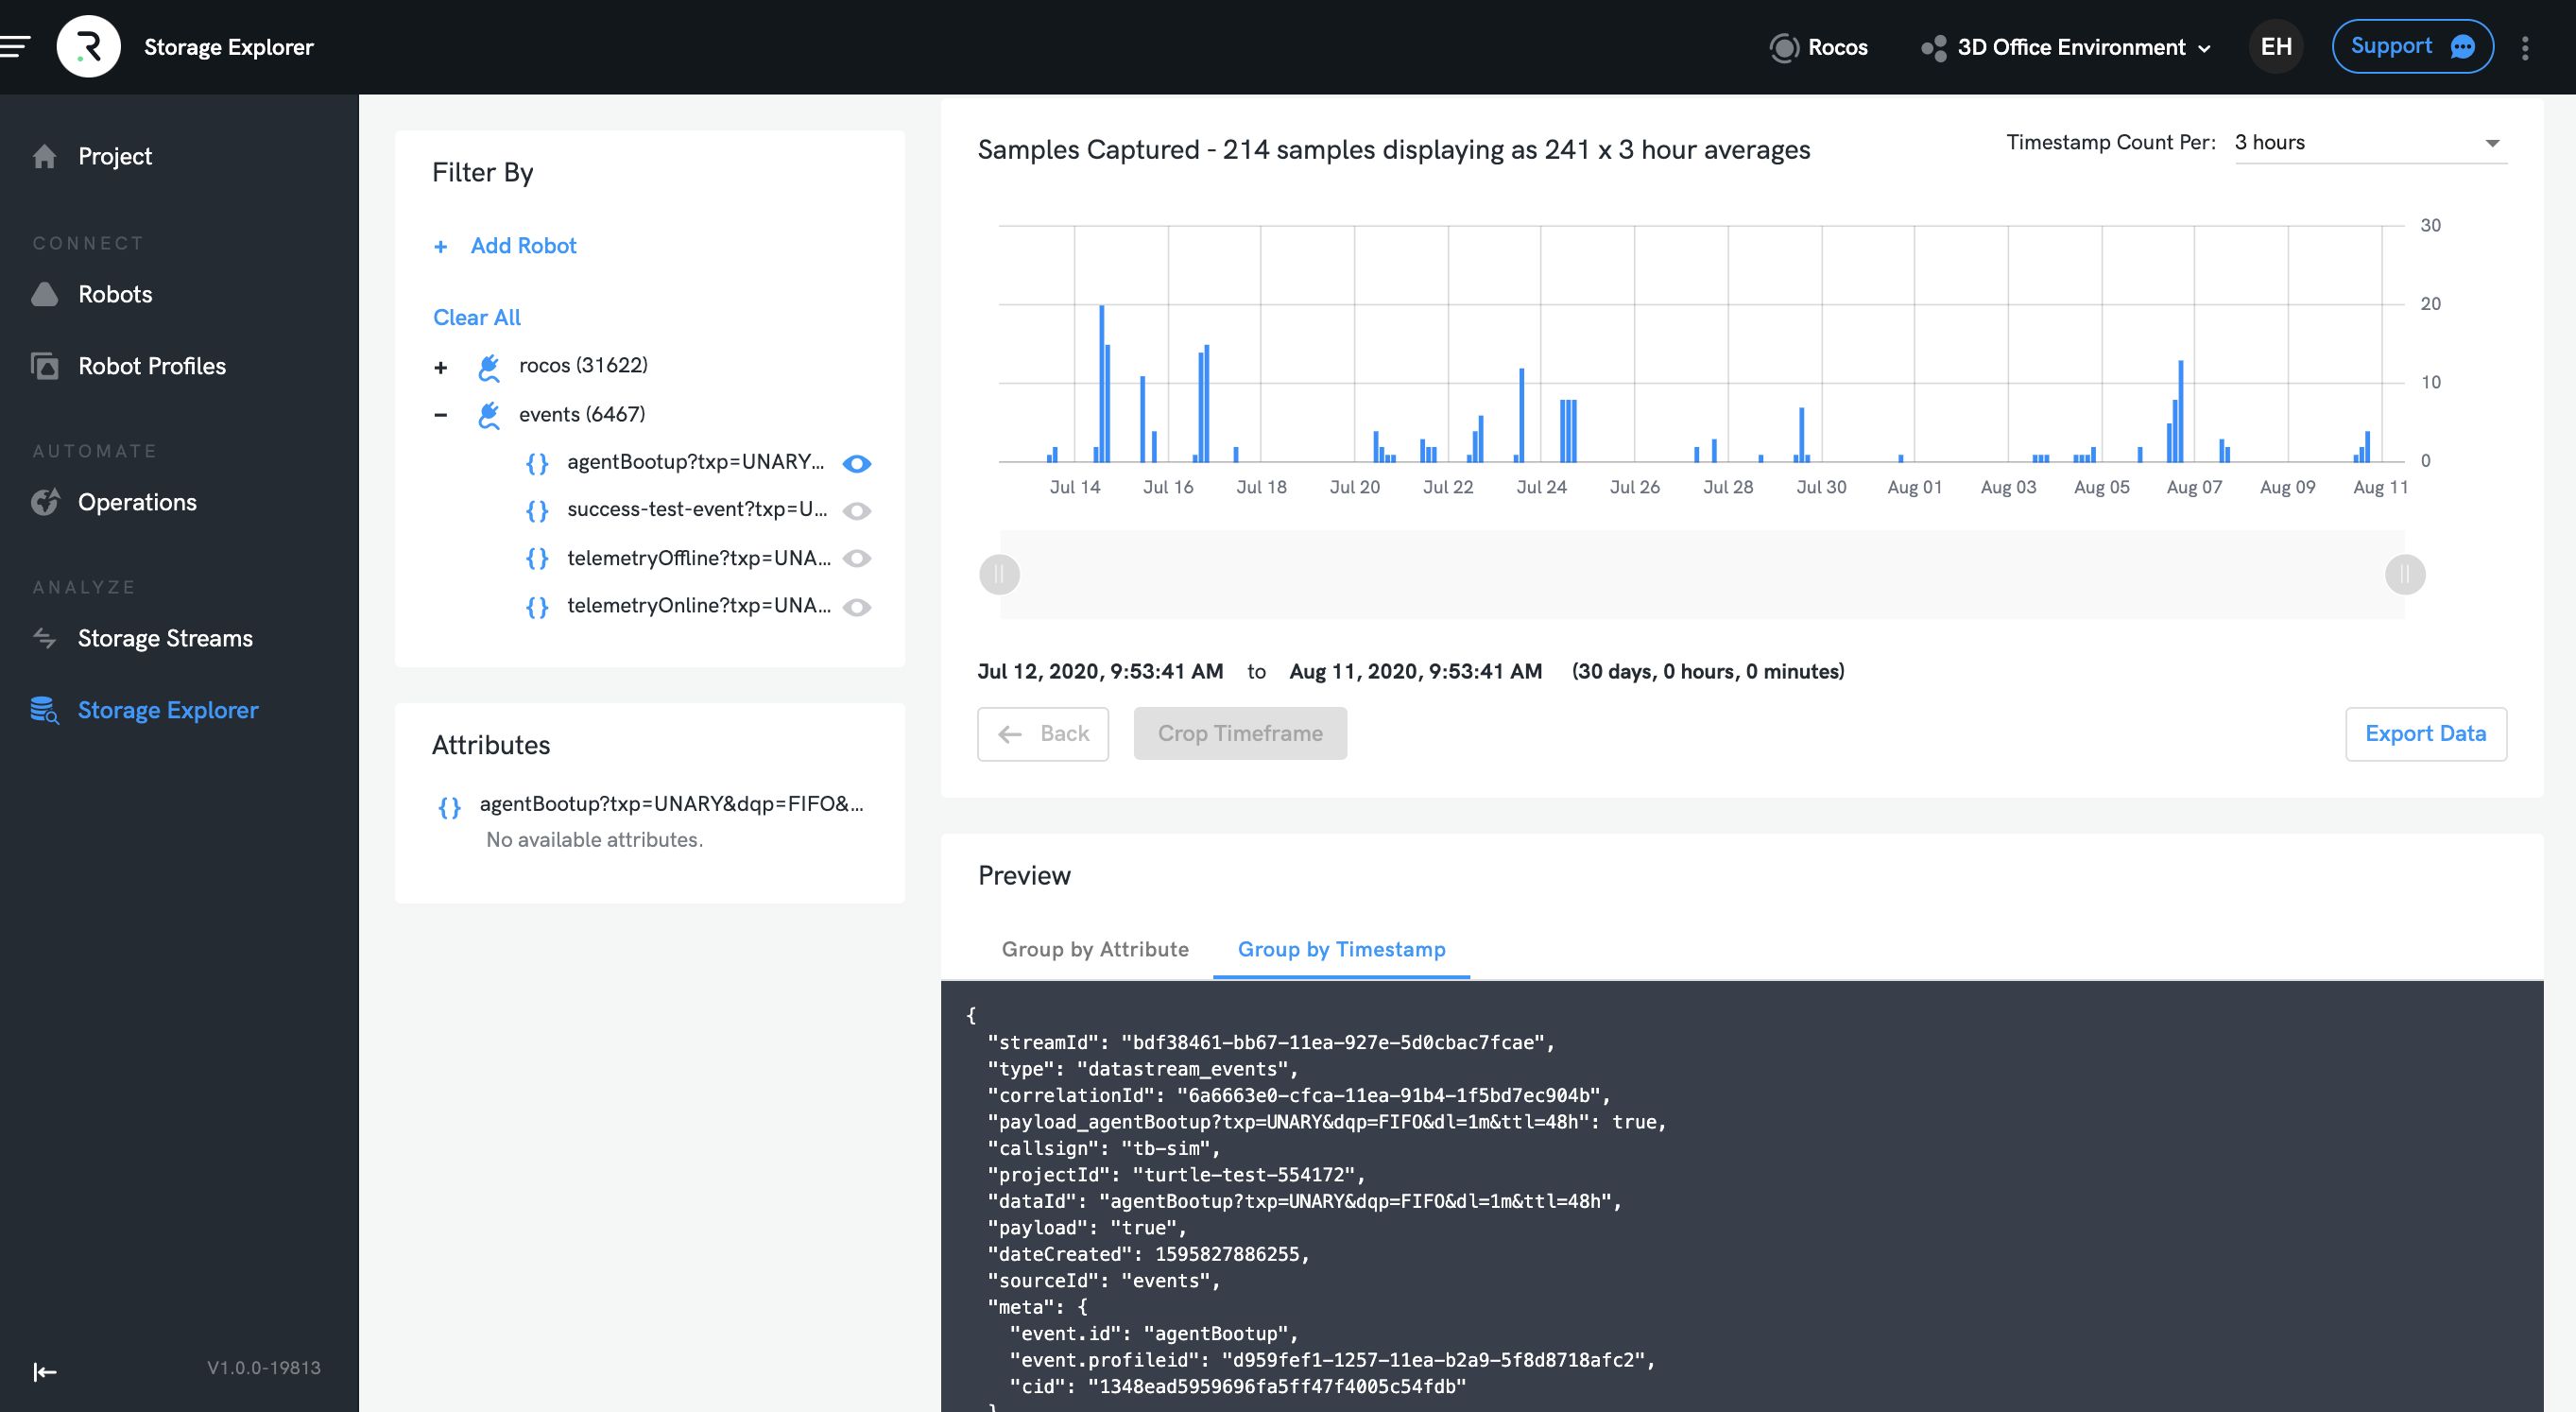
You can thus view the details of Events using the Storage Explorer page:
Technical Details
Event Definitions are automatically downloaded onto the robot, and are stored locally (refer File Locations): the Agent needs to be connected to the DroneDeploy Robotics Portal to receive updates to Event Definitions, but once those definitions are stored locally, the Agent will dispatch Events even without an internet connection.
The Agent evaluates the Event trigger and dispatch conditions locally to generate Events in response to Telemetry Messages. However, the execution of Actions in response to Events occurs in the DroneDeploy Robotics Portal. Accordingly, if the Agent does not have internet connectivity, while Events will continue to be dispatched, Actions will not be executed. In this case, dispatched Events will be cached for up to 48hrs, or until the Agent is restarted. If the Agent regains internet connectivity during this time, Actions will be executed by the DroneDeploy Robotics Portal once they are received from the Agent.
Trigger conditions for Events are evaluated as JavaScript; trigger conditions written using the advanced trigger panel in the UI need not consist of a single expression, they can consist of multiple statements so long as the complete script evaluates to a boolean. A separate JS environment is created for each Event Definition, and this environment persists between the evaluation of source message samples, so global variables written by advance trigger scripts will be available in subsequent evaluations of that same script. This allows custom trigger behaviour, particularly creation of stateful filters to prevent spurious Events being raised in response to noisy data. Maximum script execution time is capped at 250ms, after which execution will be interrupted (in which case the resulting environment state is undefined). Execution of complex JS conditions can impose significant CPU load on your robot, and potentially disrupt other Agent operations, so ensure your conditions are a simple as possible.