Record a map
Get help with this step: [email protected]
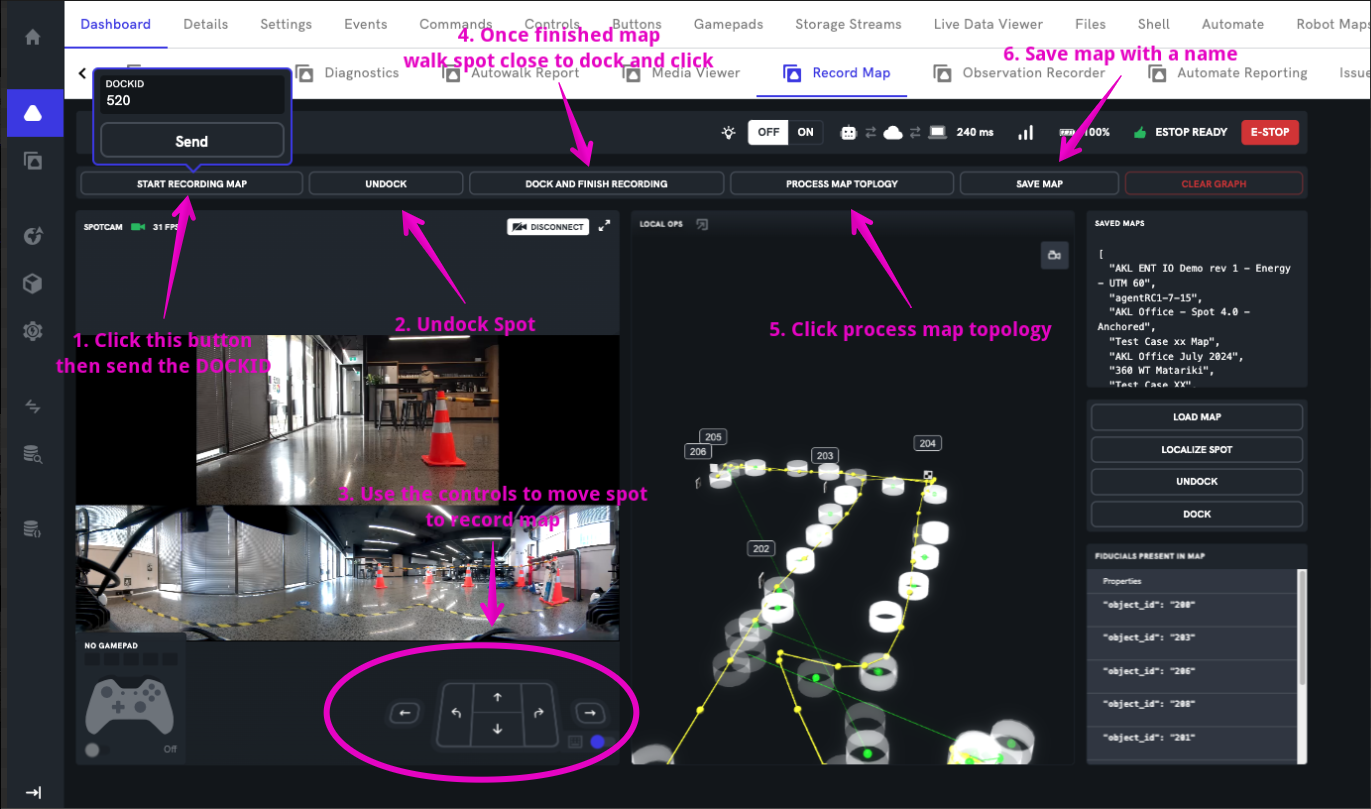
From the "Record Map" Dashboard:
- Start Recording Map, entering the dock ID that you want Spot to use on the pop-up.
- Click the "undock Spot" button.
- Teleoperate Spot where you would like the map be created, this can be as long or as short as you would like. Note: Walk, Autowalk and Map are interchangable terms for the same thing.
- Once finished teleoperating, move within line of sight of the dock fiducial and click "stop recording and dock spot" button.
- Click "process map" button, on the options pop-up the default is generally fine, click the process button to complete processing a map for spot. This can take some time depending on the size of the map.
- Once processing is complete, click the "save map" button, provide a name in the pop-up and click save.

Anchoring a map
If you've just recorded a map you can skip this step.
Load a map from the robot page > "Robot Maps" tab. Select the "set active robot map" button, select the map to use, then click "Load Map" button.
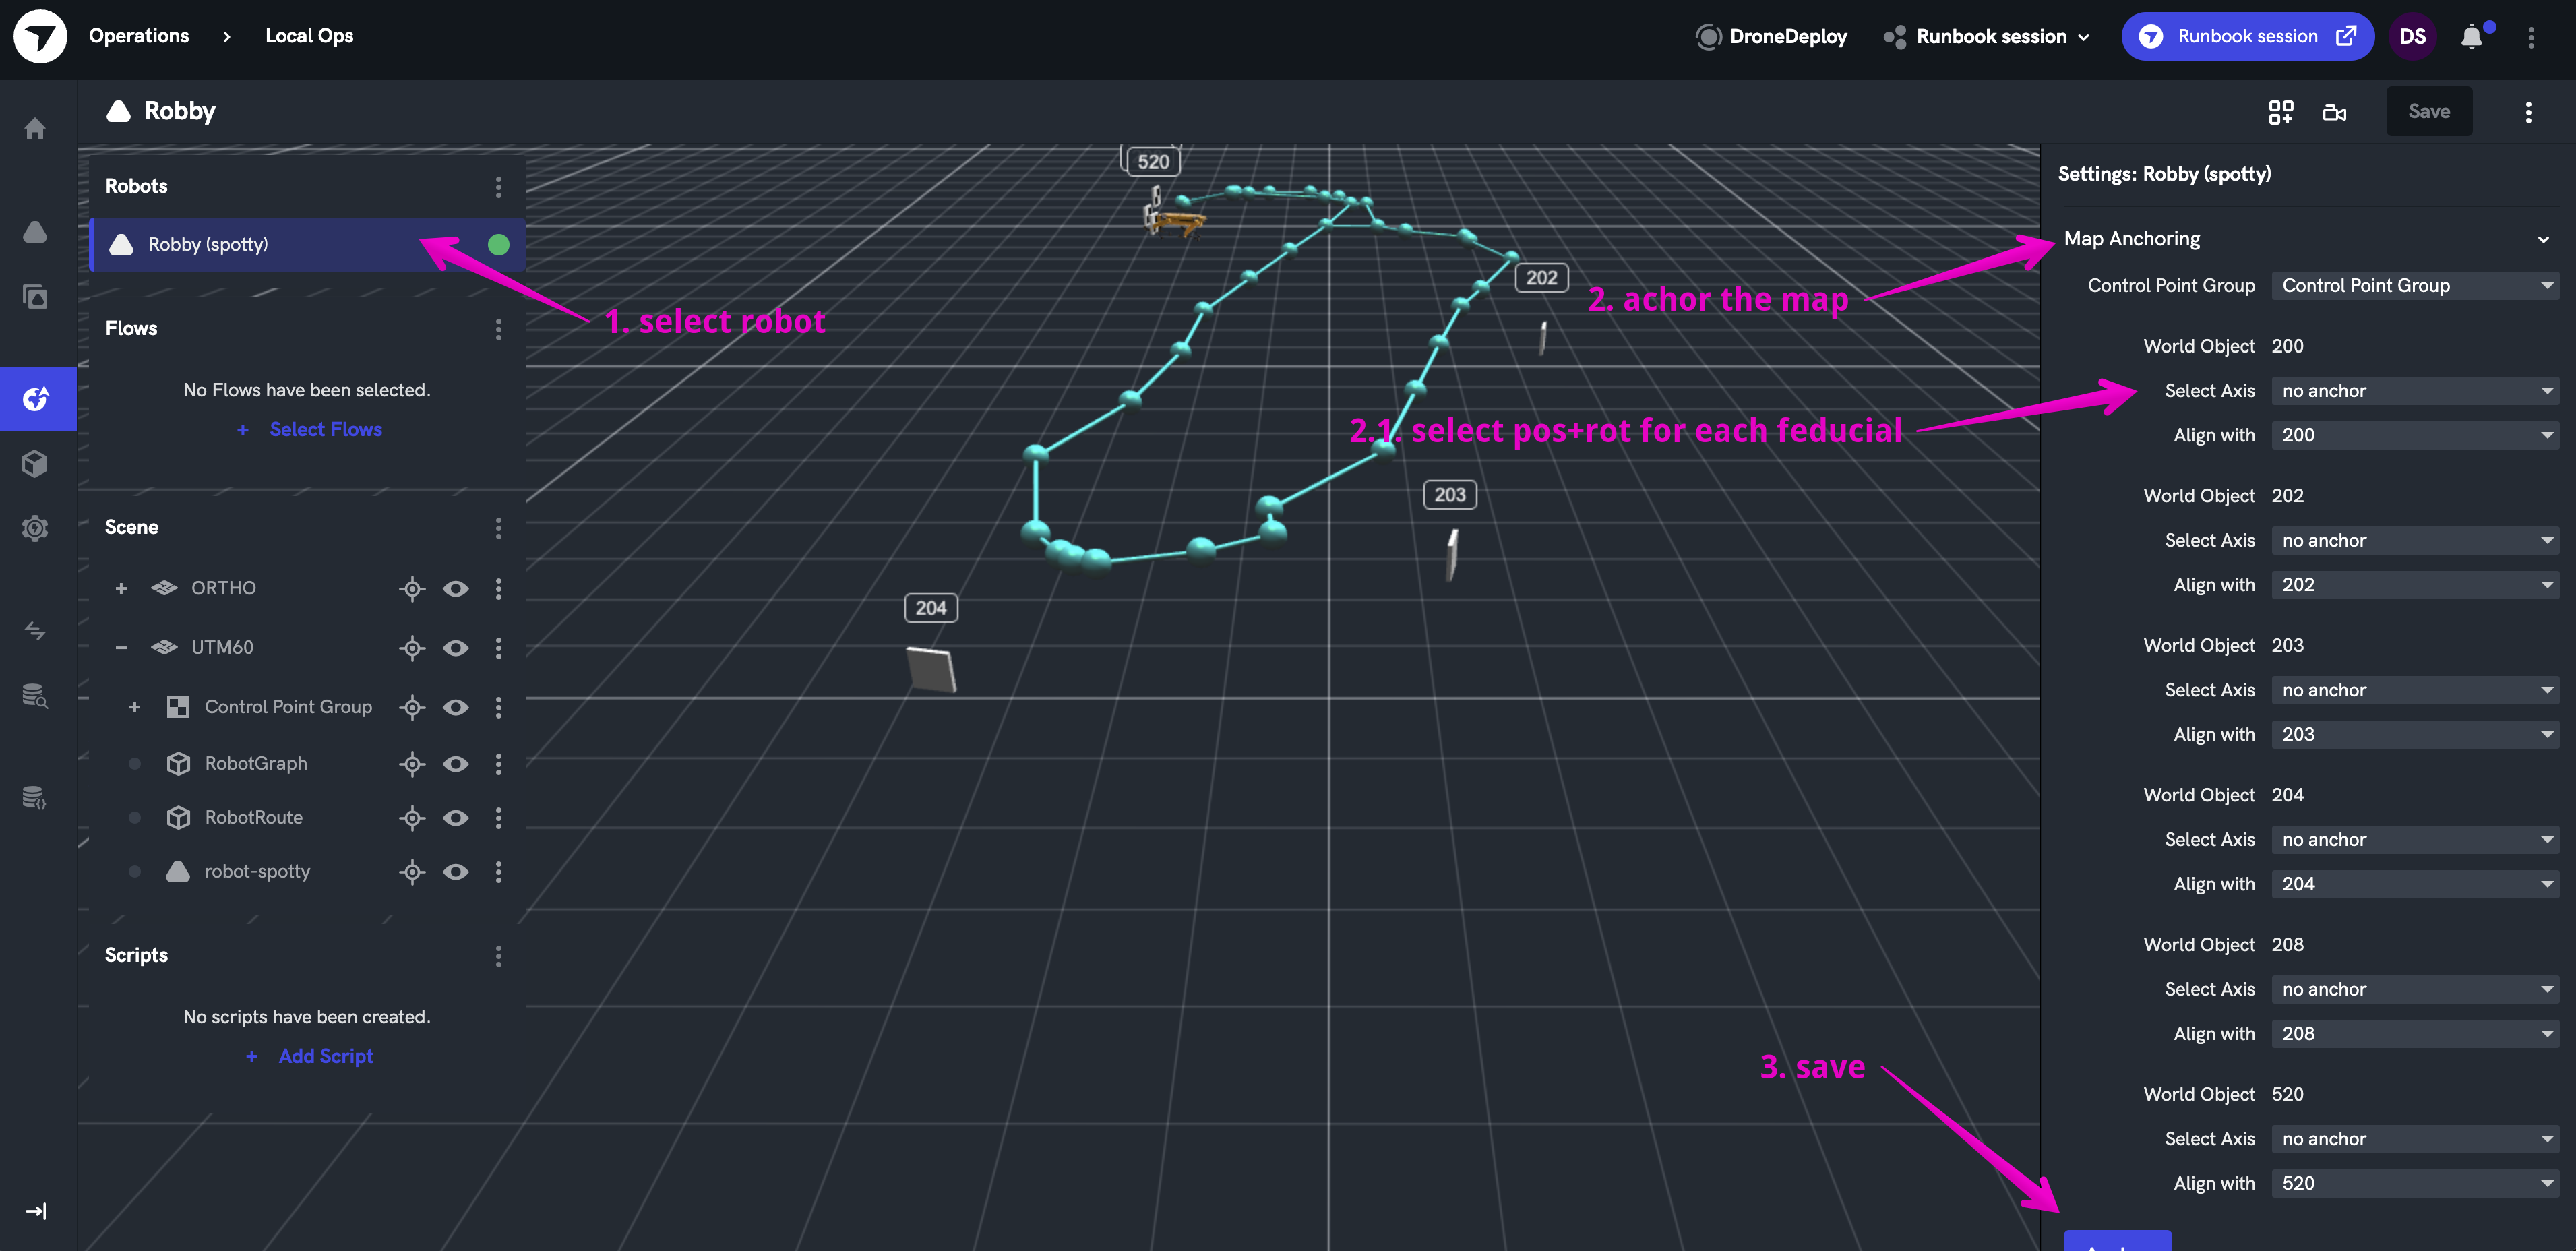
Navigate to the Local Ops page, select Spot from the Robot's panel in the top-left and then find "Map Anchouring" in the right side panel. Select pos+rot for each fiducial control point that your Spot map had line of sight and then click "save" button.

Localize Spot
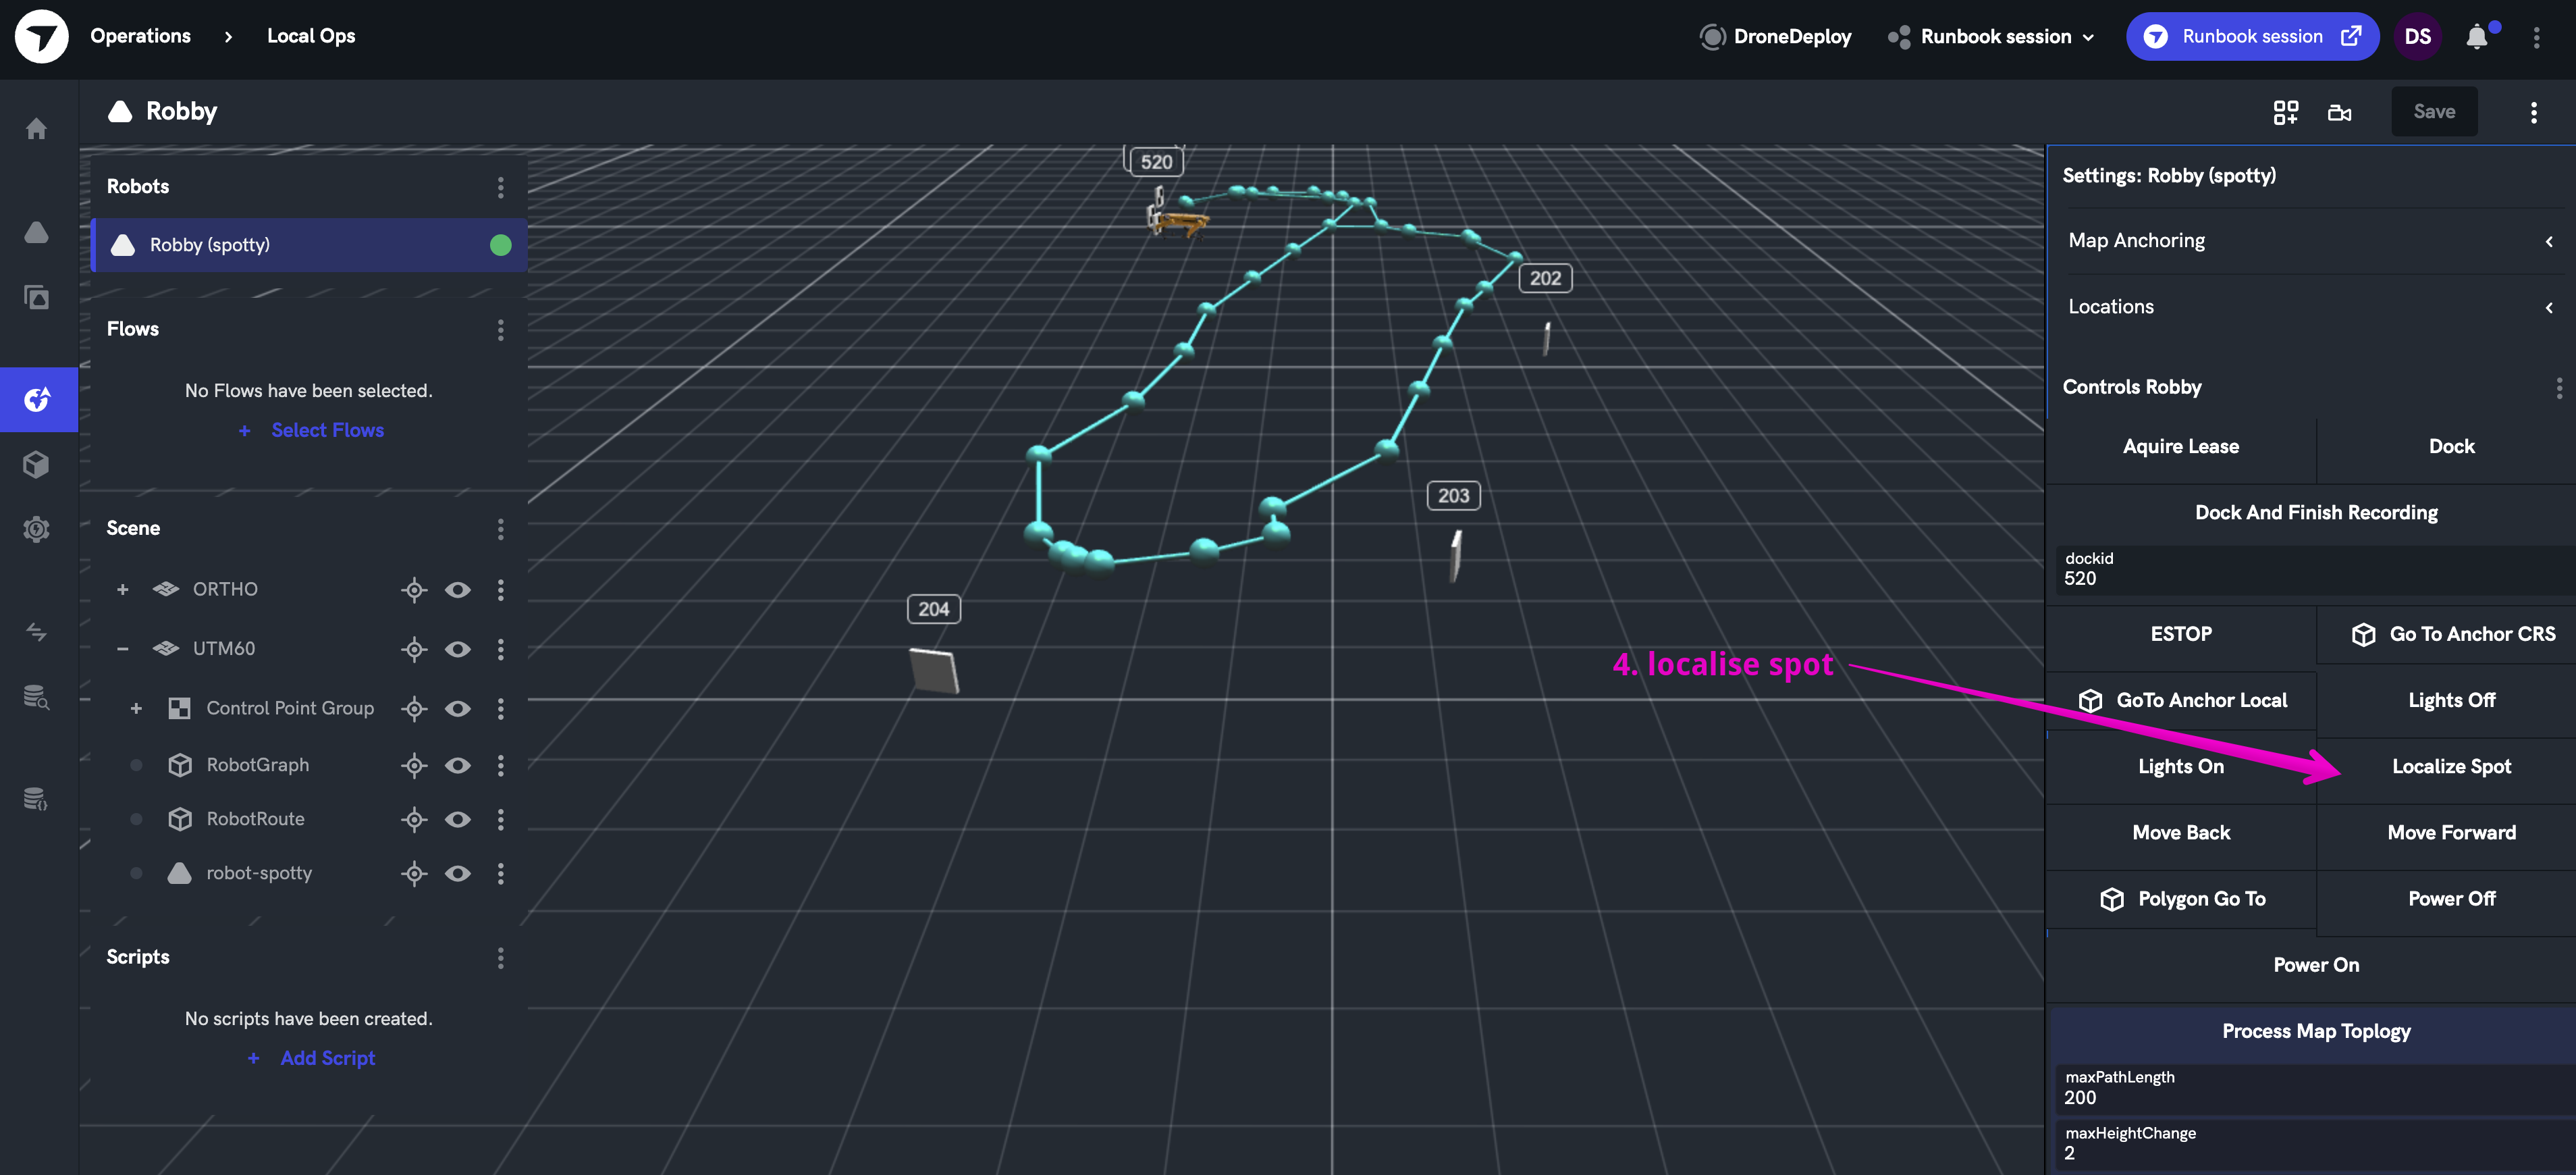
To make Spot appear in the correct location on the map, navigate to the Local Ops page, select Spot from the Robot's panel in the top-left and then find "Localize Spot" in the righthand panel.

Saving Spot's map to the cloud
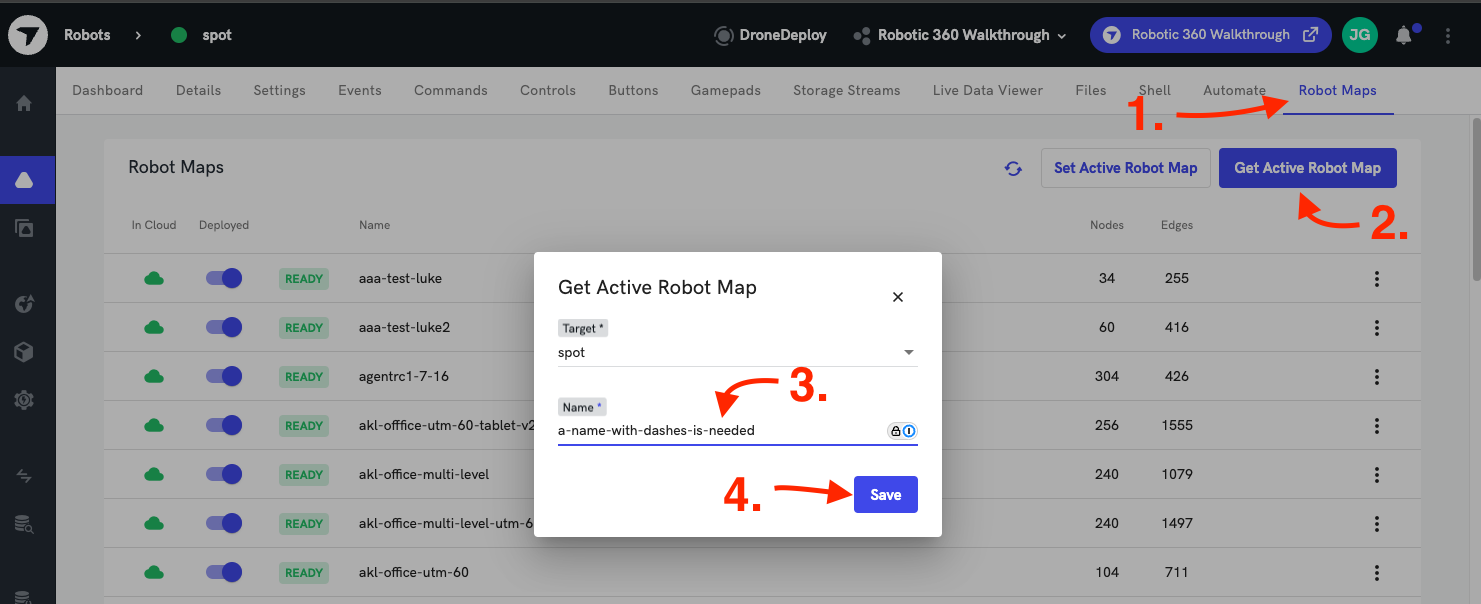
To share the map with other Spot robots or to backup the map: Make sure that the active map on Spot is anchored
- Navigate to the “Robot Maps” tab
- Click the “Get Active Robot Map” button
- Pick a name that has no spaces, you can use dashes (-)
- Click "Save" button
