Getting Started with gRPC Using Postman
We highly recommend using the DroneDeploy SDKs for interfacing with the Robotics Automation Platform. However, if you have specific requirements that are not met by the SDKs, you can interface directly with the platform using gRPC.
If you are not familiar with gRPC, check out the overview and quick-start guides on the gRPC site, which include examples in the various languages supported by gRPC.
Authentication
To get started, you will need to have a valid token to authenticate your gRPC requests. You can do this by setting up a service account in the DroneDeploy platform and using the generated token to authenticate your requests. See applications for more information.
Once you have a client ID and secret, you can use the following REST API to get a token for subsequent requests:
curl -X POST -H "Content-Type: application/json" -d '{
    "applicationId": "",
    "secret": "•••••••"
}' "https://api-automate.dronedeploy.com/applications/auth"
This returns:
{
  "token": "...",
  "expiresIn": 86400
}
The token will expire based on the expiresIn value, so you will need to refresh it periodically. The token length can be set when creating the application.
Import Proto Files
The protocol buffer files (proto files) define the gRPC services that are available on the platform. You can download the proto files from here:
You can use the same protos with the protoc compiler to generate the client code in your language of choice. In Postman, you can import the proto files by clicking on the Import button and selecting the proto files. In this case, we want to import the telemetry v1 proto file by navigating to the telemetry/v1 folder and selecting the telemetry.proto file.
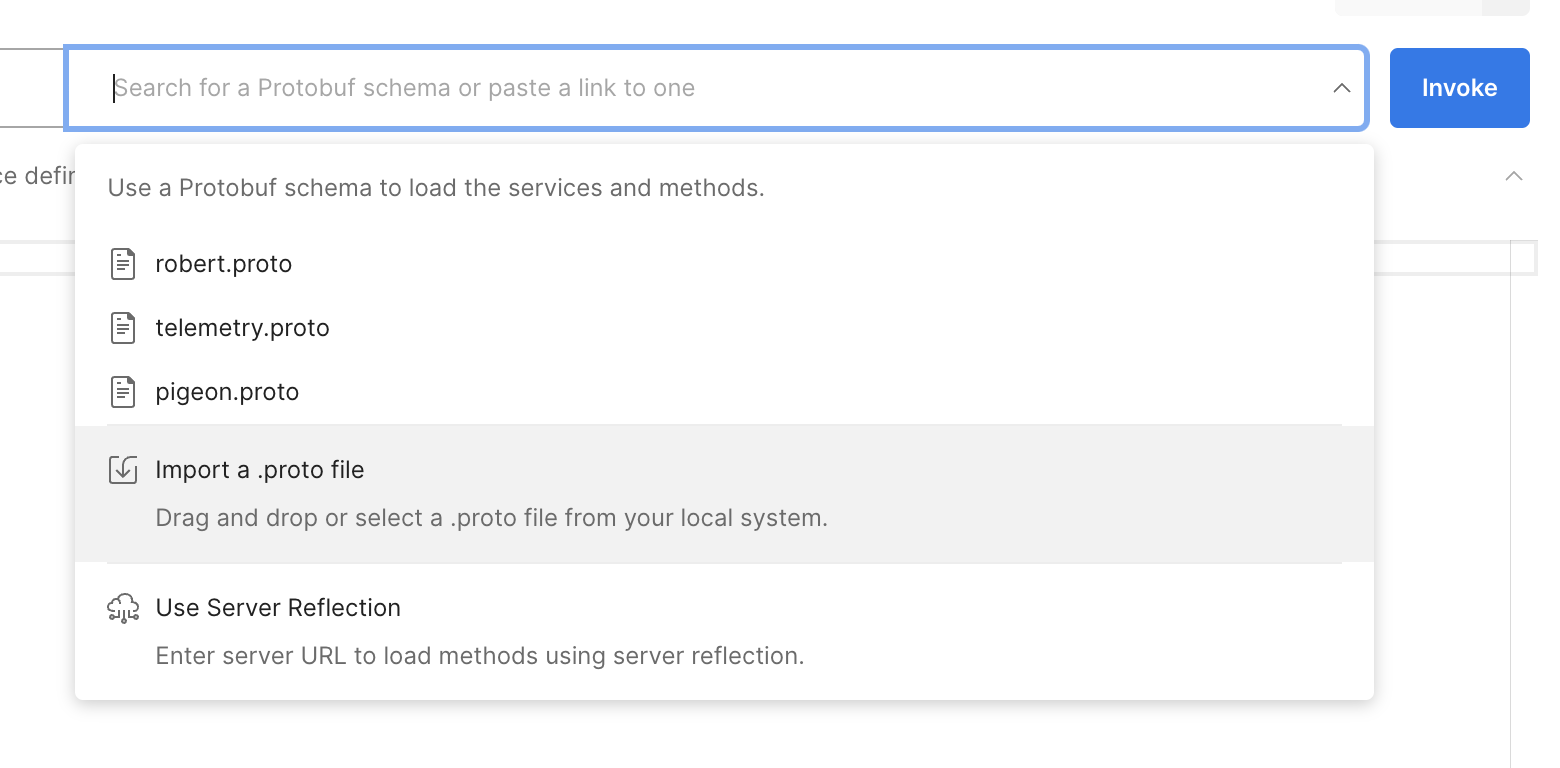
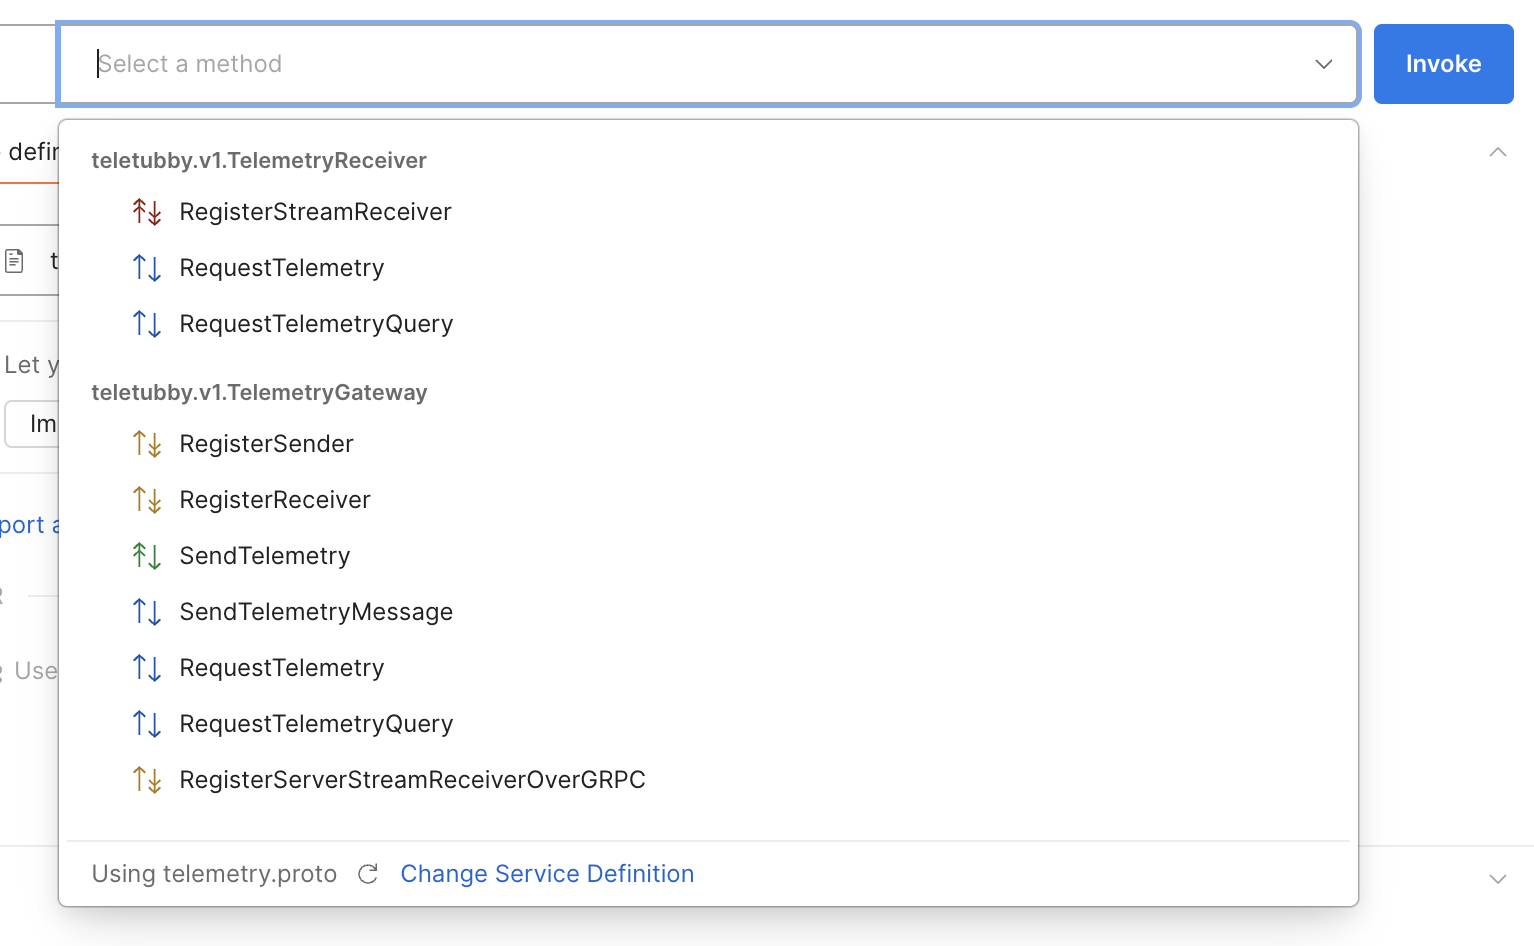
Once imported, you should see the services available on the right side.
Set Metadata
For every gRPC request, metadata is expected. The authorization metadata should include the token you received from the authentication step and r-p metadata with the project ID you are interacting with.
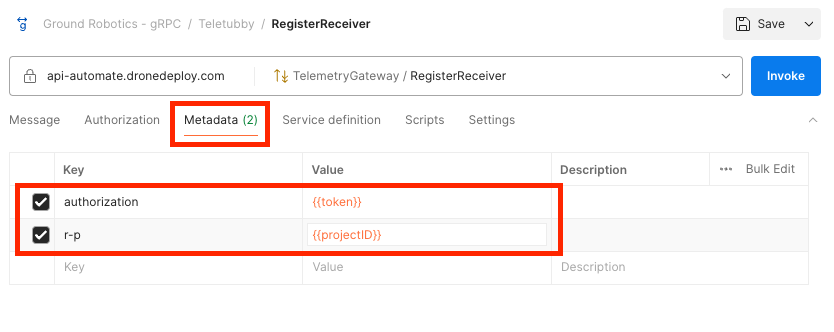
You can set the metadata in Postman by clicking on the Metadata tab and adding new keys authorization and r-p. A quick way to get your Project ID is from the DroneDeploy platform address bar, e.g., automate.dronedeploy.com/projects/<project-id>/....
Register a Receiver
A receiver is a gRPC client that listens for messages from the platform. Once you register you will receive a subscriber ID that you can use to request telemetry using another endpoint. Once telemetry is requested it will be received on the original connection opened when registering.
Create a new gRPC request and set the URL to api-automate.dronedeploy.com. Ensure you enable a secure connection by toggling the lock icon. Select the TelemetryGateway / RegisterReceiver service and set the message body to:
{}
Click invoke, and you should get a subscribed message with a base64 payload. This encoded payload will include a subscriberId that you can use to request telemetry (see Request Telemetry below).
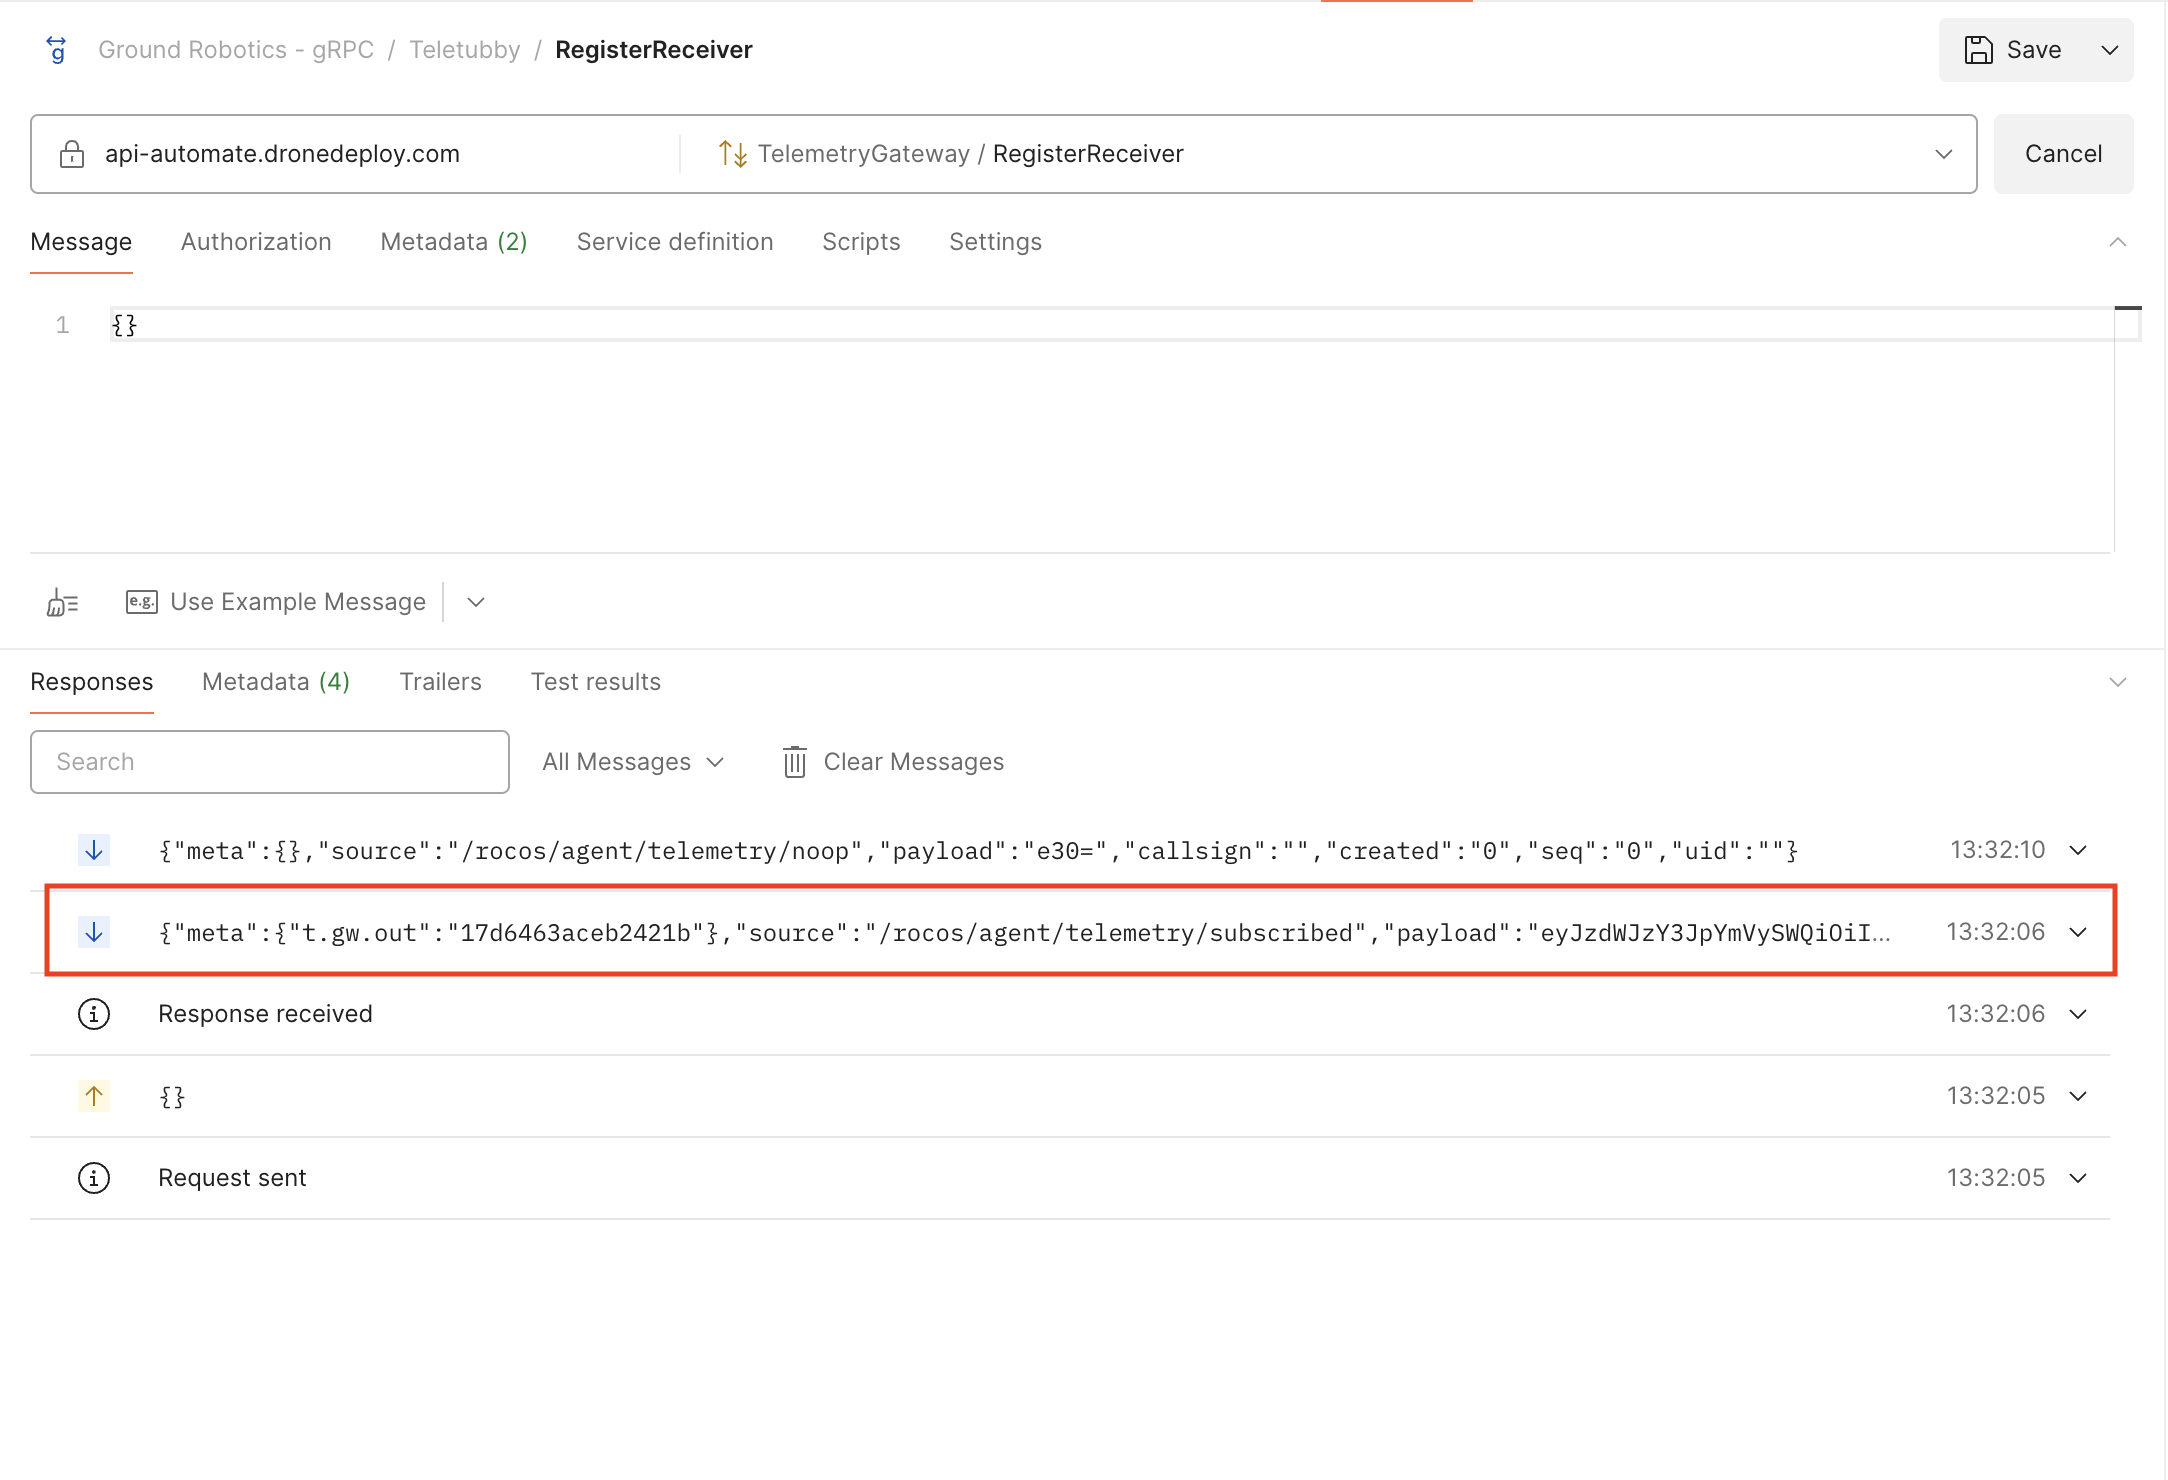
Expand the subscribed message to see its payload:
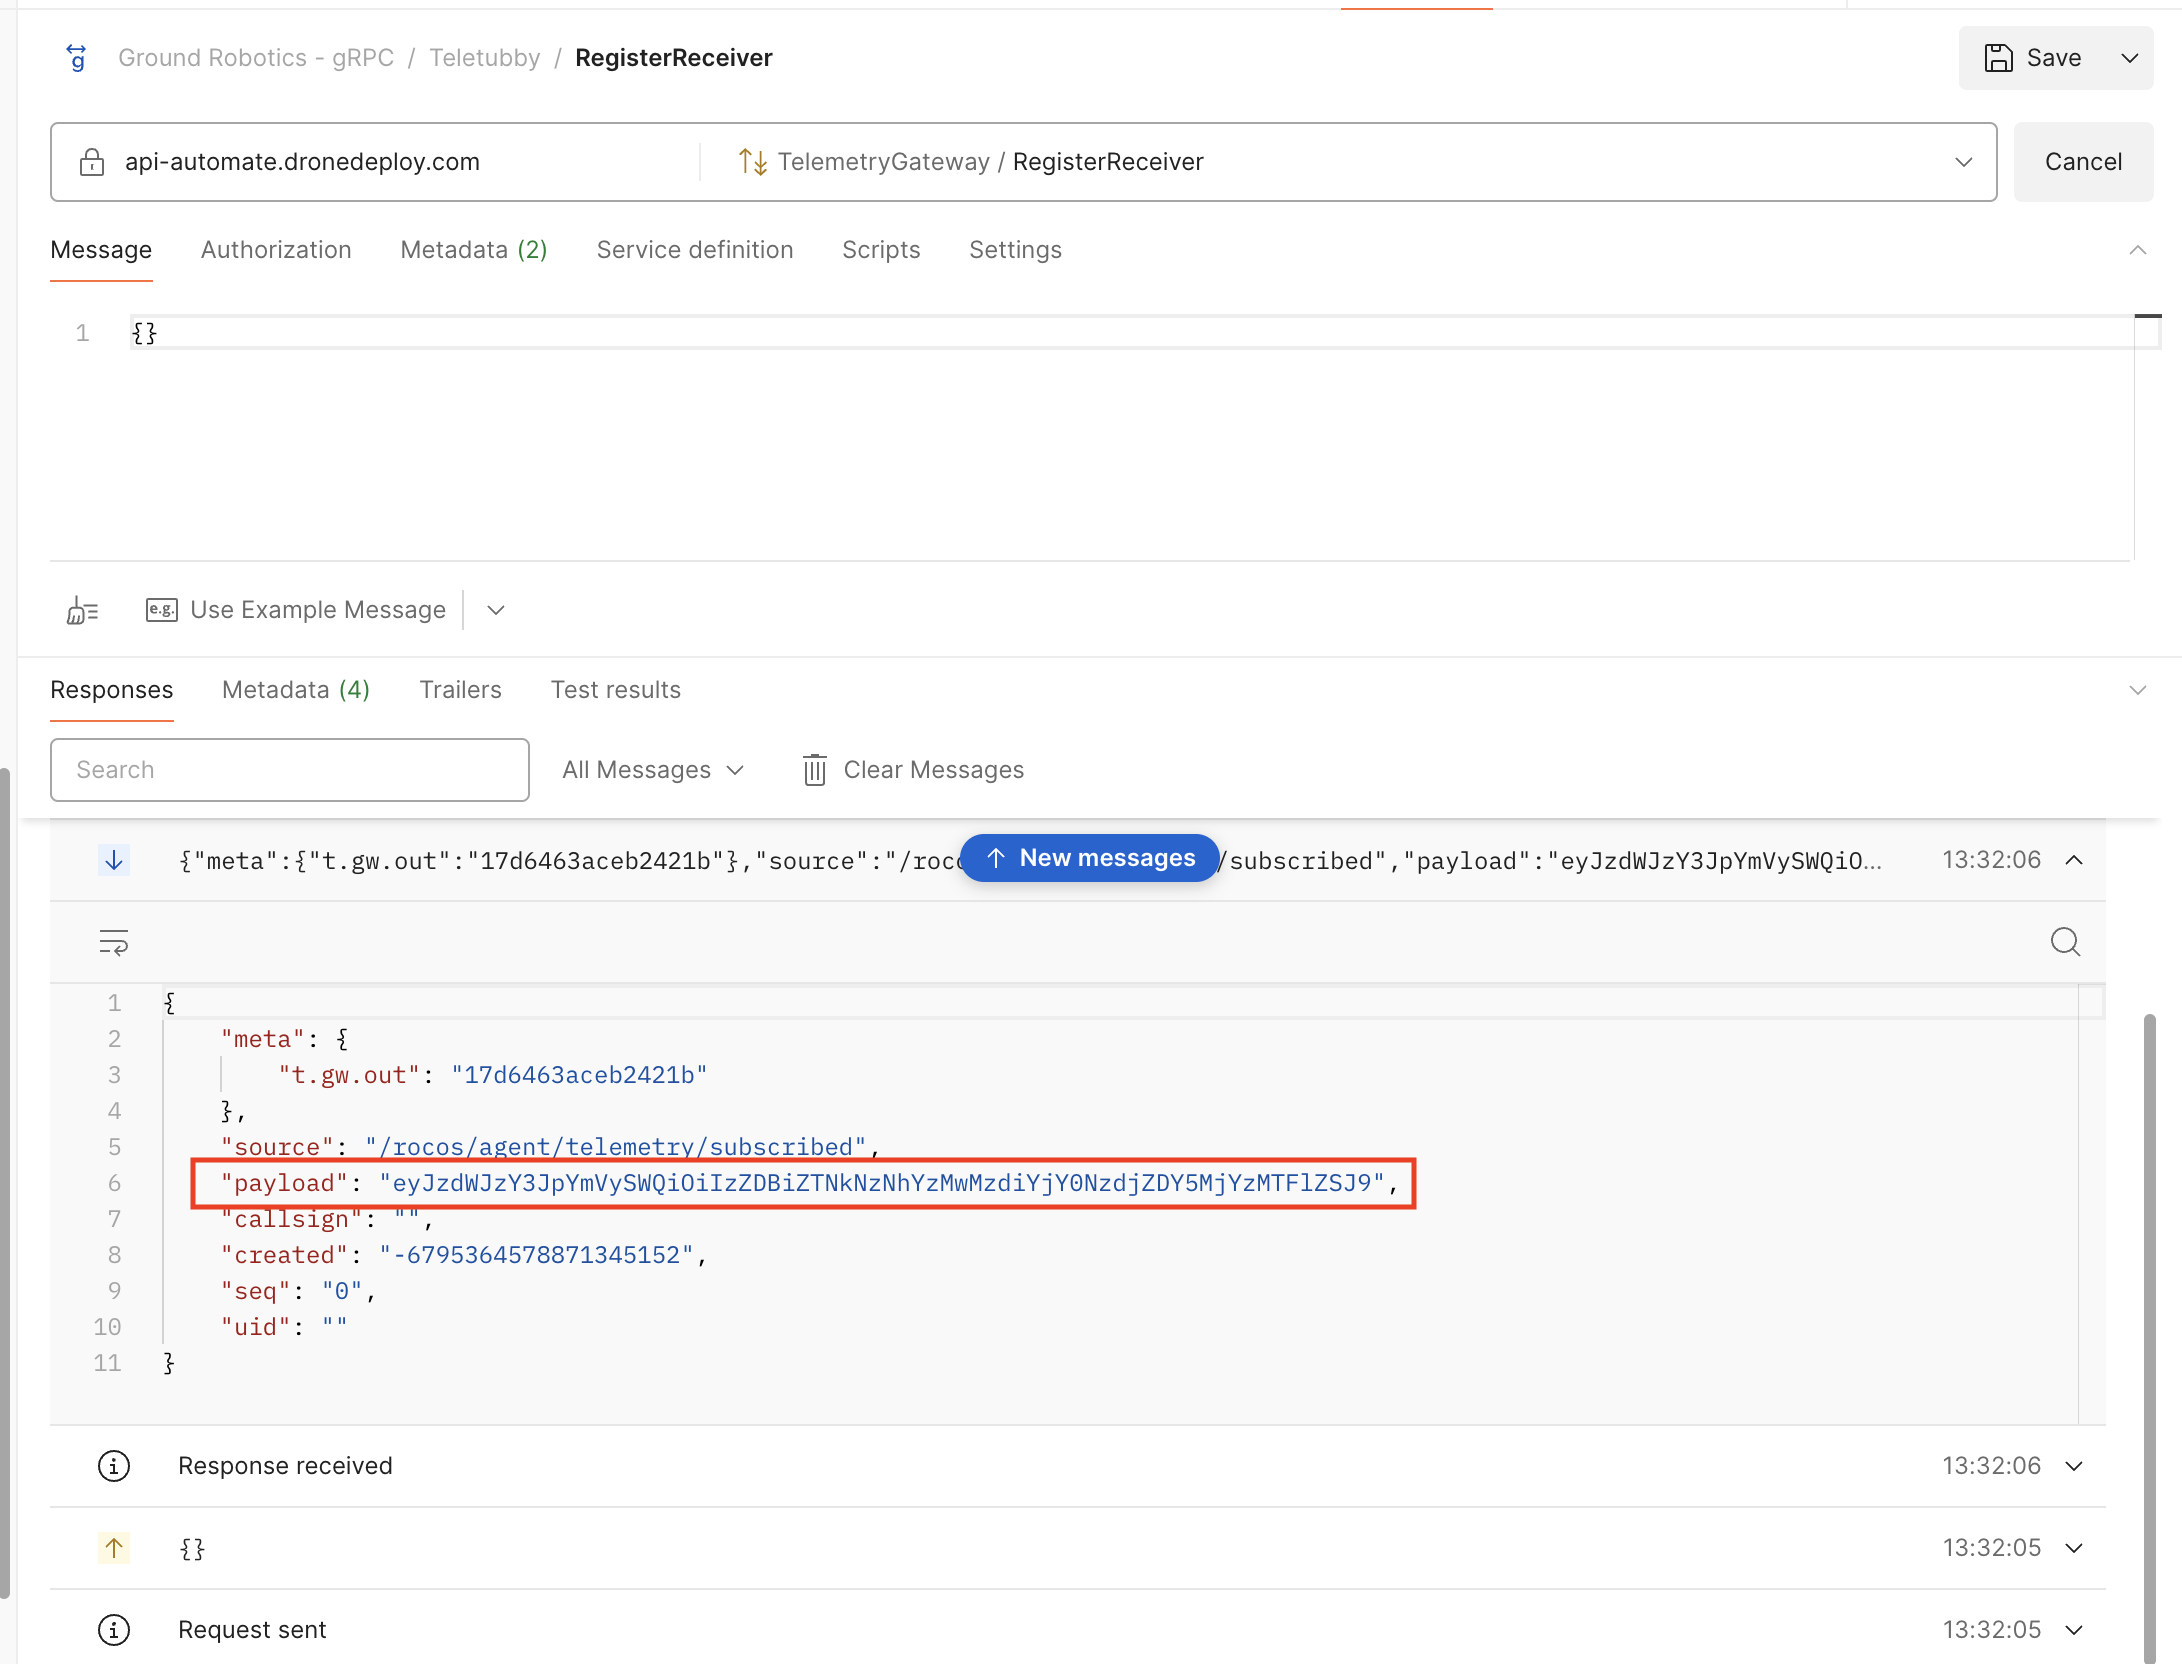
Subsequent responses will be heartbeats from the platform to keep the connection alive. Once you request telemetry, you should see the telemetry messages arrive on the same stream/connection.
Decode the response and copy the subscriberId to use in the next step when requesting telemetry.
echo eyJzdWJzY3JpYmVySWQiOiJlNmNjZWZhMDRhYjAyOTk1ZjI0Mjg0NDNmODNjMDY1NCJ9 | base64 -d
Should return a JSON payload with the subscriber ID, for example:
{
  "subscriberId": "e6ccefa04ab02995f2428443f83c0654"
}
Use the subscriberId returned to request telemetry.
Request Telemetry
Create a new gRPC request and set the URL to api-automate.dronedeploy.com. Ensure you enable a secure connection by toggling the lock icon. Select the TelemetryGateway / RequestTelemetry service and set the message body to:
{
  "requestedActions": [
    {
      "operation": "subscribe",
      "callsigns": ["my-robot-callsign"],
      "sources": ["/rocos/agent/clock/realTime?int=1s"]
    }
  ],
  "subscriberId": "e6ccefa04ab02995f2428443f83c0654"
}
Ensure the metadata from the previous step is set (see above). Click invoke and you should see telemetry messages arrive on the stream/connection that was invoked in the earlier step when registering the receiver.
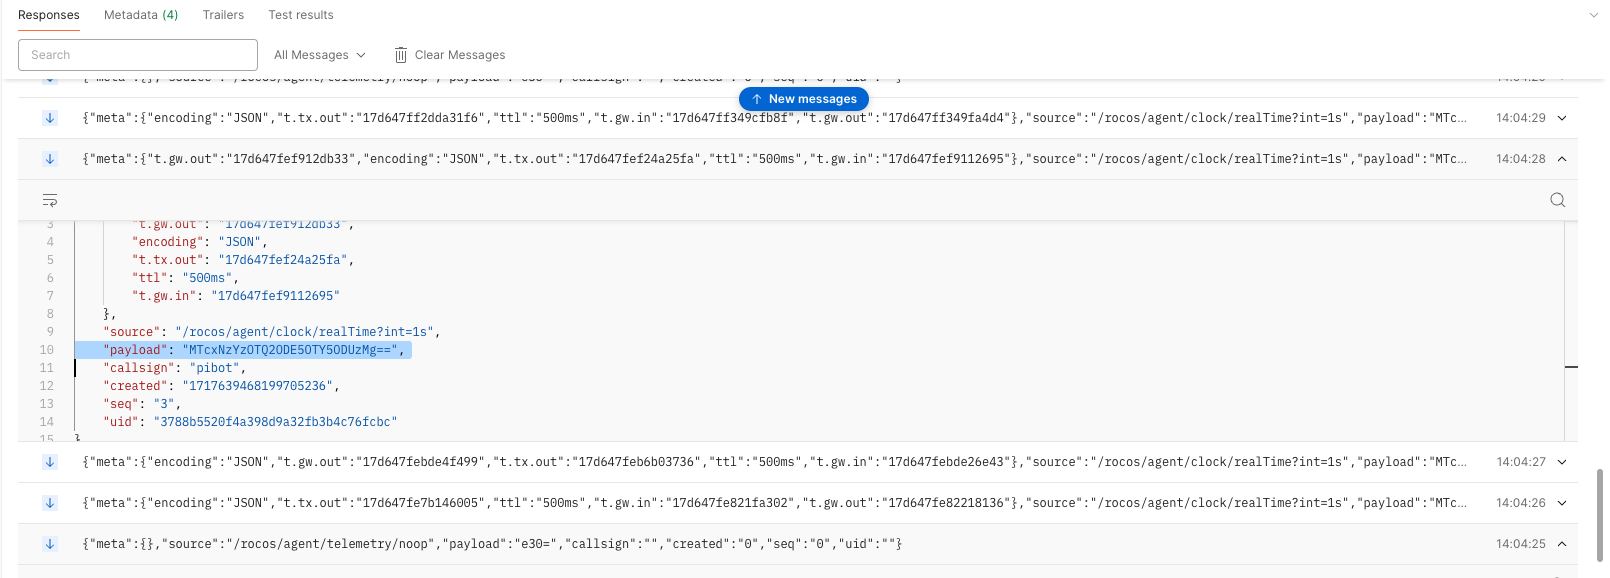
The payload in the message will contain base64 encoded telemetry data that you requested. You can decode the payload to see the telemetry data. This will either be a primitive value or a JSON object depending on the source. In this example, it will return the time in nanoseconds since the epoch.
echo MTcxNzYzOTQ2ODE5OTY5ODUzMg== | base64 -d
# returns 1717639468199698532
For more information on streaming telemetry, see our Streaming Telemetry Data page. To explore which telemetry sources are available, you can browse these via the Live Data Viewer in the DroneDeploy platform.
Unsubscribing from Telemetry
To unsubscribe from telemetry, you can use the TelemetryGateway / RequestTelemetry service with the unsubscribe operation. The message body should be:
{
  "requestedActions": [
    {
      "operation": "unsubscribe",
      "callsigns": ["my-robot-callsign"],
      "sources": ["/rocos/agent/clock/realTime?int=1s"]
    }
  ],
  "subscriberId": "e6ccefa04ab02995f2428443f83c0654"
}
Ensure the metadata from the previous step is set (see above). Click invoke and you should see the telemetry messages stop arriving on the stream/connection that was invoked in the earlier step when registering the receiver.
The source provided must match the exact source that was used to subscribe to the telemetry, including the query parameters.
Once all subscribers have unsubscribed, the receiver will be automatically unregistered, and the stream will end. You will need to register again and receive a new subscriber ID.
Next Steps
This guide should give you a good idea of how to get started with gRPC without programming in any specific language. The next steps would be to find out how you want to interact with the platform and then generate the client code in your language of choice. You can use the same protos with the protoc compiler to generate the client code in your language of choice.
protoc supports the following languages:
- C# / .NET
- C++
- Dart
- Go
- Java
- Kotlin
- Node
- Objective-C
- PHP
- Python
- Ruby
If you are looking to develop in TypeScript / JavaScript in the browser or Node.js, we highly recommend looking into our SDK, which provides a higher level of abstraction over the gRPC services along with resiliency around connections. You can find more information on the SDK here.