MAVLink: Deploy an ArduPilot Simulator
This tutorial steps through setting up a new project based on a MAVLink template project and then making some of your own modifications.
The first step is to go to your Account home page by clicking on the link on the top navigation bar.
Click on the New Project link.

Choose the Pre-configured Template option.
Choose the MAVLink ArduPilot Template and select Create Project.
A new project is now in the list called Rocos MAVLink example project. Go ahead and click on that.
You will now see a fresh project which will be deploying 2 new virtual MAVLink robots.
Robots Section
In the left navigation, click on Robots to see the robots, Virtual Drone 1 and Virtual Drone 2.
Clicking on one of the Virtual Robots will show you:
- Dashboard: This lights up live data from the robot. See Dashboards.
- Details: Information about the robot.
- Commands: MAVLink commands are already present in this tab for you. These commands can be sent to the virtual robot using the buttons in the Buttons tab. To create your own commands, click on Add Command. See Controlling a Robot for further information on MAVLink commands.
- Buttons: The buttons in this tab make use of the commands defined in the Commands tab. To use a button, first click Activate buttons. To get started with controlling the virtual drone using buttons, do the following: first click the Mode: Guided button, followed by Arm Throttle, then Takeoff. The Altitude display in the Dashboard tab should show that the drone has taken off, with an increasing altitude. Buttons can be added to correspond to any new commands you may have added by clicking Add Button. See Controlling your Robot for further information on buttons.
- Storage Streams: This is an area where you can activate or deactivate which stream definition can be used to record background information from the drone. See Streaming Data for more information.
- Live Data Viewer: This is a way to see what data is available to bind to from the drone. Under Sources, you should see the rocos and mavlink plugins present. See Exploring Data on your Robot for more information.
Streams Section
Click on the Storage Streams link in the left navigation. This shows you a list of Stream definitions for the project.
In order to record data from your robot and persist it in the cloud, the first step is to setup a stream that can then be applied to any of your robots.
One is already setup in this template project called MAVLink Basics.
Click on this Stream to see a list of Telemetry that is captured in this definition.
The Data URI /mavlink/ATTITUDE has already been added as one of the items of Telemetry.
Add your own Telemetry to this stream by clicking on Add Telemetry, then enter the MAVLink message /mavlink/VFR_HUD. Next, click on Add Telemetry.
Note: Alternatively, click Add Telemetry, then Data Picker. Next, click to enter text under Robot Call Sign. The two virtual drone call signs should appear below. Choose the one whose data you would like to examine. Next, expand the mavlink menu which appears below, click the check box next to VFR_HUD, then click the Insert button in the top right corner. After this, click Add Telemetry.
/mavlink/VFR_HUD is now added to this stream and by default it will be sampled and stored every 5000 milliseconds.
Any robots that have been set to use this stream definition will automatically start to capture and store this data in the cloud.
By turning on the Chart eye icons you can see the average requests / second and bytes / second graphs showing how much information is being captured by these telemetry feeds. You can also change the range of the x-axis from 5 minutes up to 30 days.
Global Operations
Go to the Operations link in the left navigation, the click Global Ops.
Double clicking on one of the robots in the Robots tab will take you to where the robot is and show the Heads Up Display information for that robot on the right hand side. This is streamed live.
This view shows the location of your drones on a map. You can change the style of the map by clicking on the style options on the bottom right.
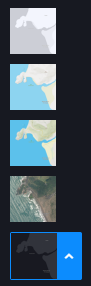
For example, try choosing the satellite map option at the bottom.
You can use your mouse wheel to zoom right in and left-click to pan the map. Holding down the right mouse button you can change the pitch / angle of the map view.
Nice work!